Create Custom Presets for exif Tags
Create Custom Presets for exif Tags
I let go of this project for a little while, but came back to it. I hate obsessions like this. Anyway, I've figured out how to save a set of exif tags with values. It was not intuitive or straightforward. Since I know a good bit about configuring and programming computers, I managed to work through it. So I thought I should explain in detail here this part especially for others who don't have a computer programming background.
Open again,
File --> Plug-In Manager --> rf Exif Meta. Look for the
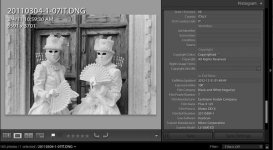
Preset Manager section. There will be a pull-down menu that will read initially,
Default. Click on it and then choose
New Preset so that you can create a new set of exif tags to reuse. See the screenshot below to get your bearing:
You'll notice in the screenshot above that there's one preset called,
Leica M-Mount system. I created that. That's where we're heading with what follows. So, click on
New Preset. A small dialog box will appear asking you to enter the name of the preset. I named mine,
Leica M-Mount system because I intend to use it for all of my Leica m-mount cameras and lenses. This is a name for a group of presets, not just one, per se. You may name it whatever you want. However, it doesn't work with certain odd characters (e.g., the ampersand). Once you've entered a name for the configuration file, click
OK.
Another dialog box will appear next saying that the preference support file has been created and it wants to know if you want to edit it now. Tell it,
Yes. That should open a simple text editor program on your computer so that you may edit the configuration file it created. Using the text editor's search feature, search for the words "Presets", including the double-quotes. That will take you to where you will have to edit the configuration file. Yes, this will seem very complicated at this point. But you're already through the labyrinth and the treasure is right in front of you now. From here it's simple, although it looks confusing. Just ignore everything but the following code. It's all you need to change to get what you want. So look for it.
Code:
_t.addlTagPresets = {
    { title = "One Tag Template", value = {
        { tag="tag", value="value" },
    }},
    { title = "Two Tag Template", value = {
        { tag="tag", value="value" },
        { tag="tag2", value="value2" },
    }},
There will be a line or two of instructions and a few examples for Nikon. But this is where you need to type. If you've been playing with this plug-in already, you probably recognize these templates and probably thought they're senseless. This is from whence they come. The basic format is a pair of squiggly-brackets to designate a preset. It contains a title and then a value for the preset. Within that preset value, you enter another set of squiggly-brackets that contain pairs of exif tag names and the values you want for them. Be sure to have an opening and closing squiggly-bracket for each tag/value pair (each separated by a comma), and for each preset (title/value pair). A simple way to do this is to edit just these templates or to copy and paste each line or section. You can add as many tag/value pairs as you want to each preset.
On my computer, I edited the two templates provided and added more tag/value pairs. I made one preset for setting the exif tags for images taken with my Zeiss Ikon camera and my Zeiss Biogon 35mm f/2 ZM lens, using Kodak Portra 160 film. I made another for when I use the same camera and film with my Leica Elmarit-M 90mm f/2.8 lens. Below is the code I used to replace the above section of code:
Code:
_t.addlTagPresets = {
    { title = "Zeiss Ikon, Biogon 35mm f/2, Kodak Portra 160", value = {
        { tag="Make", value="Zeiss Ikon" },
        { tag="CameraModelName", value="Zeiss Ikon" },
        { tag="Lens", value="Zeiss 35mm f/2.0 T* ZM Biogon" },
        { tag="LensModel", value="Zeiss 35mm f/2.0 T* ZM Biogon" },
        { tag="Focal", value="35" },
        { tag="ISOSpeedRating", value="160" },
    }},
    { title = "Zeiss Ikon, Leica Elmarit-M 90mm f/2.8, Kodak Portra 160", value = {
        { tag="Make", value="Zeiss Ikon" },
        { tag="CameraModelName", value="Zeiss Ikon" },
        { tag="Lens", value="Elmarit-M 90mm f/2.8" },
        { tag="LensModel", value="Elmarit-M 90mm f/2.8" },
        { tag="Focal", value="90" },
        { tag="ISOSpeedRating", value="160" },
    }},
}
When you're finished, be sure to save the configuration file in your text editor. On my computer, I can do
File --> Save. Then close the configuration file. The
Plug-In Manager should still be open. You'll have some messages trying to help you through the process. Read them if you want, but then close them. Go back to the
Preset Manager section and select the preset group you created. In my case, that's
Leica M-Mount system. You will now need to reload the plug-in. Click on the
Reload Plug-in button to do that. When that's done, close the
Plug-In Manager by clicking on
Done.
Now you can use the presets that you created. Select an image file to try them. From the menus, click on
File --> Plug-In Extras --> Exif Write. If it's not already set, check the box for
Additional tags. Then click on the list of choices and look for the presets you've created. In the screenshot below taken on my computer, you can see I have now two choices: both have tags for a Zeiss Ikon camera and Kodak Portra 160 film, but one with the Zeiss 35mm lens and another with the Leica 90mm lens.
Once you click on the preset for the camera and lens combination that you want, that you used for taking the photos, it then loads the preset exif tags and values from the configuration file. Then click on
Modify Photo Files to apply these tags and values. You can change them on the fly here if you want and it won't change the settings in your configuration file. It will only apply adjustments made here to the image files for which you're applying the tags and their values. By creating presets for the exif tags you would like to change for all of your image files made from film, you can quickly apply them to the entire roll of film in seconds. It's just an effort to create a configuration file the first time. The hardest part is figuring out how to configure the plug-in. I've now done that. That part now will be easier for you.
If you want to edit the configuration file later, you can go back through the
Plug-In Manager, or you can use a text editor to edit it, directly. On my Macintosh system, the configuration file is located at
/Applications/Adobe Photoshop Lightroom 4.app/Contents/PlugIns/ExifMeta.lrplugin/Preferences/Leica M-Mount system.txt. Don't edit it with a word processor program like, MS Word. That will add binary characters to it and probably stop it from working. After you make changes to the configuration file and save it, you'll still have to reload the plug-in. If Lightroom is not running, then when you start it, the plug-in will reload automatically.