Practical Ways to Optimize Exposure and Developing

JPSuisse

Well-known
Local time
5:24 PM
Joined
Jan 20, 2008
Messages
434
Hi all...

I am in the process of reviewing all my technique now that I need to change films. In particular the death of Neopan 1600 and 125 PX, Kodachrome and Ektachrome has led me to the conclusion it's time to review all and move forward with new ideas.

The good side to all this is that there are really some interesting new choices out there in the way of film and develpers, and this has given me the chance to reflect on my technique (or lack thereof).

Here is my strategy for slide film:
We are going to work with Provia 100 and 400. I have a couple Pentax spot meters. First, I'm going to measure the brightest and darkest areas in a scene, bracket the exposures 2 half stops up and 2 half stops down, and then find out where the clipping starts and where the color looks good. Then just expose for the highlights and good color area using a spot meter for the next months and analyze the overall results.

For black and white...
We are going to work first with slower speeds: Silvermax 100, Pan F 50, and Rollei Retro 80s at box speed. Measure the brightest and lowest ranges, bracket so as not to under expose the shadows, and bump up the development times maybe 20% in low contrast situations. (Low contrast situation needs to be defined here.) The goal here for black and white is to get a feeling for getting a good tonal response and a not too flat negative and to decide which of these 3 films I want to work with going forward.

What do you think? Trying to proceed methodically like this, how long till I can get a feel for new film types?

Cheers,

John
 
Your method will work fine for slide film. An incident light meter is better though, as 99% of the time it gives a perfect reading without having to analyze the readings. Its basically a highlight-biased meter.

For black and white, You're doing it wrong. Here's why: normal developing times for BW films, the times manufacturers give, are designed for fairly soft light. Think cloudy overcast days and shooting in the shade on sunny days.

If you shoot in bright sun, you'll need to DECREASE developing times (and increase exposure to compensate for the loss of film speed caused by the short dev. time). You'll almost never have a real-world situation where you'll want to increase contrast. I've been developing my own film since I was 15. 22 years. I have NEVER, not even once, EVER needed to increase developing time because the light was too flat. Ever.

Here are developing times and tested film speeds for several films in several developers I like to use. I tested these rigorously. Assuming your meters are accurate and your camera's shutter is too, and you're careful and accurate in developing, they'll work perfectly for you.
 
how about some heresy: develop all your same
speed iso film with the same development time
as a starting point, err on the side of
over-development.
 
how about some heresy: develop all your same
speed iso film with the same development time
as a starting point, err on the side of
over-development.

I can't think of worse advice. Sorry, Ray, but I can't let the OP do what you recommended.

First: Different films, even of the same ISO, often have dramatically different developing times.

Second: Over developing is the WORST thing you can do to a black and white film. The worst. Increasing contrast of underdeveloped film is easy in the darkroom or in Photoshop. It is very hard to reduce contrast.
 
Chris, thanks for your reply.

I am wondering now, if I am not currently overdeveloping my films! I kind of assumed that development times were rated more for sunny conditions for say the central United States...

One of my other ongoing projects is to try to distinguish between under- vs. overexposed negatives.

Unfortunately, the 2 developers I'll be working with are DD-X and Acurol. So, your charts don't help me so much. Did want to try some Rodinal some time, but haven't gotten that far yet... I'll come back to them then!
 
You have a great strategy if you want to mess about with testing for a few months. If you on the other hand you want to make some meaningful photographs and get on with life just take an incident reading each time and work with that. It hasn't failed yet for millions of photographers, but they didn't try to 'over think' the situation. Naturallly you get an overall impression of what different films prefer for exposure and different processing methods, but these are better equated to actual results, and often well documented with a Google search. So don't try to re-invent the wheel, unless you adopt the Zone System 'average' is always best.
 
V-12:

Don't know what planet you are from. I'm just trying to exposure optimally as often as possible.

Millions of people have also used Pentax spotmeters. Were they over analyzing? Thanks, I'll take pictures at my own pace.
 
To be honest, I'd suggest not using a spotmeter with slide film (unless, perhaps, you are metering off a target card). Your half-stop intervals in testing seem too large. When you mention clipping it suggests that you are scanning the slides, so what you really want to achieve is a good scan with the equipment you have I think? Mostly, use an incident meter and do your bracketing by a quarters of a stop, remember the film itself can vary from batch to batch and depending on age and storage, and not forgetting that very few E6 lines are run perfectly consistently these days. Also, if you are shooting scenes with bright skies (which would otherwise be blown out) then try a neutral graduated filter.

For the black and white films, are you scanning these too? In general, decide how much shadow detail you want then expose accordingly. Of course, there is no need to limit yourself to the "box speed" either as there will be some variation in the way you meter versus any 'standard'. The manufacturers development instructions are a very very good place to start, and Chris Crawford's tips show what turns out very well for his working methods as an alternate set of starting points.

By the way are you using sheet-film? It sounds rather like it from your questions. In that case Apug or the large-format forum may have more useful tips for you than asking here.

Please don't be cross, but your original post seems a little like a broad, random, approach to some exposures and then picking something that works. It could be more valuable to understand better what is going on with the materials and the changes you might make in your process, for your different desired outcomes in different circumstances. On my part, I am still not far along that learning curve. Good luck.

Edit:

The OP could try finding a copy of this book "Perfect Exposure from Theory to Practice" (ISBN: 0817453989).

In order to practically tie together your film exposure, film development and film contact-print there are some old and very clear articles by Barry Thornton still online here. Scroll down to the bottom of the page and look for 'UnZone' and 'Personal Film Speed' in the list of articles.
 
Concrete Explanations

Concrete Explanations

Maritn, you are spot on. :) I am looking for a broad, random, experimental approach to solve systematic problems that I have been noticing for some time. And no, I am shooting almost only 35mm which means, yes, I know I have to make compromises. Due to the subject matter of my shots, an incident light meter though no doubt better is a difficult choice. (I have 3 Pentax Spotmeter V's that I picked up real cheap too!)

Slide Film
Usually, I am underexposing. By always just "bumping up" a little more than I would normally expose do, I have a high number of shots that are pretty darn good now. But, I think I can easily do better with a spot meter.

B+W Negatives
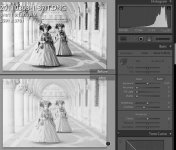
Regarding this topic, my negatives are quite consistently like the one I post here with this post. After a RAW scan in Vuescan, I have a histogram that is mostly in the upper 2/3 part of the histogram. (The picture is misleading the bottom one is the "before" and the top the "after". The histogram is of the "before" shot.)

After reading some (following Chris' response), I see that I have a conceptual problem. And am probably over developing, which is increasing my film speed. In all credit to Chris' comments, since I am ONLY scanning right now, I am happy to have a contrastier negative than one might want for printing.

Actions
I think with my 2 slide films, I can easily bracket shots on one roll for each film and get an idea where white is. I'll take your advice and do half stops, Martin! Then just shoot a half year and see where I am in Fall.

For B+W, I still don't know what to do. I will have to bracket around low contrast scenes (where I could increase exposure slightly) and then for high contrast scenes just reduce exposure some. Then, just adjust accordingly in Lightroom. There should be enough lattitude with B+W films to work like this. That is, since I want a contrastier negative, fix my development time, and bracket the exposure around that. Sound reasonable?

In any case, Martin, Chris, thanks for the feedback!

John
 

Attachments

  • negativequality.jpg
    negativequality.jpg
    44.6 KB · Views: 0
I'm close to Chris's recommendations (maybe because I am in a neighboring state).

Slide film: Incident meter. The only heresy is that I sometimes point the ball at the light source in strong side lighting, so as to not blow out the highlights.

B&W: a longer story here...

Back in the day, my photo instructor was Arnold Gassan, he had written many books on B&W photography. He had a method called the 4-finger system,
a sort of simplified zone system for beginning shooters.

To use the system, you first had to observe shadows in the scene. He recommended using an incident meter, however any meter used properly would work.

Three-fingers: No shadows, very flat light, 3 stops between shadows and highlights - Shoot at box speed and develop at the manufacturer's recommended time as a starting point. (N+1)

Four-fingers: Soft edged shadows, light has a bit of direction, hazy bright, 4 stops difference between highlight and shadow - Shoot at half of box speed, and develop at 80% of manufacturer's recommended time as a starting point. (Normal)

Five-fingers: Hard shadows, bright, direct sun. 5 stops difference from highlight to shadow - Shoot at one quarter box speed, and develop at 60% of recommended time. (N-1)

After years of testing and using a spot meter to work with the zone system, I came back to this simple approach, and it has worked wonderfully in 90% of situations. Not perfect, but very practical.

Some 25 years later, I still have the notes from Arnold's class.
 
Please note that I did not recommend bracketing slide film by half stops, in fact I suggested specifically not doing that.

I print in a darkroom so know little of scanning, but it looks as though your example above has a fairly high-key scene, therefore most of the tones of the scene are indeed in the top half of the brightness range.

I hesitate to say it, but you would do well to read the articles I linked and the book I suggested (or equivalent). There is no awesome secret exposure method for you to discover. Remember that most people, most of the time, for decades, based slide exposure on the sunny-16 diagrams that came in the box. Reflection spot meters are an over-complication for transparency film. If you can not understand why then read that book.

Look at your negs and the shadows present. When they look sufficient (which you can find out in a few frames of film, with manufacturers recommended development) consider the overall contrast and make small agitation and/or development adjustments if necessary. Forget Ansel Adams with 35mm film.
 
Sorry to sound blunt, but here's a modest suggestion:

Learn the Zone System.

The goal of exposure is to capture on the film as much of the detail of the scene as possible, and the Zone System helps you do that. The raw scans from such a negative may look a bit flat, but good negatives should look that way because they have most of the detail captured. Getting the image to the contrast you want is the job of various paper grades in analog printing, or bumping up the contrast curves in Photoshop.

Chris Crawford above is right: it's easy to increase contrast but difficult to reduce it. Why? Because to increase contrast, you're effectively getting rid of information in the middle tones -- information you already have. To reduce contrast, you're trying to flatten out a scene, to bring back sketchy information in the midtones. If you have no information there, then you can't bring it back.
 
@ Martin
Thanks for the book tip. I immediately went to Amazon... I have it on order for a read. If nothing else, it is from "our own Roger" and I have spent a lot of time reading his website. When I first started to develop I read quite a bit of his site and also donated. Of course, I understand a lot more of it now than I did 5 years ago.

Regarding the slides. Sorry, I mis-read you. When I did my last shoot, I shot about 5 roles of E100G (yes still have some in my fridge) and I had only 4 - 5 shots that were over exposed. I am back on the road and can't look at my desktop, but I am guessing that 30% were correctly exposed, 50% maybe a half stop under and 10% maybe a stop and 10% even more under exposed. I am thinking to do a test with a role of Provia 100, then shoot a few roles using the spotmeter to see, if I can have more shots on average in the correct exposure range.

@ Terry
A question: I thought that increasing the contrast (some) would not necessarily remove detail, just spread it out over the tonal range some. Of course, I could imagine, if you are printing on paper that the detail has effectively disappeared, because of the narrow latitude of paper. In your opinion, the negative that I showed above, is it too flat, right or too contrasty? I think it is at the least a half-stop overexposed (the tones are too far into the bright area of the histogram) given the fact that the shot was taken under a covered area at about 8:00AM in March. I should read a book to understand what the zone system is, but I hesitate to try to use it for 35mm film rolls.

@ Larry
I have to think about your approach. It sounds imminently practical and maybe even appropriate for my level of skill/understanding. I think for me, this is the key: something appropriate for my level of skill/understanding as hobby photographer with an incremental improvement in quality!

Anyway, thanks for the feedback again. It will help me improve.
 
Humbly submitting my 2 cents: Rollei 80S is a superb film. It produces incredibly detailed images, and the film substrate dries incredibly flat and clear -- makes scanning the negs a relative delight.

I found the tonal curve to be a bit of a challenge to get a handle on. I think that's due to the way it responds to the near-infrared. Shooting at box speed never seemed to work out for me. Everything turned out way too contrasty for my tastes.

I ended up shooting Rollei 80S at 40 ISO (especially in sunny conditions) and adjusted my developing times accordingly.

Best of luck on your new approach.
 
V-12:

Don't know what planet you are from. I'm just trying to exposure optimally as often as possible.

Millions of people have also used Pentax spotmeters. Were they over analyzing? Thanks, I'll take pictures at my own pace.

I'm from this planet, and was simply trying to help. You admitted to a lack of technique, I think you could add to that a lack of good manners as well.

The lack of technique combined with a spot meter are two things I wouldn't recommend together, and suggesting you use a simple reflectance or incident meter was not to question your manhood, but to help you with getting consistent results, increasing the average's in your favour. It is pretty clear the spot meter is supplying you with information that you don't have the ability to use, so please go ahead and waste some more film, it couldn't happen to a more deserving person.
 
For B&W in my opinion, you should look to enhance what B&W does best, i.e. describe coloured universe in a widest possible range of B&W tones.
A side point here, would be, if you scan your negs, or wet print. In case of wet printing, you should really start with the choice of paper/paper developer, and work towards the choice of film/developer. In case of scanning, you should be looking for getting the widest possible gradation palette in a negative that is not too dense, as this will compromise the ease of scanning.
For this reason, OVEREXPOSING and UNDERDEVELOPING, or alternatively using compensating developers gives the best results. Subsequently, you can adjust the look to the desired effect in PS. If you start with a contrasty negative that lacks the shadow detail, you will never have the full tonal information available.
My advice, would be to stick to a couple of films, and work out the exposure/development routine well, before experimenting further. To me, a great starting point would be APX 100 @64 and Tri X @250. I like APX in Rodinal and Tri X in HC110, but you could try them both in D76 and move on from there.
 
John, my two cents: I wonder if you are trying to "overdigitize" the exposure determination and unnecessarily complicating the situation by trying to find ways to make your actual exposures and meter readings match. You seem to indicate some consistent errors.

Would your life be simpler by just remembering to give a bit more or less exposure in specific situations than your meter indicates? That has worked well for many people for a long time. Then you can tweak your development times to suit.

I have a friend who is close to dead perfect with his exposure 100% of the time. He has never owned an exposure meter and still uses the Leica M4 model that he started with back when they were new. He shoots Tri-X, about 13,000 rolls of it so far. When someone asked him what e.i. he uses, he could only say he had no clue but pointed and said "f5.6 at 1/500th, whatever that works out to".

I think the modern era often causes us to search for complicated solutions to simple problems.
 
Slide: incident. Spot is a LOT harder and no better. See http://www.rogerandfrances.com/subscription/ps expo slide.html

Negative: The very best is spot metering of the darkest area in which you want texture detail, but just about any method (even incident light readings) can be made to work if you learn how to modify your readings to suit the subject. Bob has it right when he says, "Would your life be simpler by just remembering to give a bit more or less exposure in specific situations than your meter indicates? That has worked well for many people for a long time." In fact, that's the ONLY way you can get good exposures of subjects with a long tonal range if you use an incident light meter. See also http://www.rogerandfrances.com/subscription/ps expo neg.html

The Zone System is a subset of basic sensitometry, based on the materials of decades ago, and is intended only for B&W and primarily for large format.There's over-simplification in much of the Zone System; over-complication in other areas of it, and it's worth remembering that Ansel Adams allegedly reckoned that when he acquired a spot meter, his exposures increased on average by a full stop. You might find it interesting to read a case against the Zone System, http://www.rogerandfrances.com/subscription/ps zone.html

And finally, the Zone System Gospel from http://www.rogerandfrances.com/subscription/zone system.html

1 In the beginning, Sensitometry was void and without form; and the spirit of Ferdinand Hurter and Vero Charles Driffield moved upon the waters.

2 And in 1890, they said, 'Let there be the d/log E curve, which thou shalt also call the H&D curve, where d is density and log E is the Logarithm of the Exposure; and it shall also be known unto thee as the characteristic curve; for it describeth the characteristics of an suspension of silver halide crystals in gelatine, which men call also an photographic emulsion.

3 And wise men read these words, and meditated upon them; and there were giants in those days, whose names were Lueppo-Cramer, and Crabtree, and Spencer, and Henn, and Edgerton; and Clerc, and Neblette, and Glafkides, and Haist; and they interpreted and enlarged upon the words of Hurter and Driffield; and great were their works.

4 In later days there came in the land that is called California an teacher, whose name was Ansel Adams, who meditated also upon these words, and he brought forth the Zone System.

5 And the people said, See, he is a sage, who interpreteth the words of the wise.

6 But in the fullness of time they forgot he was but an interpreter, and worshipped him saying, See, This is the man who hath created all that there is to be known about exposure. And the followers of the followers magnified him, and forgot Ferdinand Hurter and Vero Charles Driffield, and knew of them not, and made as if they had not been.

7 After them came the followers of followers of followers, whose name was called Zonies or Ansel-ites, who read about sensitometry, and said, This is nought but an re-interpretation of the writings of the Blessèd Ansel; and he who denieth this knows not whereof he speaks, but is an ignoramus, or an man embittered.

8 Which is why those who of ancient days studied sensitometry and not its popularizations, and eschewed those books written by disciples of disciples of disciples of the Blessèd Ansel, waxed wroth against those Ansel-ites whose pride was overweening.

9 But they who had in time past studied these things were derided, and not heard.

10 Wherefore we have written that which is above.

11 And wherefore we apologize to he who thinketh it blasphemous to write in 16th century English, for it is nought but an poor attempt at an reminder that The Camera, The Negative and The Print are not the roots of sensitometry, nor an work of religion, though the Ansel-ites magnify their prophet never so much. Nor, save only the Naming of Zones, which is an work of Genius, is there much that is original in these books.

12 And if ye seek some of the real science that is behind photography, seek ye Haist's Modern Photographic Processing or Clerk's Photography or Glafkides's Chimie et Physique Photographique or Neblette's Photography, Its Principles and Practice. And thou shalt be enlightened.

Of course, if the Zone System works for you, it works for you. But there are at least as many great photographers who don't use it as do, so it can't be essential.

Cheers,

R.
 
John, my two cents: I wonder if you are trying to "overdigitize" the exposure determination and unnecessarily complicating the situation by trying to find ways to make your actual exposures and meter readings match. You seem to indicate some consistent errors.

Would your life be simpler by just remembering to give a bit more or less exposure in specific situations than your meter indicates? That has worked well for many people for a long time. Then you can tweak your development times to suit.

I have a friend who is close to dead perfect with his exposure 100% of the time. He has never owned an exposure meter and still uses the Leica M4 model that he started with back when they were new. He shoots Tri-X, about 13,000 rolls of it so far. When someone asked him what e.i. he uses, he could only say he had no clue but pointed and said "f5.6 at 1/500th, whatever that works out to".

I think the modern era often causes us to search for complicated solutions to simple problems.

Well said.
 
OK, well, I hope I haven't seemed rude by not closing on all these comments. In fact, I've been thinking a lot about them.

I've been following Bob's comments and fotos since I joined. I like lots of your shots. Now, in fact what I am currently doing is "giving a bit more or less exposure in specific situations than my meter indicates!" I don't even hope though to ever be "dead perfect" without a meter like your friend is. And I will probably never have the opportunity to say that I have shot 13.000 roles of Tri-X, either!!

I finally will proceed as mfogiel suggested "OVEREXPOSING and UNDERDEVELOPING." The first comments in this thread by Chris and analysis of my raw scans lead me to the conclusion that I am currently tending towards overexposure and overdevelopment. So, for me, this in and of itself is very useful. Thanks also to Roger for sending me back to one of his pages (that I'd already read once) to help me to use my new spot meters:
"True spot meters such as the Pentax on the right are invaluable for high-precision metering for negatives because you can directly read the darkest area in which you want shadow and detail and base your exposure on that: exposure for negatives is keyed to the shadows. A similar approach can be used for high-precision metering for slides and digital, by taking a spot reading of the lightest area in which you want shadow and detail and basing your exposure on that. This is arguably the best approach when you cannot approach your subject closely or you cannot take a reading in equivalent lighting, as noted above. On the other hand, it takes a little practice before you learn to recognize the brightest highlight in which you want texture and detail: it sounds easier than it is"

So, I am quite lucky to now have 3 Pentax V spotmeters (all seemingly about within a 1/4 of stop of each other and having cost about USD 15.00 each. I am going to try to improve my intuition some. Maybe I will waste some film. Maybe I will be able to increase the percentage of shots I have that are in the area that I think is proper exposure.


We will see. :) Thanks to all for the constructive comments.
 
Back
Top Bottom