I'm going to start this thread off with the J-3 job that is more involved than the ones documented elsewhere. This modification is required when the lens will not drive the RF to infinity. The helical is not deep enough into the mount. The solution is to take the helical out of the mount, and grind/polish the mount down little-by-little until Infinity on the focus ring matches infinity on the RF of the camera. I've mostly had to do this with Valdai Jupiter-3's. The Valdai Jupiter-3's are not as good at the earlier lenses. I've shot with 10 of them to get one good one.
This is the good one.


Focus ring off, remove the three set screws.
Set screws have Taps, small holes, to hold in place.
Whoever made this lens drilled through the screw holes of the focus ring and left the metal filings of the taps in the lens. That made focus a little rough. These needed to come out.

The inner and outer parts of the helical are held together with screws that act as guide pins.
Always make scribe marks to mark each side. I use one scribe for the first screw and two scribes for the second. They must go back together the same way as they come apart.
The other "Big Whoops" on this lens: two screw holes for the guide screws. Only time I've ever seen this screw-up. Good think I marked the correct set.

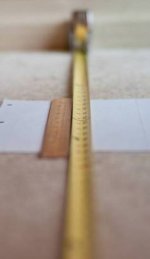
Once the helical is clean and relubed, you need to grind down the lens mount and screw the helical in deeper. This is trial and error, do a little bit at a time. This is the final position for this lens.

Now the hard part. The taps for the set screws of the focus mount need to be redone. Position the focus ring in place, tape it down.

And use a small pick or drill bit to Mark the position on the underlying ring. Do not drill with the focus ring on, you are likely to damage the threads.

I put the helical and mount into a vice, use triple-zero drill bits in a hand drill to start the taps. Then move to a bigger drill bit to finish. Don't go too feep, just deep enough for the set screws.