jrichie
Member
What are the best settings to have on the M8? Is there anything I should set up for it??
Having done my first shoot with the camera today, I had all settings as set from the factory but remember reading somewhere that they should be tweaked.
I must say, I absolutely love this camera and do not regret the purchase at all - this is my first ever rangefinder and find it so easy to use! On shoot today and all was in focus and exactly as intended, with great results") Just wondered if they could be better
Just wondered if they could be better
Having done my first shoot with the camera today, I had all settings as set from the factory but remember reading somewhere that they should be tweaked.
I must say, I absolutely love this camera and do not regret the purchase at all - this is my first ever rangefinder and find it so easy to use! On shoot today and all was in focus and exactly as intended, with great results
Just wondered if they could be betterBully
Established
Congratulations to your M8!
I´ve lusted for the M8 since it was introduced in Fall 2006. The mechanical MP in combination with the first Leica digital rangefinder M8 would be my absolute dream combination...
Have fun with it and give us a feedback of your first impressions of your new jewel.
Bully
I´ve lusted for the M8 since it was introduced in Fall 2006. The mechanical MP in combination with the first Leica digital rangefinder M8 would be my absolute dream combination...
Have fun with it and give us a feedback of your first impressions of your new jewel.
Bully
nksyoon
Well-known
Some of my settings choices:
- DNG only
- instant review off
- RGB histogram on review, overexposed highlights in red
- usually -1/3 EV
- beep if no card in camera
- DNG only
- instant review off
- RGB histogram on review, overexposed highlights in red
- usually -1/3 EV
- beep if no card in camera
Keith
The best camera is one that still works!
This would be good thread for people to post their favoured M8 settings ... comparisons with what others are in tune with is always interesting.
DNG only
320 ISO
-2/3 EV (files have excellent shadow recovery capability)
Auto review off
Power off after two minutes
White balance - cloudy
DNG only
320 ISO
-2/3 EV (files have excellent shadow recovery capability)
Auto review off
Power off after two minutes
White balance - cloudy
jrichie
Member
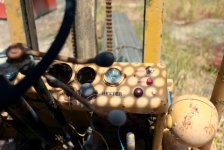
ok here is a pic I took today - factory settings on M8 with a tweak of white balance in aperture.
areas to improve??? You guys have sharpness, contrast etc set to factory? It is always easy to sort in software though!
My initial impressions are fantastic images, great focus [1st time rangefinder and now long term.........] easy to carry and hold. Negatives are hood in view of rangefinder on 28mm Elmarit lens, strap causes issues when holding, not too easy to focus on concrete at a distance! Other than that so far is great
Hope the image comes out ok........
Attachments
jrichie
Member

louiskht
Established
i certainly appreciate this thread, in fact this may eventually change my mind in getting rid of my 2 month old M8.
he
he
jaapv
RFF Sponsoring Member.
User 1 :
DNG only
Autoreview off
ISO160
Histogram+clipping RGB
LCD medium high
WB daylight
EV 0
User2:
DNG only
Autoreview off
ISO 640
Histogram+clipping RGB
LCD medium low
WB tungsten
EV -1
User3
DNG+Basic
Autoreview on
ISO 1250
Colour B&W
Histogram visible
LCD standard
AWB
EV -1 1/3
On all users: Slow sync lens dependent
2nd curtain flash
DNG only
Autoreview off
ISO160
Histogram+clipping RGB
LCD medium high
WB daylight
EV 0
User2:
DNG only
Autoreview off
ISO 640
Histogram+clipping RGB
LCD medium low
WB tungsten
EV -1
User3
DNG+Basic
Autoreview on
ISO 1250
Colour B&W
Histogram visible
LCD standard
AWB
EV -1 1/3
On all users: Slow sync lens dependent
2nd curtain flash
Last edited:
jrichie
Member
Kieth, I think I like your images a lot! So, I will give your setting a go for a while - unless there is anyone better.......
When in the UK [visiting home in North Yorkshire] I will be taking pictures of monestaries and castles in the winter light. Hopefully B+W will be the way to go - what software are you using to convert?
edit - ok jaap has some good points - so I guess they are various set ups depending on the situation
gavinlg
Veteran
Dont shoot in JPEG if you can possibly help it.
The basic explanation is that digital cameras output 2 main types of files, the JPEG and a RAW file (in the M8s case, the RAW is called DNG). What happens is that the when you take a JPEG picture,you're allowing the internal processing in the camera (which isn't great - it oversharpens really badly for starters) to interpret the raw data collected by the sensor and edit it to the parameters. Once thats done, the resulting file has less information in it, and therefor if you needed to tweak or edit it afterwards, there's less info in the image to begin with and you start getting artifacts and bad tonal graduations. Also, if you badly blow some highlights or underexpose something, because the JPEG processor has thrown out the info in the file it doesn't need, it's very difficult to tweak the file to correct it.
RAW or DNG is the opposite, its the raw data from the sensor, and you use a raw converter to bring it into a workable file. One of the better ones is ACR, which comes with adobe lightroom (highly recommended) or adobe photoshop. You can then edit the file to your own parameters without artifacts etc, and generally the image quality is much better.
If you already knew this, please forgive the long winded post, but by shooting DNG you won't need to set "shooting parameters" like sharpness and color in camera - you'll do it in the raw converter.
I think thats the main key to unlocking the m8s potential.
Keith
The best camera is one that still works!
I think provided you shoot in raw the final image is a pretty individual preference and depends on what each person visualises as satisfactory on a monitor.
One thing I like about M8 DNG files is just how little you have to do to them to get a pleasing result. I don't bother with Photo Shop ... I convert them to tiffs in Capture One after adjusting white balance then do as little as possible to them with ACDSee Pro.
They really are a great camera and it's a shame that the odd person seems to get one that gives them grief. I've had no problems aside from the occasional freeze!
Philippe D.
Cheeeeeese
Hi,
B/W Styler ($50) or B-W-Conversion (donateware)
I do always shoot only RAW (DNG), if a picture has to be converted to B&W, i mostly use a plugin on Photoshopjrichie said:- what software are you using to convert?
B/W Styler ($50) or B-W-Conversion (donateware)
palker
Established
Hi, here are my in camera settings, I also set up three profiles but never use them, always profile 0.
DNG only
160 ISO
-2/3 EV
Auto review off
White balance - Daylight or Cloudy is usual state .. depending if I want a warmer feel out of the camera. If I'm indoors I use the two electric light options .. Tungsten or Flourescent. I know it can be corrected after .. but I prefer to have it look right in camera .. and do fewer adjustments afterwards.
I have self coded my lenses and so use the Lens Detection.
I'm a Mac user and use Aperture.
So I usually import them (not into the Aperture library), at the same time add my own metadata.
I then quickly grade them. I use all five stars.
On my picks I do a little levels (used to do a lot with my D200 - hardly anything with the M8).
I may change the colour balance - but not if I don't have to.
I have a preset to do a little Shadows/Highlight recovery to offset my -2/3 EV.
I may convert to B&W - using some Presets.
I use the default Edge Sharpen settings.
Good luck.
Gid
Well-known
ISO 160
-2/3 EV
DNG
Auto review off
Auto power off 2 minutes
Use Lightroom default settings for basic conversion. Have set up my own B&W conversion in Lightroom.
-2/3 EV
DNG
Auto review off
Auto power off 2 minutes
Use Lightroom default settings for basic conversion. Have set up my own B&W conversion in Lightroom.
palker
Established
in fact i have a better idea .. drink loads and worry less ... .. .... .
usccharles
Well-known
hi
user profile 1: for regular use
iso 160
DNG + JPEG Fine
contrast normal
saturation normal
sharpening off
user profile 2: for available light
iso 640
DNG + JPEG Fine
contrast high
saturation low
sharpening off
user profile 3: B/W
iso 1250
saturation B/W
contrast high
sharpening off
I use my Jpegs often. i don't know why people don't like them. yes the DNG files can pull sharper clearer images, but i don't blow up all my photos and most of the time the jpegs suffice.
I also like Jpegs becuase with my user profile 2 (for available light), the high contrast and low saturation processing creates a nice usuable high iso image with alot of the color noise removed. many times the noise reduction looks more natural to me than post processing, so i keep shooting both Jpegs and DNG so i can choose which ever one i like more after processing.
i also like the WB of in camer JPegs WHEN the white balance is done properly by the camera. there are some images with the JPegs with colors I just could not for the life of me duplicate when post processing my DNG, so i take both files, compare which one i like the most after post processing and go with that.
cheers~
jlm
Newbie
why care about WB settng in the camera if shooting raw?
palker
Established
If it is right in the camera, you don't need to fix it afterwards and one thing less to fix speeds up the workflow.
dont45
Member
ReidReviews had a nice b&w workflow, including m8 settings which I read a few weeks ago. For the life of me I can't find it now, perhaps it's been removed?
By the way, I find the info contained well worth th $30 or so to subscribe. His lens reviews are awesome with all the example shots for various test purposes. Lots of other great info as well.
As to the b&w workflow, I think his main point is to setup a 100% b&w workflow, beginning with the camera image preview. On m8 he sets colorspace to adobeRGB, image capture to RAW+JPEGbasic, color saturation B&W. He uses C1 Pro (I use C1 LE) to convert to b&w with jfiColorLabs b&w plugins. These he also reviews, and I find great -- select a b&w film or use a color filter.
What I find is that almost nothing else is needed, a little contrast/highlight adjust in C1 and on to Photoshop or something to print. From all this, what I found most helpful to produce nice b&w print (on R1800) was the adobeRGB setting, and the 100% b&w view throughout the entire workflow. Old images I shot before this workflow I find photoshop convert to adobeRGB also solved my printing problems. This may be simply to solve in another way, but for me it has simplified my workflow. I know I butchered Sean's workflow with my brief description so I suggest you check it out to learn more.
Gabriel M.A.
My Red Dot Glows For You
If you shoot dim indoor scenes, if you don't set your WB to Tungsten (if that's the lighting K temperature), you'll find that shadows don't come out as nicely if you didn't set the WB to Tungsten (or Fluorescent, etc.)jlm said:why care about WB settng in the camera if shooting raw?
So, I care.
Share:
-
This site uses cookies to help personalise content, tailor your experience and to keep you logged in if you register.
By continuing to use this site, you are consenting to our use of cookies.