Arjay
Time Traveller
When I took up film photography again, someone gave me a bunch of expired color negative films. Recently, I shot several series of pictures using these films, all with modest success: The pictures were lacking contrast and had an ugly greenish color cast. Unattractive as color pictures, but an interesting starting point for black-and-white (bw) conversions.
Since I scan my films using a Nikon scanner/software combo that can produce NEF (Raw) files, I played around with them in Nikon's Capture NX2 image processor software. I discovered some interesting things that I want to share with you - a very powerful way to control tonal value distribution far beyond what gradation curves can do, and with a lot more control over local contrast.
But let's start at the beginning ...
Here's a picture I recently shot and post-processed (incidentally, it originates from a DSLR, but it could just as well also have been a scanned film image):

The usual BW conversion by pulling back saturation ...

Hue/saturation control in Photoshop, just pull saturation slider all the way left
... delivered a fairly uninteresting picture with lots of lost image detail. Dissatisfied, I researched a little more.
Photoshop offers the 'Channel Mixer' for this purpose, albeit this tool is anything but simple to use. ...

Channel mixer tool in Photoshop, you need to check the 'monochrome' box, manipulate all the Red, Green and Blue sliders simultaneously, and make sure that the sum of all the values in the numerical boxes equals +100.
That's a lot of balls to juggle all in one step, and then - do you really know what you are doing and why? Well, just imagine that the channel mixer is a simulation of what a color filter does when you use bw film. Modern bw films have a more or less uniform sensitivity over the entire visible light spectrum, and thus will translate colors into bw tones using a 'flat' sensitivity curve. This sensitivity curve determines which colors will be reproduced in what bw tonality value. You won't always want your film to act that way...
Imagine for a moment shooting with bw film and using color filters: Landscape photographers love a yellow filter because it produces brighter tonal values for grass and trees, i.e.greenish or yellow colors will be transmitted with less attenuation than other colors and thus produce a brighter tone on the film. If you want to have dramatic skies, you might want to use a red filter which - by attenuating blues - will produce much more dramatic skies. Or you might prefer a green filter for nice skin tones etc. The filters feature a spectral attenuation curve - a yellow filter attenuates yellow colors least, and all others much more. The same applies in analogy to red, greeen or blue filters.
These filters in cooperation with bw film act in a way similar to what the channel mixer does when it translates a color picture into black-and-white. The problem is, however, that you need to set the 'filter color' by finding the right combination of the three R, G and B values which together will define the effective color of your conversion filter. And - to make matters a little more challenging, the aggregate sum of their numerical values must be +100. Phew - that was enough to make me look for another tool as I planned to get deeper into bw conversion.
Another image processor features a different way to set this conversion filter, by not defining it as an RGB value, but as an HSB value (Hue, Saturation & Brightness) - probably similar to what you did in a wet color lab when you set the color wheel on your enlarger.
So, how can I imagine the HSB color model?

Color picker tool in Nikon Capture NX2, in which the hue (H, in my screenshot of a German software version shown as F for 'Farbton') directly defines the color hue as a value from 0 to 360 degrees. In the above illustration, the color in the triangle will change as you change the F (Hue) value. The S (Saturation) parameter will move the little circle for the actual color up and down, the B (Brightness, in my screenshot of a German software version shown as H for 'Helligkeit') moves the circle from right to left.
So, for the purpose of bw conversion, we only worry about hue and brightness (we always assume to use color filters with full saturation). If we set the color of the bw conversion filter in the HSB color space, we'll have a lot less parameters to worry about:

BW conversion tool in Nikon Capture NX2. The 'Farbfilter' slider stands for Color Filter and lets you select the hue of the conversion filter with a value from 0 to 360. These values correspond to the hue values shown in the color wheel above.Since we aren't interested in changing filter saturation, we'll move the Filter Strength ('Farbfilterstärke') slider all the way to the right. The remaining two sliders for 'Helligkeit' and 'Kontrast' (Brightnes and Contrast) stay as they are - we might change those parameters later, but using a much more flexible gradation curve.
Now we can start to play, pulling the Filter Strength slider left and right, watching how our bw converted image is changing. Those changes can be rather dramatic:

Click here to see the picture in 2655 by 800 pixels size for more detail. The 'conv filter' values are Red for 0, orange for 44, yellow for 64 and blue for 299.
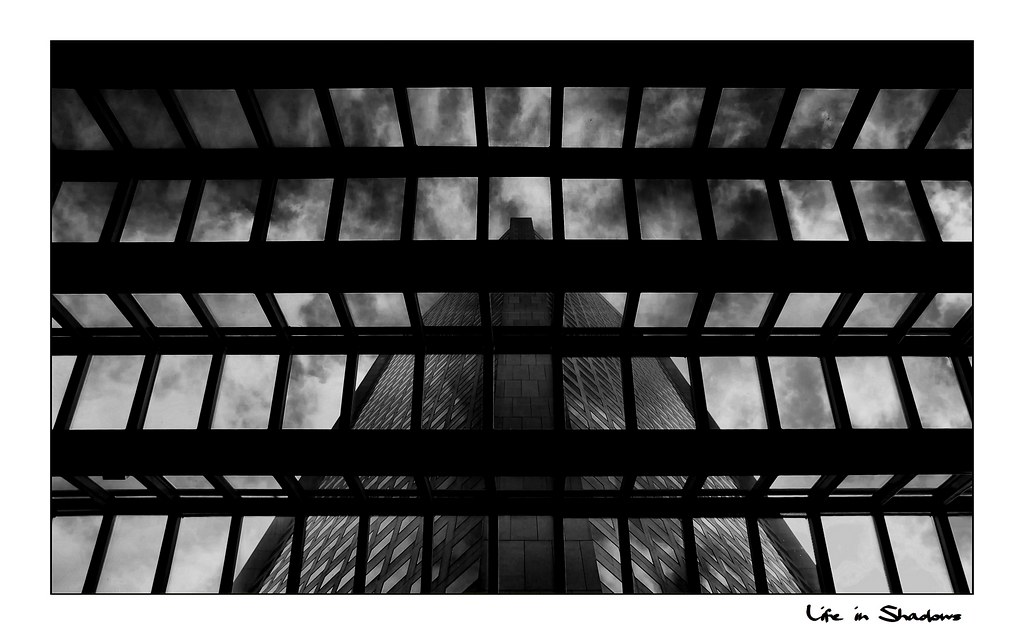
It's obvious that integrating such a variety of bw renderings into one bw picture will be much more impressive than limiting oneself to a conversion using just one conversion filter value. I'm quite sure that I would not have been able to produce the bw picture at the top of my message by just using one filter color and messing intensely with dodging and burning.
Since AFAIK neither Photoshop nor Capture NX2 can use layers (one per conversion & filter color value) in such a way that each layer (or conversion filter step) can reference directly to the same color picture (in a base layer of the image processor's layer stack), I saved the four conversions as separate image files.
I then loaded them into separate layers in Photoshop and merged them using individual layer masks:
Conclusion
I'm thinking hard about using more color film when producing bw pictures, because it would give me much more crative freedom for post-processing. The only problem: I hate having to wait for C41 processing and having to cope with lab quality variations.
So, let's begin the discussion:
Since I scan my films using a Nikon scanner/software combo that can produce NEF (Raw) files, I played around with them in Nikon's Capture NX2 image processor software. I discovered some interesting things that I want to share with you - a very powerful way to control tonal value distribution far beyond what gradation curves can do, and with a lot more control over local contrast.
But let's start at the beginning ...
Here's a picture I recently shot and post-processed (incidentally, it originates from a DSLR, but it could just as well also have been a scanned film image):
The usual BW conversion by pulling back saturation ...
Hue/saturation control in Photoshop, just pull saturation slider all the way left
... delivered a fairly uninteresting picture with lots of lost image detail. Dissatisfied, I researched a little more.
Photoshop offers the 'Channel Mixer' for this purpose, albeit this tool is anything but simple to use. ...
Channel mixer tool in Photoshop, you need to check the 'monochrome' box, manipulate all the Red, Green and Blue sliders simultaneously, and make sure that the sum of all the values in the numerical boxes equals +100.
That's a lot of balls to juggle all in one step, and then - do you really know what you are doing and why? Well, just imagine that the channel mixer is a simulation of what a color filter does when you use bw film. Modern bw films have a more or less uniform sensitivity over the entire visible light spectrum, and thus will translate colors into bw tones using a 'flat' sensitivity curve. This sensitivity curve determines which colors will be reproduced in what bw tonality value. You won't always want your film to act that way...
Imagine for a moment shooting with bw film and using color filters: Landscape photographers love a yellow filter because it produces brighter tonal values for grass and trees, i.e.greenish or yellow colors will be transmitted with less attenuation than other colors and thus produce a brighter tone on the film. If you want to have dramatic skies, you might want to use a red filter which - by attenuating blues - will produce much more dramatic skies. Or you might prefer a green filter for nice skin tones etc. The filters feature a spectral attenuation curve - a yellow filter attenuates yellow colors least, and all others much more. The same applies in analogy to red, greeen or blue filters.
These filters in cooperation with bw film act in a way similar to what the channel mixer does when it translates a color picture into black-and-white. The problem is, however, that you need to set the 'filter color' by finding the right combination of the three R, G and B values which together will define the effective color of your conversion filter. And - to make matters a little more challenging, the aggregate sum of their numerical values must be +100. Phew - that was enough to make me look for another tool as I planned to get deeper into bw conversion.
Another image processor features a different way to set this conversion filter, by not defining it as an RGB value, but as an HSB value (Hue, Saturation & Brightness) - probably similar to what you did in a wet color lab when you set the color wheel on your enlarger.
So, how can I imagine the HSB color model?
Color picker tool in Nikon Capture NX2, in which the hue (H, in my screenshot of a German software version shown as F for 'Farbton') directly defines the color hue as a value from 0 to 360 degrees. In the above illustration, the color in the triangle will change as you change the F (Hue) value. The S (Saturation) parameter will move the little circle for the actual color up and down, the B (Brightness, in my screenshot of a German software version shown as H for 'Helligkeit') moves the circle from right to left.
So, for the purpose of bw conversion, we only worry about hue and brightness (we always assume to use color filters with full saturation). If we set the color of the bw conversion filter in the HSB color space, we'll have a lot less parameters to worry about:
BW conversion tool in Nikon Capture NX2. The 'Farbfilter' slider stands for Color Filter and lets you select the hue of the conversion filter with a value from 0 to 360. These values correspond to the hue values shown in the color wheel above.Since we aren't interested in changing filter saturation, we'll move the Filter Strength ('Farbfilterstärke') slider all the way to the right. The remaining two sliders for 'Helligkeit' and 'Kontrast' (Brightnes and Contrast) stay as they are - we might change those parameters later, but using a much more flexible gradation curve.
Now we can start to play, pulling the Filter Strength slider left and right, watching how our bw converted image is changing. Those changes can be rather dramatic:
Click here to see the picture in 2655 by 800 pixels size for more detail. The 'conv filter' values are Red for 0, orange for 44, yellow for 64 and blue for 299.
It's obvious that integrating such a variety of bw renderings into one bw picture will be much more impressive than limiting oneself to a conversion using just one conversion filter value. I'm quite sure that I would not have been able to produce the bw picture at the top of my message by just using one filter color and messing intensely with dodging and burning.
Since AFAIK neither Photoshop nor Capture NX2 can use layers (one per conversion & filter color value) in such a way that each layer (or conversion filter step) can reference directly to the same color picture (in a base layer of the image processor's layer stack), I saved the four conversions as separate image files.
I then loaded them into separate layers in Photoshop and merged them using individual layer masks:
- The 'red' layer (conversion filter value 0) contributed the girl's left foot - the one without blur, as it offered most tonality values and detail.
- The 'orange' layer (conversion filter value 44) contributed the all of the girl, as it offered a nice rendering of the girl's skin tones and nice contrast on her dress.
- The 'yellow' layer (conversion filter value 64) contributed the floor with the shadows rgoing from the couple's feet to the right-hand side as well as the man's arm, head and hat.
- The 'blue' layer (conversion filter value 299) provided the shadows coming from the stage in the background toward the man as well as the man's chest, trousers and feet.
Conclusion
I'm thinking hard about using more color film when producing bw pictures, because it would give me much more crative freedom for post-processing. The only problem: I hate having to wait for C41 processing and having to cope with lab quality variations.
So, let's begin the discussion:
- Let me hear of your bw conversion workflows - teach me some of your wisdom!
- Do you have comments and corrections (I'm a technical writer who is specialized on electronics, so my description might still contain some inaccuracies)?
Last edited:
Ezzie
E. D. Russell Roberts
BW from RAW is quite fun. Mixing the channels gives you the opportunity to simulate colour filters.
I first do whatever is necessary before BW conversion. Sharpening, add definition, recovery of highlights, slight curve adjustment.
I then use the monochrome colour mixer. I don´t always end up with all channels adding up to 100, depends on the effect you´re after. I then adjust hue and saturation for blue/green/red/yellow, if need be. I then adjust highlights and shadows, and then mid contrast, high and low tonal width. Depending, one might need to go back on some previous decisions and reiterate.
Steve Karr
Film tank shaker
It's not a digital darkroom, it's a Mac
I had a new assistant helping in the darkroom when I was printing some 8x10 wet plate negs one night and he said "Boy that's just like Photoshop, did you know that?"
For God Sake!
I had a new assistant helping in the darkroom when I was printing some 8x10 wet plate negs one night and he said "Boy that's just like Photoshop, did you know that?"
For God Sake!
craygc
Well-known
Apologies but I played a little with your original colour image; more to address my later issue around shadow detail. I often use a blended approach as well with split filtering but I do everything with "history states". Convert to B&W 1st to how I like the majority of the image and take a snapshot of it; then go back to the colour version and convert again to address other areas; snapshot again and repeat as required. Eg. for me the first version had lightened yellows/reds for the skin, whereas my 2nd version yellow was darkened to improve contrast in the sign behind the girl, etc. I then paint the relevant parts of the 2nd into the first with the history brush (I just always tend to work on a flat image)
For me though, I like detail in the shadows, especially when its there originally - but I appreciated that this is personal preference. For me, there was a lot of detail in the guy shirt or the girl's hair from the original that can easily be lost in straight colour filtering. In the same way as I blend separate conversions, I will also create other versions where I open up these shadows with curves and paint them back in as well.
Just my 2c worth, for what its worth...
Arjay
Time Traveller
Thanks Craig,
I'll have to try your approach using history states - which I have never used. I'm impressed by how much detail you managed to tickle out of the color image - especially in the guy's shirt and on his right shoe, as well as in the girl's hair. I keep wondering which channel mixer settings you used for these parts (I didn't do the actual conversions in PS, but in CNX2).
Of course, every specific pp sequence also is a matter of taste, and whereas you put your focus e.g. on the girl's hair, I worried more about the compositional aspects of the shadows on the ground ... But that's yet another story.
P
Peter S
Guest
Hi Arjay I basically have two B+W conversion techniques.
1. B+W conversion adjustment layer in Photoshop for quick conversions. I think it works very well or sometimes Silverefex.
2. A 3 layer channel mixer workflow (one channel mixer per RGB component) and on top of that a fourth neutralizing channel mixer layer. Painting in the layer masks if so required. Changing the sequence of the layers also has an effect. Most of the time I also will use Silvefex in combination with this workflow. I copied it from Vincent Versace.
It is a new technique to me and I am still trying to fully understand what happens and I am also still looking for a good way to add grain to my B+W conversions. I will probably end with an additional layer where I use scanned grain from my favorite films (Trix, Agfa 100).
It is fun this digital world and although the tonality and look (spectral response/contrast) of B+W conversions is still not the same as using film I do get better prints than I ever did in the wet darkroom. I really like the localized contrast control we enjoy in Photoshop etc.
Arjay
Time Traveller
That sounds like an interesting workflow. Would you care to post screenshots of such a bw conversion, e.g.of the layer stack and of the settings for the three channel mixer layers - I would really like to understand what you are doing there. Thank you!...
2. A 3 layer channel mixer workflow (one channel mixer per RGB component) and on top of that a fourth neutralizing channel mixer layer. Painting in the layer masks if so required. Changing the sequence of the layers also has an effect.
P
Peter S
Guest
Not behind my photoshop computer, but it is well explained in Vincent Versace's DVD and also in his book Welcome to Oz. I bought the DVD on B+W conversions and at USD 70 I found it money well spent. BTW I have no commercial our other relatiosnhip with VV.
Difficult to explain exactly,but it boils down to a stack of 3 monochrome channel mixers where in each you start with red, green or blue at 100% and then you go finetuning that particular layer (others not visible) to get the best looking B+W in that particular channel mixer (f.e. for green you could well end up with green at 90%, blue at 15 and red at 8%). After having done that for every channelmixer you can play with the sequence of the layers and also with their opacity and on top of that of course you have the layer masks for further finetuning. After that I use Silverefex because I like their control point user interface. You then have left localized sharpening, maybe some dodging and burning (I doubt it) and that is it.
Please see a nice collection of B+W links at:
www.retouchpro.com/forums/photo-art...ing-color-image-black-white-grayscale-bw.html .
tlitody
Well-known
it seems to me that the more complicated it can be made to look the better people seem to think the results are simply because "It must be good because I use so and so's conversion routine".
B+W sharpness is all about local contrast. Get that right and you are 90% there.
There are dozens and dozens of colour to B+W conversion actions available for free download from the web. Each image works best with one of them. No action works best with all images. That should tell you that no single way of doing a conversion is the correct way to do it.
Personally, when I scan colour and convert to B+W which is rare, I use a basic conversion to B+W and then work sections of the image by creating layers from feathered selections (a la print map in the darkroom) and work on each section to get it where I want using levels,contrast,brightness with occasional burn and dodge tools. Seems to work just fine and is very simple.
P
Peter S
Guest
You are right, as I wrote in my first message I have two ways: either a simple B+W adjustment layer or my 4 channel mixer layer. The last is actually automated so it does not take me a lot of time. I also use luminosity masks (google Tony Kuyper if you are interested) that select certain values and then turn that selection into a curves adjustment layer.
There are so many ways to do a B+W conversion, some pictures do better with a simple conversion others need something more complex. In the end there is only one thing important: the end result. We all have different tastes and that make this place so interesting.
There are so many ways to do a B+W conversion, some pictures do better with a simple conversion others need something more complex. In the end there is only one thing important: the end result. We all have different tastes and that make this place so interesting.
Last edited by a moderator:
peterm1
Veteran
I mainly use Paintshop Pro Photo X2 and it has a BW conversion color wheel that allows you to select whatever color filter effect you like. I sometimes also use its channel mixer just as you would with Photoshop, too. But my favorite way of converting is to use Nik Silver Efex. It is very flexible and gives great results.
I especially like its ability to add grain, vignettes and silver toning. Very nice. In each case, I first process to get rid of any digital camera noise and then sharpen (the textbooks say do it last but I find its not absolutely necessary.) I may also dodge and burn and then crop if that's needed. That way I end up with a processed color version plus a converted black and white version. And of course the digital negative if I am shooting RAW which I usually am.
If I really want a dramatic effect I may also duplicate layers and then change the blend mode on the second layer to multiply as shown here. This creates a very moody effect. (Of course you may aslo need to adjust the opacity slider too.)
craygc
Well-known
I was considering shooting some colour film and converting when I go to Macau next month (just being lazy). Then I saw this thread last night New Zealand and after especially seeing the tonality of the first shot instantly decided that colour conversions just cant do this... I AM going to use B&W film
P
Peter S
Guest
Craig, why not do both and give it a try ? To be frank on my screen those New Zealand shots show muddy midtones, but I am not home right now and my screen here is not callibrated. I am still in the learning stages myself and just grab information and techniques wherever I can. Slowly, slowly am getting a lot better at it and am starting to get results that I find very pleasing. Steep lurning curve though and a lot depends on the quality of the original color file.
craygc
Well-known
Craig, why not do both and give it a try ? To be frank on my screen those New Zealand shots show muddy midtones, but I am not home right now and my screen here is not callibrated. I am still in the learning stages myself and just grab information and techniques wherever I can. Slowly, slowly am getting a lot better at it and am starting to get results that I find very pleasing. Steep lurning curve though and a lot depends on the quality of the original color file.
It was the first shot in the NZ thread that struck me more than anything. I do at times shoot colour and convert and although I can like the results it almost never has that traditional B&W look to it that I like...
Arjay
Time Traveller
I do at times shoot colour and convert and although I can like the results it almost never has that traditional B&W look to it that I like...
I wonder what you consider a 'traditional BW look' ...
craygc
Well-known
I wonder what you consider a 'traditional BW look' ...
Hmmm... this is something I find very difficult to frame and accurately articulate. I agree that often when people post 2 photos and ask which one is film and which digital it usually isnt clear cut so in that sense some colour film or digital conversions do work well.
I really dont like posting my own images to try and show images that I feel have a traditional look (as I see it) - although Ive tried with a few here. To me its often clearer when I see it in others work such as the first image in the referenced NZ series. I would probably best describe what I observe as a level of luminance and tonal subtlety that just doesnt exist in conversions; but not that it exists in all traditional B&W images either.
But just to note that this view is not something I'm trying to convince you or anybody else with. Its merely an attempt to try and explain what I feel I see as a significant enough difference that convinces me to continue working with the medium... :bang:


P
Peter S
Guest
I see what you mean Craig. I usually end finalize my B+W conversions with a mid tone contrast boost.
http://layersmagazine.com/creative-contrast-in-photoshop-cs3.html
http://layersmagazine.com/creative-contrast-in-photoshop-cs3.html
Share:
-
This site uses cookies to help personalise content, tailor your experience and to keep you logged in if you register.
By continuing to use this site, you are consenting to our use of cookies.