OK, gentlemen,
I did it.
The wobble is solved and everything looks fine.
All in all, the lens is not that difficult to work on, but there are a few tricks, so here we go:
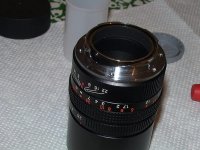
first, the slotted ring that you see from the back is the one to tighten. The only problem is to reach it safely since it is quite recessed. If you have a GOOD spanner wrench, you can try. It's the shortest path.
The long and winding road now:
Remove the five screws of the bayonet. remove the bayonet.
Now you will see a ring with two tiny holes that retains the cam. unscrew it.
Now be careful, I will explain later...
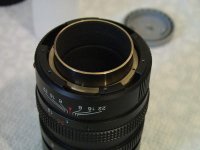
1- make a sign on the cam body, for example in front of the aperture index.
2- remove gently the cam. Careful with the shims. This is NOT the a good time to shake the lens around: There is a tiny winy pin on the inner part of the brass cylinder around the cam. make sure you don't loose it. remove it while the lens is horizontal so you wont drop it in the lens body.
3- Breath again. If you are slow on these operation, like me, you probably just broke the Olympic record for apnea with all sphincter contracted (sure there is such a sport).
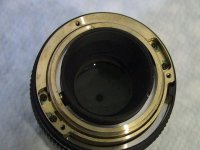
Now, play with the focus ring until the retaining ring is out. Take a metal ruler, tighten it. replace the tiny pin (contract and hold again), and replace the cam following the mark you made earlier. You will see six slots that can engage the pin head. Only one is the right one. If you didn't mark the cam, you are good for a trial and error matinee (Please, oh please, ask me how I know :bang🙂.
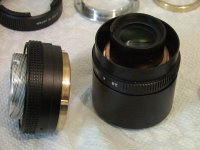
the rest is pretty straightforward. make sure the shims are under the cam collar, and not above it, under the cam retaining ring (Your questions are welcommed here too :bang::bang🙂.
At the beginning I didn't understand why the six slots. The shimming is done, well, by the shims.
I came to the conclusion that Konica allowed for a few positioning of the cam to find the one that would correct the tiny height variations of the surface making contact with the camera follower. In fact, only one position would allow the lens to focus to infinity.
That's all folks. I will now enjoy my weekend knowing that my Hexanon set is complete (28/35/50/90) 😀
Take care