jc031699
Established
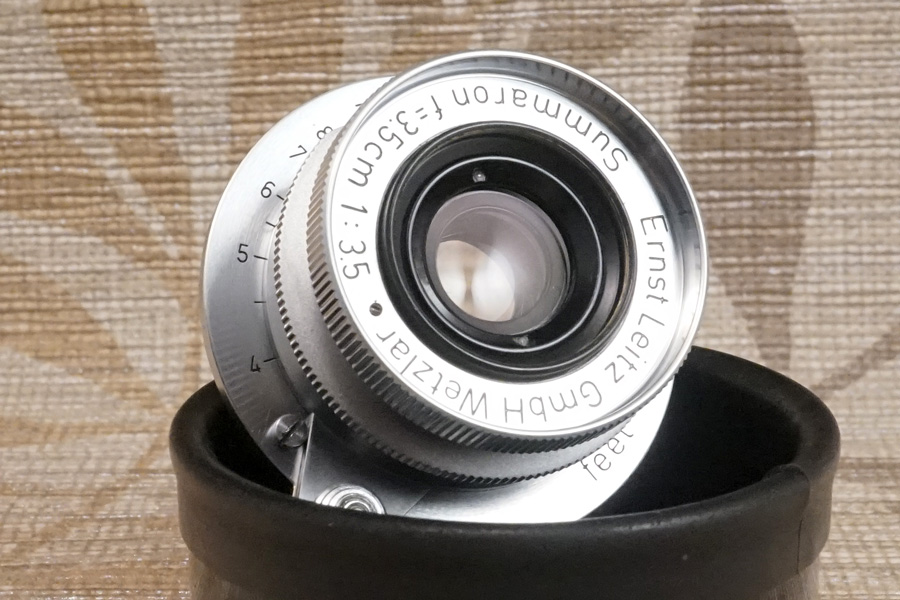
I had a heck of a time getting this lens open and worked out, so thought I would contribute to the hive mind by describing the process. This is lens serial number 751928.
Pretty sure it had not been opened or cleaned since it was made in 1953ish. I did not overhaul the helicoid, as it was still smooth and silky. This is probably not ideal, but I just didn't have the desire to mess with something still working well.
Here is a site with a rough breakdown of the lens construct for reference:
 Edge was able to translate it reasonably well for me.
Steps for getting in: (all unscrewing is the typical counterclockwise direction, and vice versa)
1. Unscrew rear "outer" retaining ring with lens spanner. This is the ring just inside the black ring with 4 screws.
2. Unscrew rearmost lens element with lens spanner.
3. Remove tiny 1.2mm set screw from front trim ring. This is located between the "Wetzlar" and the "1:3.5" text.
4. Unscrew front trim ring.
5. Unscrew the two threaded pins on opposite sides of the aperture ring.
6. Remove aperture ring, take caution of the two ball bearings under this. They may appear stuck to their respective seats/holes in the lens barrel, but can fall out.
7. This allows the entire brass optical unit to slide out from the front. (An impressive piece of engineering, solid as a hunk of brass...)
8. Remove tiny 1.2mm set screw from the side of the brass optical unit, located in the gap of the aperture control ring.
9. Unscrew frontmost lens element (the entire black piece - not necessary to unscrew the tiny retaining ring in the middle on top of the element). This was extremely stuck on mine, resistant to PB blaster drops and extreme waiting. I had to resort to a vise and Knipex pliers wrench to undo this. No permanent harm done due to the solid hunk of brass, lucky...
10. Now you have the brass optical unit with a press fit front and rear lens element. These each have threads around the actual front and rear lens element housing, presumably to use the threads to pull out the front and rear lens elements using factory tools. Obviously I did not have these tools. From some indirect internet sleuthing, I figured out that I should heat the entire optical unit until very hot to the touch with a hair dryer. Then I could tap the optical unit front on a marble countertop to get the front unit to drop out / loosen until I could pry it out. Later, I tried the same with tapping the optical unit backside on a marble countertop and got the rear unit to drop out too.
11. The first time I opened the lens, I made the mistake of unfastening the aperture control ring by removing the opposing threaded pins. * You don't really need to do this to clean the aperture, if you remove both the front and rear lens elements from the optical unit. * This causes the retaining ring that holds the aperture blades to fall out. Since I had made this mistake, I cleaned the aperture blades with naptha and then 95% isopropanol. The blades are symmetrical and can flip 180 degrees without problem, but I tried to place them back right side front and rear based on markings on the surface. The way to reassemble the aperture is as follows: 1) Place the aperture retaining ring rearside up. The slots for the aperture blade pins on this ring are open to the inner and outer diameter of the ring, so the pins can be slid in from either inner or outer diameter. 2) The aperture blades can be placed in a perfect circle along the circumference of the aperture retaining ring, each overlapping the next going either direction. They can only go in one way, so don't fret over the orientation as I did at first. 3) I put a finger in the middle of the aperture and aperture retaining ring to hold it all together. I then took the optical unit rear side up and put it over my finger to seat the aperture. 4) With the optical unit front side up again, I had to spin the aperture retaining ring around a bit to get the aperture blade pins to all match up and fall into the holes on the optical unit. Does not take as much futzing as you might think. 4) I did have to lift up the aperture retaining ring and "clock" it, and press back down onto the blades again, in order to get the threaded pins into their slots on the aperture retaining ring and the aperture opening and closing fully as originally set. 5) I then put the aperture retaining ring back on and placed the opposing threaded pins back in. Carefully with the screw heads, they strip easily.
12. The innermost front and rear elements, after being tapped free of the heated optical unit, can be accessed fully. I had to clean the rear element inner surface with both hand cream (containing NaOH per the internet) for 10 minutes of contact, followed by 30 minute soak with ammonia mixed 1:1 with hydrogen peroxide, to remove the recalcitrant haze from this element. I do believe that this haze is likely to be what gives the false impression that this lens is "soft" or "flare-y". Per the internet, this haze may be due to the hygroscopic (?) nature of the high refractive index glass that Leitz used in these lenses. However, there was oil on the aperture blades possibly migrated from the grease used to lubricate the outer aperture ring. So this decomposed lube could be responsible for the haze as well, despite the inner surface of the rear lens element being protected within the "sealed" optical unit. It is not really sealed because the aperture control ring covers large slots in the optical unit. My innermost rear element, inner surface, still had some likely coating "etch", but otherwise shiny and all haze gone. So much better than when I started. (Unlucky, I guess. Some get totally clear/clean/shiny from what I have read, although YYe gave a disclaimer of "clean considering the age of the lens" by someone's report which makes me think that one was similar to mine.)
13. Both of the innermost front and rear elements also had early "Schneideritis" type cracking of the opaque black paint arount the circumference of the lens. I blew the loose paint off and repainted it with black matte india ink (Dr. Ph. Martin's, from Michael's).
14. I then reassembled in reverse: 1) press front and rear lens elements back into optical unit. 2) screw front element back on and place set screw carefully (head breaks easily). 3) screw rear element back on. 4) slide optical unit back into lens barrel. 5) place aperture ring on (lube per routine) and threaded pins back into aperture control ring; careful with the bearings. 6) open the aperture complete by turning the optical unit, place aperture ring at f3.5. 7) flip lens over, use surface to hold optical unit in position, screw the rear "outer" retaining ring back on; not too tightly, as this will bind the aperture. 8) replace front trim ring, replace its set screw.
Pretty sure it had not been opened or cleaned since it was made in 1953ish. I did not overhaul the helicoid, as it was still smooth and silky. This is probably not ideal, but I just didn't have the desire to mess with something still working well.
Here is a site with a rough breakdown of the lens construct for reference:
◎ Ernst Leitz GmbH Wetzlar (ライカ) Summaron 3.5cm/f3.5《前期型》(L39)
(以下掲載の写真はクリックすると拡大写真をご覧頂けます) 写真を閉じる際は、写真の外 (グレー部分) をクリックすれば閉じます 今回の掲載はオーバーホール/修理ご依頼分のオールドレンズに関する、ご依頼
pakira3.sakura.ne.jp
Steps for getting in: (all unscrewing is the typical counterclockwise direction, and vice versa)
1. Unscrew rear "outer" retaining ring with lens spanner. This is the ring just inside the black ring with 4 screws.
2. Unscrew rearmost lens element with lens spanner.
3. Remove tiny 1.2mm set screw from front trim ring. This is located between the "Wetzlar" and the "1:3.5" text.
4. Unscrew front trim ring.
5. Unscrew the two threaded pins on opposite sides of the aperture ring.
6. Remove aperture ring, take caution of the two ball bearings under this. They may appear stuck to their respective seats/holes in the lens barrel, but can fall out.
7. This allows the entire brass optical unit to slide out from the front. (An impressive piece of engineering, solid as a hunk of brass...)
8. Remove tiny 1.2mm set screw from the side of the brass optical unit, located in the gap of the aperture control ring.
9. Unscrew frontmost lens element (the entire black piece - not necessary to unscrew the tiny retaining ring in the middle on top of the element). This was extremely stuck on mine, resistant to PB blaster drops and extreme waiting. I had to resort to a vise and Knipex pliers wrench to undo this. No permanent harm done due to the solid hunk of brass, lucky...
10. Now you have the brass optical unit with a press fit front and rear lens element. These each have threads around the actual front and rear lens element housing, presumably to use the threads to pull out the front and rear lens elements using factory tools. Obviously I did not have these tools. From some indirect internet sleuthing, I figured out that I should heat the entire optical unit until very hot to the touch with a hair dryer. Then I could tap the optical unit front on a marble countertop to get the front unit to drop out / loosen until I could pry it out. Later, I tried the same with tapping the optical unit backside on a marble countertop and got the rear unit to drop out too.
11. The first time I opened the lens, I made the mistake of unfastening the aperture control ring by removing the opposing threaded pins. * You don't really need to do this to clean the aperture, if you remove both the front and rear lens elements from the optical unit. * This causes the retaining ring that holds the aperture blades to fall out. Since I had made this mistake, I cleaned the aperture blades with naptha and then 95% isopropanol. The blades are symmetrical and can flip 180 degrees without problem, but I tried to place them back right side front and rear based on markings on the surface. The way to reassemble the aperture is as follows: 1) Place the aperture retaining ring rearside up. The slots for the aperture blade pins on this ring are open to the inner and outer diameter of the ring, so the pins can be slid in from either inner or outer diameter. 2) The aperture blades can be placed in a perfect circle along the circumference of the aperture retaining ring, each overlapping the next going either direction. They can only go in one way, so don't fret over the orientation as I did at first. 3) I put a finger in the middle of the aperture and aperture retaining ring to hold it all together. I then took the optical unit rear side up and put it over my finger to seat the aperture. 4) With the optical unit front side up again, I had to spin the aperture retaining ring around a bit to get the aperture blade pins to all match up and fall into the holes on the optical unit. Does not take as much futzing as you might think. 4) I did have to lift up the aperture retaining ring and "clock" it, and press back down onto the blades again, in order to get the threaded pins into their slots on the aperture retaining ring and the aperture opening and closing fully as originally set. 5) I then put the aperture retaining ring back on and placed the opposing threaded pins back in. Carefully with the screw heads, they strip easily.
12. The innermost front and rear elements, after being tapped free of the heated optical unit, can be accessed fully. I had to clean the rear element inner surface with both hand cream (containing NaOH per the internet) for 10 minutes of contact, followed by 30 minute soak with ammonia mixed 1:1 with hydrogen peroxide, to remove the recalcitrant haze from this element. I do believe that this haze is likely to be what gives the false impression that this lens is "soft" or "flare-y". Per the internet, this haze may be due to the hygroscopic (?) nature of the high refractive index glass that Leitz used in these lenses. However, there was oil on the aperture blades possibly migrated from the grease used to lubricate the outer aperture ring. So this decomposed lube could be responsible for the haze as well, despite the inner surface of the rear lens element being protected within the "sealed" optical unit. It is not really sealed because the aperture control ring covers large slots in the optical unit. My innermost rear element, inner surface, still had some likely coating "etch", but otherwise shiny and all haze gone. So much better than when I started. (Unlucky, I guess. Some get totally clear/clean/shiny from what I have read, although YYe gave a disclaimer of "clean considering the age of the lens" by someone's report which makes me think that one was similar to mine.)
13. Both of the innermost front and rear elements also had early "Schneideritis" type cracking of the opaque black paint arount the circumference of the lens. I blew the loose paint off and repainted it with black matte india ink (Dr. Ph. Martin's, from Michael's).
14. I then reassembled in reverse: 1) press front and rear lens elements back into optical unit. 2) screw front element back on and place set screw carefully (head breaks easily). 3) screw rear element back on. 4) slide optical unit back into lens barrel. 5) place aperture ring on (lube per routine) and threaded pins back into aperture control ring; careful with the bearings. 6) open the aperture complete by turning the optical unit, place aperture ring at f3.5. 7) flip lens over, use surface to hold optical unit in position, screw the rear "outer" retaining ring back on; not too tightly, as this will bind the aperture. 8) replace front trim ring, replace its set screw.

.jpg")