kb244
Well-known
Many years ago I had a brief run with Kodak Ultratec, an orthochromatic film that seems to be safe under both red light and amber (the one we use on campus seems fine with it, but we have to keep the lids on it shorter to keep it dim, because with them opened up more, they will slightly fog ilford multigrade paper).
At the time I treated it as ISO 6 (rated as 10 on the original paperwork), and developed it in diluted dektol. But I can't remember the specifics of what I did.
So earlier today, I put it into the bulk loader as I have nearly 100 foot of it still, and loaded up a small 10ct roll to try in my Canon 7. Since I remembered the film being extremely sharp and fine grain I figured it would be a nice test of rangefinder's focus (which did turn out to be helpful).
I mixed up a tray of Kodak HC-110 dilution B, and under the amber safelight I went ahead and developed my test roll that I had exposed as ISO 6, using my Minolta Autometer IVf for incident readings. Except I forgot that the film might have drastically different speeds when it comes to tungsten lights.
The temperature was 64F. I thought it was on 68F but the campus thermometer on the main tap was slow to show the drop in temperature, I measured the temperature of the tray while the strip was in the stop bath to be sure what it was at when finished. I pulled it out at the 4 minute mark as the negatives seemed good enough (if it wasn't I could least guestimate where I need to go from there), put it in the stop bath, wash, fixer for about 4~ minutes, then fixer remover, then a running wash for about 10 minutes. The school uses the sprint system, but I didn't want to use that developer as I prefer hc-110 in the long run.


Other than finding out I needed to calibrate my rangefinder, I was pleased with the results so far as a nice starting point.
These are initial scan results (meaning as a scan I can bring up the black/white point and adjust the curve before scanning), but I'm curious to see how they actually print, and any tips on printing on the enlarger with a clear ektar base like that would be appreciated (mainly using ilford multigrade RC for the school stuff, but I been printing with a pack of Agfa Brovira that expired in 1957 as well as a box of ilford multigrade warm toned semi-mat fiber based 8x10).
These are the three out-the-window shots. For initial metering I was lazy and just used my Olympus E-M5 mirrorless to find a safe 'middle', which ended up being a 1/500 f/5.6 ISO 200, which I figured 1/125 f/2 for ISO 6 for my starting point.
Frame 1 : 1/125 f/2
Frame 2 : 1/60 f/2
*cloud cover blocked the sun slightly at this point*
Frame 3 : 1/30 f/2
The Canon 50mm f/1.8 (type 6) lens was used for these three.

The indoor shots not quite as nice probably because I need to boost my exposure time a bit for the tungsten/fluorescent, which apparently it is 'seeing', though I'm not sure how much blue light they emit (or if the film is strictly blue sensitive or not).
The 50mm lens was used here as well. The incident meter read 1 second at f/2, so I shot both the hallway ones at the same with different focus (both of which were much closer than actual focusing point). The white board at the end was shot at 1 second at f/2, with the meter reading giving between f/2 and f/2.8.

The half a frame at the end is because apparently I loaded too much of the film in that I didn't quite get my 10 frames. But I decided to snap the shot anyways knowing it would overlap the previous (was hoping it would include the crosshair I drew on the board for the purpose of focus check).
And these shots of inside the lab itself, room's fluorescent lights turned on, and the window curtains fully open to a brighter partly cloudy day outside (around 2~3pm). The first frame was 1 second at f/2.8 with the incident meter giving me halfway between f/2 and f/2.8. The second was the same exposure time, but the incident meter gave between f/2.8 and f/4. The 1951 Canon Serenar 35mm f/2.8 was uses for these two shots.

The window one with the light viewing stand seemed nice so I gave it a higher scan on the lab's Epson V700. (I'll have to try again with my dedicated 35mm scanner Canon FS4000 I have here at home later, left it at the school for later enlargement printing).

I really love how sharp it is on the scan as well as how smooth it is relatively speaking, my only hope is that I can print it close to that.
So the question is, do I want to treat the film slower (ie: ... ISO 3? Looking at the 1/60 outside frame, that seems right for my development time/temp), or should I attempt to go warmer(68)/longer(~5-6 mins?) in the development? Just from the scan I really like how the grain in the daylight lit shots came out on the frames that were dense enough.
At the current sharpness/grain this would be just lovely in my Univex Mercury II half-frame camera once I verify the shutter speeds are correct (They seem to be over by a third of a stop, if consistent that should be fine, since if one speed is good they all are, as it's a torque based rotary shutter on the Mercury II, though I only have T/B, 1/20, 1/30, 1/40, 1/60, 1/100, 1/200, 1/300, 1/1000 to pick from, as opposed to T/B, 1 second to 1/1000 in full stops on my Canon 7).
At the time I treated it as ISO 6 (rated as 10 on the original paperwork), and developed it in diluted dektol. But I can't remember the specifics of what I did.
So earlier today, I put it into the bulk loader as I have nearly 100 foot of it still, and loaded up a small 10ct roll to try in my Canon 7. Since I remembered the film being extremely sharp and fine grain I figured it would be a nice test of rangefinder's focus (which did turn out to be helpful).
I mixed up a tray of Kodak HC-110 dilution B, and under the amber safelight I went ahead and developed my test roll that I had exposed as ISO 6, using my Minolta Autometer IVf for incident readings. Except I forgot that the film might have drastically different speeds when it comes to tungsten lights.
The temperature was 64F. I thought it was on 68F but the campus thermometer on the main tap was slow to show the drop in temperature, I measured the temperature of the tray while the strip was in the stop bath to be sure what it was at when finished. I pulled it out at the 4 minute mark as the negatives seemed good enough (if it wasn't I could least guestimate where I need to go from there), put it in the stop bath, wash, fixer for about 4~ minutes, then fixer remover, then a running wash for about 10 minutes. The school uses the sprint system, but I didn't want to use that developer as I prefer hc-110 in the long run.
Other than finding out I needed to calibrate my rangefinder, I was pleased with the results so far as a nice starting point.
These are initial scan results (meaning as a scan I can bring up the black/white point and adjust the curve before scanning), but I'm curious to see how they actually print, and any tips on printing on the enlarger with a clear ektar base like that would be appreciated (mainly using ilford multigrade RC for the school stuff, but I been printing with a pack of Agfa Brovira that expired in 1957 as well as a box of ilford multigrade warm toned semi-mat fiber based 8x10).
These are the three out-the-window shots. For initial metering I was lazy and just used my Olympus E-M5 mirrorless to find a safe 'middle', which ended up being a 1/500 f/5.6 ISO 200, which I figured 1/125 f/2 for ISO 6 for my starting point.
Frame 1 : 1/125 f/2
Frame 2 : 1/60 f/2
*cloud cover blocked the sun slightly at this point*
Frame 3 : 1/30 f/2
The Canon 50mm f/1.8 (type 6) lens was used for these three.
The indoor shots not quite as nice probably because I need to boost my exposure time a bit for the tungsten/fluorescent, which apparently it is 'seeing', though I'm not sure how much blue light they emit (or if the film is strictly blue sensitive or not).
The 50mm lens was used here as well. The incident meter read 1 second at f/2, so I shot both the hallway ones at the same with different focus (both of which were much closer than actual focusing point). The white board at the end was shot at 1 second at f/2, with the meter reading giving between f/2 and f/2.8.
The half a frame at the end is because apparently I loaded too much of the film in that I didn't quite get my 10 frames. But I decided to snap the shot anyways knowing it would overlap the previous (was hoping it would include the crosshair I drew on the board for the purpose of focus check).
And these shots of inside the lab itself, room's fluorescent lights turned on, and the window curtains fully open to a brighter partly cloudy day outside (around 2~3pm). The first frame was 1 second at f/2.8 with the incident meter giving me halfway between f/2 and f/2.8. The second was the same exposure time, but the incident meter gave between f/2.8 and f/4. The 1951 Canon Serenar 35mm f/2.8 was uses for these two shots.
The window one with the light viewing stand seemed nice so I gave it a higher scan on the lab's Epson V700. (I'll have to try again with my dedicated 35mm scanner Canon FS4000 I have here at home later, left it at the school for later enlargement printing).
I really love how sharp it is on the scan as well as how smooth it is relatively speaking, my only hope is that I can print it close to that.
So the question is, do I want to treat the film slower (ie: ... ISO 3? Looking at the 1/60 outside frame, that seems right for my development time/temp), or should I attempt to go warmer(68)/longer(~5-6 mins?) in the development? Just from the scan I really like how the grain in the daylight lit shots came out on the frames that were dense enough.
At the current sharpness/grain this would be just lovely in my Univex Mercury II half-frame camera once I verify the shutter speeds are correct (They seem to be over by a third of a stop, if consistent that should be fine, since if one speed is good they all are, as it's a torque based rotary shutter on the Mercury II, though I only have T/B, 1/20, 1/30, 1/40, 1/60, 1/100, 1/200, 1/300, 1/1000 to pick from, as opposed to T/B, 1 second to 1/1000 in full stops on my Canon 7).
sepiareverb
genius and moron
Those look like they'll be challenging to wet print, I would start with grade 0 and set mid-tones and highlights, then try adding short grade 4 or 5 exposures to set black.
I've been working with some ORWO duplicating film, also ISO 6, but am thinking I want to treat it more like tech pan in Dektol and go for straight black and white. The contrast is hard to tame, so I figure I will just embrace it.
I would try a roll at ISO 3 and 6, bracket each shot, and perhaps a softer working developer if you are after wet prints. From the look of those quick scans I bet you could generate quite nice ink jet prints with some more careful scanning.
Seems like just the film for a half frame!
Jake Mongey
Well-known
Intresting film. Incidentally I almost purchased an 100ft roll for bulk loading in my canon 7 about 6 months ago but managed to snag some tmax 400 bulk for £30 instead. Would like to see some more results as you try different sorts of developing
kb244
Well-known
Those look like they'll be challenging to wet print, I would start with grade 0 and set mid-tones and highlights, then try adding short grade 4 or 5 exposures to set black.
I've been working with some ORWO duplicating film, also ISO 6, but am thinking I want to treat it more like tech pan in Dektol and go for straight black and white. The contrast is hard to tame, so I figure I will just embrace it.
I would try a roll at ISO 3 and 6, bracket each shot, and perhaps a softer working developer if you are after wet prints. From the look of those quick scans I bet you could generate quite nice ink jet prints with some more careful scanning.
Seems like just the film for a half frame!
Sounds like a plan for the multigrade approach. I should try to do a strip test with 0 or 00, then a strip test with maybe 4, and see which exposure combinations I want to add on.
Far as my ancient paper, if I were to do it it would probably just be straight thru with high contrast.
I used to do a few 4x5 sheets of Kodalith (which I usually rated as ISO 12 for development) in dektol with results like this (Scanned) :

One of my old postings from 2007 when I used small strips of the Ultratec for a little body cap pinhole camera resulted in these :

With the description noting I developed in HC-110 1:120 (but no note of times / temps, though temp would have almost always been 68F when I was developing back then).
sepiareverb
genius and moron
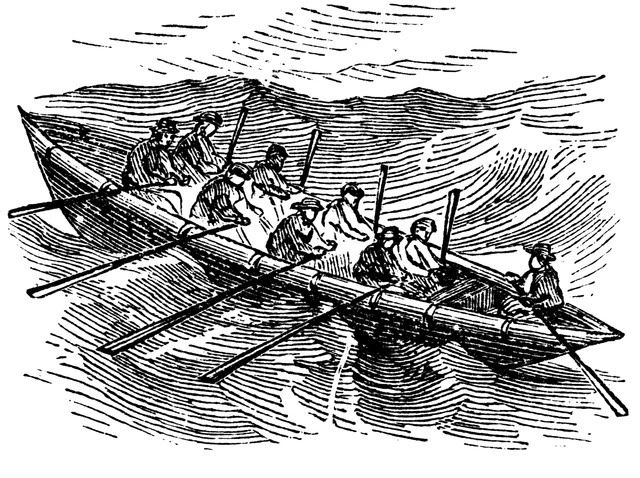
I played with Kodalith a lot when I was in school. There is a picture I have in my head of a guy rowing, shot from above, that was made on one of these high contrast films, maybe four levels of grey in the whole thing. Sixties or seventies if I recall correctly. Cannot yet remember who shot it, so I've not looked it up again. That's what I think I'm heading for with the ORWO. And some line work.
Fun stuff!
Fun stuff!

kb244
Well-known
 The Alien Bees we have (the 400 model which are only 160w/s) here at campus at full power, at less than 3 feet distance barely had enough light to fill f/1.4~2 at ISO 3.
 Plus, my skin doesn't reflect the blue light quite that well.

Having scanned a few frames on the home scanner (Cancan FS4000US), I can confirm that the little white specks evenly across the frame are indeed from the emulsion it seems like (either that or the scanner is desperately trying to resolve detail from the near-clear base).
But it's not like it had much to work with (Far left)

The development time this time around was 5 minutes, 68F , the same HC-110 dilution B, constant agitation the first 30 seconds, then 10 seconds once every minute.
Though I'm wondering what I could get if I do HC-110 1:100 semi-stand (constant first 30 seconds, and let it stand for about 30 minutes exhausting at the highlights first).
[The stuff on the right is old expired rolls of TMax P3200]
charjohncarter
Veteran
I ended up with some BlueFire Police film which I shoot at 10. I've been developing it in HC-110 1:125, 18minutes, 15 seconds initial agitation, then ONE inversion each five minutes, 68 degrees. Years ago I tried H&W film with H&W developer and it worked pretty well but wet printing was a problem. Since PS editing you can do much better.
This is from my latest and second to the last roll:
 BlueFire Police HC-110 by John Carter, on Flickr
This is from my latest and second to the last roll:
BlueFire Police HC-110 by John Carter, on FlickrVTHokiEE
Well-known
I ended up with some BlueFire Police film which I shoot at 10. I've been developing it in HC-110 1:125, 18minutes, 15 seconds initial agitation, then ONE inversion each five minutes, 68 degrees. Years ago I tried H&W film with H&W developer and it worked pretty well but wet printing was a problem. Since PS editing you can do much better.
This is from my latest and second to the last roll:
That looks really nice!
kb244
Well-known
I ended up with some BlueFire Police film which I shoot at 10. I've been developing it in HC-110 1:125, 18minutes, 15 seconds initial agitation, then ONE inversion each five minutes, 68 degrees. Years ago I tried H&W film with H&W developer and it worked pretty well but wet printing was a problem. Since PS editing you can do much better.
This is from my latest and second to the last roll:
Shame they don't seem to make that BlueFire stuff in 100ft rolls.
kb244
Well-known
I did get around to printing off one of the frames above.
Ilford Multigrade IV Resin Coated glossy 8x10, after doing a test strip of 2 second intervals for both 0 and 5, I went with
14 seconds with Grade Zero to expose in the highlights and midtones
8 seconds with Grade Five to punch in the shadows
then developed in the sprint print developer the school uses.

Got the 0/5 contrast suggestion from sepiareverb above.
Ilford Multigrade IV Resin Coated glossy 8x10, after doing a test strip of 2 second intervals for both 0 and 5, I went with
14 seconds with Grade Zero to expose in the highlights and midtones
8 seconds with Grade Five to punch in the shadows
then developed in the sprint print developer the school uses.
Got the 0/5 contrast suggestion from sepiareverb above.
Fixcinater
Never enough smoky peat
Looks good, tamed the contrast nicely.
charjohncarter
Veteran
That looks really nice!
Thank you very much, but all of the roll isn't as easy. BlueFire Police is great with low contrast scenes, and I don't know why this one came out so well.
This is more the normal from a couple of years ago:
 Bluefire Police HC-110 by John Carter, on Flickr
kb244
Well-known
Looks good, tamed the contrast nicely.
Thanks, took about three tries other than the test strip.
At first I tried 12 seconds for both. But the midtones weren't quite there, so then 14 seconds zero and 10 seconds five. Shadows were still overpowering the slight crossover, so that's when I did 14/8.
Thank you very much, but all of the roll isn't as easy. BlueFire Police is great with low contrast scenes, and I don't know why this one came out so well.
This is more the normal from a couple of years ago:
Nice
sepiareverb
genius and moron
Not a bad print. One advantage of the two filter method is the ability to dodge and burn the shadows or highlights individually, more like in Photoshop.
I tend to use longer exposures with the low contrast light - say 9 to 15 seconds - and that can even be at grade 2, combined with very short exposures at grade 5 (1 to 3 seconds) to set deep black tones. But as always with printing, best practice is whatever works!
I tend to use longer exposures with the low contrast light - say 9 to 15 seconds - and that can even be at grade 2, combined with very short exposures at grade 5 (1 to 3 seconds) to set deep black tones. But as always with printing, best practice is whatever works!
Share:
-
This site uses cookies to help personalise content, tailor your experience and to keep you logged in if you register.
By continuing to use this site, you are consenting to our use of cookies.