lrochfort
Well-known
Hello ladies and gents,
I'm going to take some head and shoulder portraits of my wife for her acting portfolio. As such they need to be fairly neutral in composition and lighting.
I'm going to be using my Hasselblad 500cm and Portra, however I only have the normal 80mm lens and no lighting equipment whatsoever. I also have no money!
I'm going to experiment with tin foil on cardboard and stretched muslin, maybe a combination of the two together to see what results I get.
Any advice for DIY Heath Robinson diffusing/reflecting/lighting equipment would be very much appreciated. As would composition advice to enhance head and shoulder portraits.
Thanks all!
Vince Lupo
Whatever
How about a large north-facing window as your main light source (from either the right side of her face or the left), and then on the opposite side use a large piece of white foam core to fill in the shadows.
If you don't have a north-facing window and the light is coming directly in (or you want a bit of a stronger, more contrasty light), you can also try a satin shower curtain taped to the window. That is a great light diffuser, and only costs about $4.00 from Target. I'd still also use a piece of white foam core or equivalent to fill in the shadows. You can move the foam core closer to her or further away, depending upon how much fill you want.
If you don't have a north-facing window and the light is coming directly in (or you want a bit of a stronger, more contrasty light), you can also try a satin shower curtain taped to the window. That is a great light diffuser, and only costs about $4.00 from Target. I'd still also use a piece of white foam core or equivalent to fill in the shadows. You can move the foam core closer to her or further away, depending upon how much fill you want.
msbarnes
Well-known

Chriscrawfordphoto
Real Men Shoot Film.
Shoot outdoors on an overcast day, or on a sunny day place her in the shade of a large building. You can hang a background on the side of a building for shooting outdoors like this. The light is soft and beautiful, and brighter than you'd get shooting by window light.


Murchu
Well-known
Window, with something reflector-like as suggested to fill in the shadows. Otherwise, perhaps somewhere outdoors in open shade, giving you nice flat lighting providing the light levels let you use a reasonable shutter speed with your film speed and aperture. If you have any money and want to do it indoors, consider two striplights with daylight balanced bulbs, should give you nice flat lighting.
shiro_kuro
Charles Bowen
Check out Dean Collins .....
Something like this
there is a downloadable PDF at the bottom of the page .
http://www.software-cinema.com/page/13/tinkertubes
Something like this
there is a downloadable PDF at the bottom of the page .
http://www.software-cinema.com/page/13/tinkertubes
Ansel
Well-known
The main thing to remember about lighting (natural or artificial) is that a big light produces soft shadows and a small light produces hard shadows.
So a free big light can be an overcast day (clouds effectively turn the small sun into a big softbox), or placing your subject close to a window (the closer you are the bigger the window in relation), etc.
And then just position your subject at 45 degress to the light and you are set.
If you are broad lighting a face there is no need to fill shadows, otherwise a simple reflector made of polystyrene will be fine.
stompyq
Well-known
All you need is a window and a bed sheet.
lrochfort
Well-known
Thanks for all the advice everyone.
I live in the UK and it's September so I'd imagine I'll have a large free lightbox soon!
I like the idea of the foam core, Vince, I'll give that a try and report back on how the muslin over tin foil works out too.
Any advice on composition and model positioning? I'm thinking fairly central horizontally with the eyeline about 2/3rds up from the bottom, maybe with shoulders angled looking at camera.
BlackXList
Well-known
Pound stores in the UK stock a lot of camping gear in the summer, as part of this they usually have 2 packs of foil survival blankets in either silver or gold (silver is far more common).
Not as controllable or versatile as a proper reflector, they're BIG and work great as a quick and dirty solution, there's 2 in a pack, and with them being roughly human sized, you can fold or cut them as needed (and if you can manage to refold the damn things they don't take up much space at all).
Not as controllable or versatile as a proper reflector, they're BIG and work great as a quick and dirty solution, there's 2 in a pack, and with them being roughly human sized, you can fold or cut them as needed (and if you can manage to refold the damn things they don't take up much space at all).
johannielscom
Snorting silver salts

An overcast day and some more foliage can do a lot to get good results!
Shot with a Horseman 970 Press, on Tmax400. 6x9 negative.
Photo_Smith
Well-known
Just use a window from one side, you could get a lastolite reflector to fill shadows, if you're cheap a large sheet of polystyrene packaging works well and will give smoother lighting than metal foil.
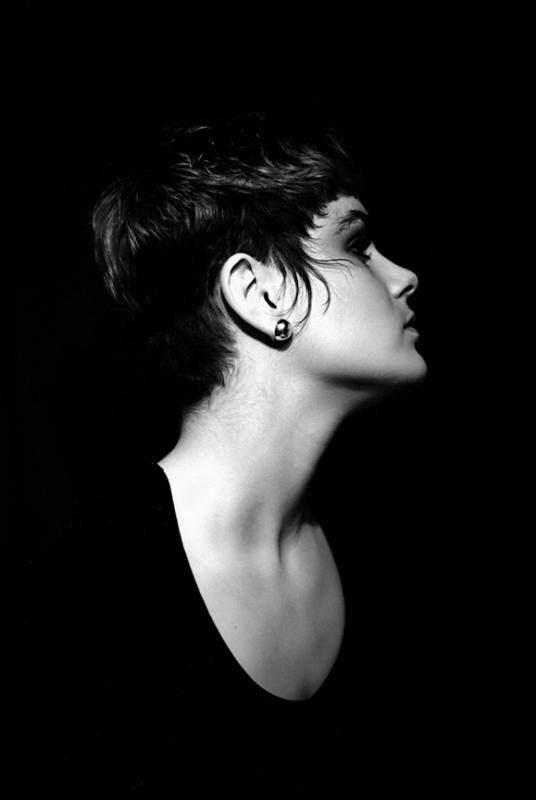
This is just a single window light.
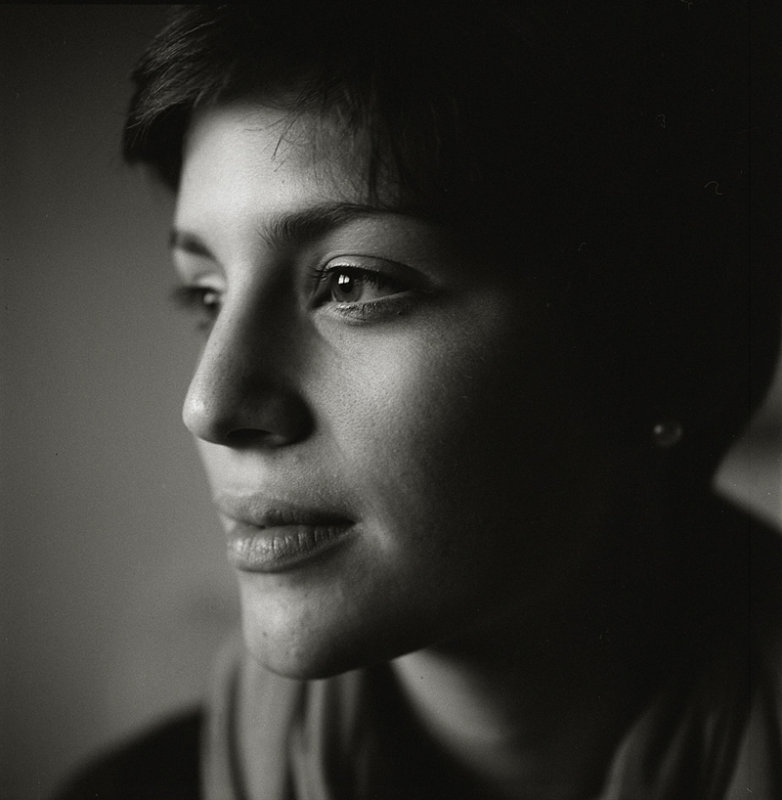
Sometimes you don't want a reflector and a black sheet helps in those low key situations, works as a cheap background too...
This is just a single window light.
Sometimes you don't want a reflector and a black sheet helps in those low key situations, works as a cheap background too...
Roger Hicks
Veteran
Another reflector option (if you can get it home in your car): an 8x4 foot sheet of fairly thick (4 inch/100mm is ideal) expanded polystyrene wall insulation. Even cheaper than foam core; lighter; easier to handle; less likely to break; and easy to get in big sheets. The only trouble is that it tends to shed a bit from the cut edges at first. Give them a rub, out of doors in in a garage/barn, with an old towel, before you use it.
I first encountered this in an advertising studio in the 1970s. You can even, with the right paint, paint one side black for a "black bounce" to reduce unwanted reflections.
Cheers,
R.
I first encountered this in an advertising studio in the 1970s. You can even, with the right paint, paint one side black for a "black bounce" to reduce unwanted reflections.
Cheers,
R.
lrochfort
Well-known
Just use a window from one side, you could get a lastolite reflector to fill shadows, if you're cheap a large sheet of polystyrene packaging works well and will give smoother lighting than metal foil.
This is just a single window light.
Sometimes you don't want a reflector and a black sheet helps in those low key situations, works as a cheap background too...
Photo_Smith, I really like the dark background idea. My wife has dark hair and eyes and very fair skin so I think that would work well for her.
lrochfort
Well-known
Another reflector option (if you can get it home in your car): an 8x4 foot sheet of fairly thick (4 inch/100mm is ideal) expanded polystyrene wall insulation. Even cheaper than foam core; lighter; easier to handle; less likely to break; and easy to get in big sheets. The only trouble is that it tends to shed a bit from the cut edges at first. Give them a rub, out of doors in in a garage/barn, with an old towel, before you use it.
I first encountered this in an advertising studio in the 1970s. You can even, with the right paint, paint one side black for a "black bounce" to reduce unwanted reflections.
Cheers,
R.
Roger, could you please explain why and how to use a black bounce? Or link to your site if the information is there
")
I'm glad your site isn't giving 404s anymore that stopped an evening's reading and I didn't quite know what to do with myself!
Roger Hicks
Veteran
A "black bounce" is simply to make sure you don't get too much light reflected back from a nearby white wall or whatever: it's a way of absorbing light instead of reflecting it.Roger, could you please explain why and how to use a black bounce? Or link to your site if the information is there
I'm glad your site isn't giving 404s anymore that stopped an evening's reading and I didn't quite know what to do with myself!
In other words, if your subject is lit from the left, and you want the right hand side as dark as possible, you use a black bounce to the right of your subject so that no (or very little) light is reflected back. Rarely useful in portraits unless you want to be (sometimes overly) dramatic.
Cheers,
R.
Keith
The best camera is one that still works!
A sheet of white polestyrene will reflect light incredibly effectively to balance the light on a subject's face when seated next to a window. Someone recommended this to me ages ago and when I tried it to take some pics of a friend for her business cards I was impressed by just how well it worked.
daveleo
what?
If you do decide to shoot some color portraits (Portra) outdoors, watch your color balance if you are under trees. The light passing through and reflecting from the leaves will reflect slightly green-ish off the skin. Very unflattering.
lrochfort
Well-known
If you do decide to shoot some color portraits (Portra) outdoors, watch your color balance if you are under trees. The light passing through and reflecting from the leaves will reflect slightly green-ish off the skin. Very unflattering.
I've been stung by that before, so I'll be careful, thanks
Keith
The best camera is one that still works!
I was having a think about this and was reminded how good Jane Bown's portraits are ... she usually sat her subjects near a window and used an OM with a 50mm lens. Absolute simplicity that produced some of the best natural light portraits you'll ever see.
Share:
-
This site uses cookies to help personalise content, tailor your experience and to keep you logged in if you register.
By continuing to use this site, you are consenting to our use of cookies.