After looking through the pics here I feel really bad. Crying. Could you give me some advice how to make clear and high contrast like your pics? Or is it cause of developer or scanner?
My pics take with Provia 400.
The imaging chain is strong as weakest link. All has to be done correctly with decent equipment.
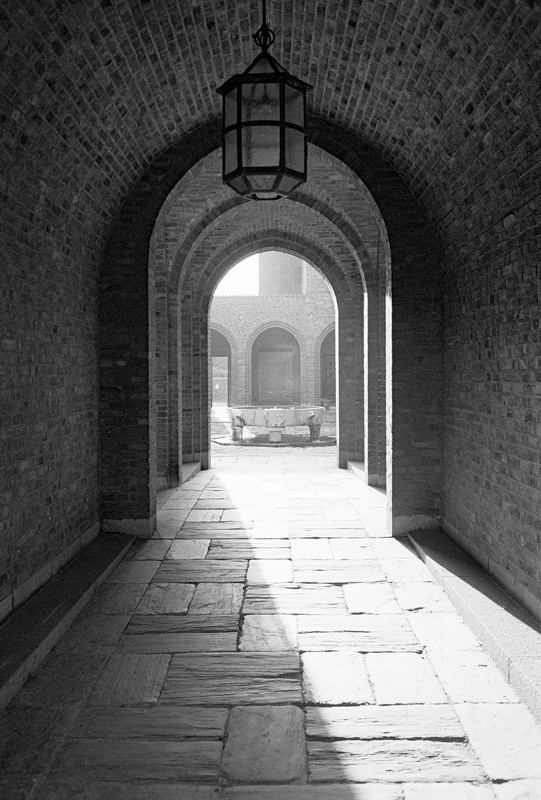
The correct contrast is controlled by time in developer and type of developer matters little. Too little time and the scan is grey and flat. Too much time in developer and darker tones merge to black and lighter tones merge to white.
Scan to get full tones inside the histogram. Shades that go off the right will all go white even if they are to be light grey. Shades that go off the left will all be black even if they are supposed to be dark grey with detail showing. If you can not get it all in, the development time is too long.
Generally a manual scan is more easily controlled.
If the image fits the histogram, but there is space at either end, use levels to bring it to the ends by moving the input sliders toward the center.
Generally you need to use curves to increase midtone contrast.
Do a small amount of sharpening at capture/scanning.
Do any photoshop work like levels and curves, burn & dodge now, and save as TIFF or PSD.
Reduce to final size required, say 600 to 900 pixels at 100 ppifor web. Use USM sharpen at .5 , point five, pixel radius, and an amount large enough to make it sharp, but small enough to not show halos around objects.
Save as JPEG
This final sharpening is dependent on final use. I gave you suggestions for web. Glossy prints, matt prints, printed material are all different.
These are all basic guidelines and each is subject in itself. Look to web tutorials or books for details.
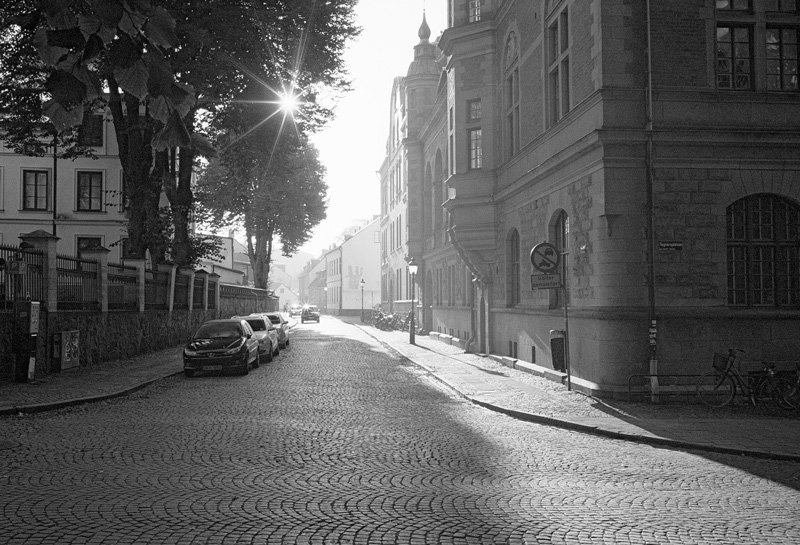
I would just take 6 photos, develop 13" of film, then practice scan. Find a subject you can return to anytime with both dark and light tones. This is how you will establish your development time.
Exposure puts detail in the darks. Extending development time will not increase this shadow detail, but will add significant density to highlights.
Practice on unimportant subjects so you can establish procedure.
With color film, you need to get the color balance right in the scan and there is little control after that. Film is made daylight and if you expose under fluorescent or tungsten, you must filter it to get it right.
Fluorescent light requires magenta filters and tungsten will require blue, say 80 B. If you expose it under wrong color temperature without correct filtration, you will have problems getting color correct.
Digital is much easier in that you just set the camera to lighting condition, daylight, tungsten, cloudy, fluorescent, etc.
In any case, scan for correct color and density ( use histogram) and leave all else for photoshop.
If you have excess green, add magenta, excess yellow, add blue, red-cyan the same. Adjust these three axis individually.