a little help on post-scanning photoediting

Kat

Well-known
Local time
7:50 AM
Joined
Jun 26, 2005
Messages
445
I just got myself an Epson Perfection 4490. I tried scanning a couple of negs today, and I found that the result (staight from the scanner) needs a lot of work. Compared to the scans I got from our local Fuji minilab, the Epson's scans were quite soft, dark and had color casts (usu bluish), whatever mode I used (auto, home, professional). The scanner comes with a Photoshop Elements 2, but this is my first time to use Photoshop, and before now I have barely done any photo editing other than to resize/crop/rotate.

I've been experimenting with photoshop, but the results so far have not been as nice as I would have wanted (even compared to the minilab scans). What really bothers me is the lack of sharpness that I can't seem to correct without either pixelizing or adding a lot of grain. Would anyone perhaps have some tips on the basics for sharpening pics without sacrificing too much quality?
 
Last edited:
Usually just a small bit of unsharp mask will help with the sharpness. Try either a small amount with a bigger radius, or a bigger amount with a smaller radius. Use threshold to control the grain that comes out of the sharpening.

Of course, if the scans are really dark and you bump up the levels a lot, grain really explodes and sharpening makes it even worse.

I would first try on improving the scan itself. Try getting as much detail out of the scan as possible so that you're not getting too agreessive with sharpening. This is one of the reasons why I recommend Vuescan, but I won't go there as it's been discussed quite a bit lately.

allan
 
Not that I'm an expert in photoshop but if you want to you can send me the raw scan and I can take a look at it, apply sharpening in the way I normally do it, send it back to you with notes on what I did.

Email address is rsilfverberg @ gmail dot com
 
Kat

The files that a scanner makes aren't usually perfect. That is quite normal. Software and hardware issues are behind this. The reason why the commercial scans made by Fuji look good is that the files you get have already been put through a sort of editing software which makes them look sharp, bright, and snappy.

BTW, the scanning software from Epson has much to be desired. SMS me for details. :D

There are various tricks to do which will make the initial files to come out as good as possible, but post scan editing is still needed. Colours will ever hardly look right. There will always be a cast because of many reasons: dye differences, colour processing variations, etc. The scanner software reverses the negative to a positive following a certain "profile" which is built into it. Often the programmed profile does not conform to the actual state of the film in use. BW is even trickier to do.

Making your scans look good is like printing in the darkroom. Hardly does a 'straight print' take off. You need to do some tricks to get the picture right in the end. Ditto with scanning.

Photoshop is not quickly learned...you need some time and plenty of practice to go about it.

Bisita ka minsan, i-demo ko ang scanning. Epson din gamit ko. :D

Jay
 
Last edited:
Make sure the back light in the top is on

Crop to the single frame you want and scan at 1200 DPI.

In the Epson software where you set up the size, scroll down and you will find the levels, curves, and color balance controls.

Apply these to the prescan. If you have excess blue, open the color box and single out just the blue channel. Reduce the blue.

You will have to pull the right hand slider down to find these setting. They can be saved for future work. Now the scans will come right from the scanner correct or very close.

It is necessary on my 4780 to use the crop marque to outline the scan area required. Without it, they are very dark. Applying the crop, lightens the prescan in the area to be scanned right on the screen.

There is little wrong with the Epson software. Take the time to learn it.

Now call it up in PS E 2 and do the final corrections.
 
I also use an Epson perfection (3200) and sometimes the scans come out quite soft and with little to no contrast.

Here is a recent example of what the scan looked like out of the scanner - and what five minutes in photoshop did to fix it up a bit:

61918706.jpg

Straight out of the scanner​


62058828.jpg

Fixed up a bit in photoshop​
 
I use an Epson 4490, I leave the automatic 'unsharp mask' box on in the options menu (I find I can't do it better myself and the amount of USM applied is just right), but other than that I don't use any of the automations: no auto levels, contrast, no grain reduction, no ICE, ... And I scan as positive. I then reverse the image in postproduction, and what I get then looks similar to Rich's first shot, and from there it's just curves/levels/...

If your scans are inherently unsharp I could think of a couple of possibilities
- something is wrong with your camera / negatives / focussing (unlikely)
- something is broken in your scanner (unlikely)
- your negatives are very curly and the scanner doesn't focus accurately on them (are the results sharper at the top and bottom, and softer in the middle?)
- it just looks as if they aren't sharp, and some unsharp masking (or other, better sharpening methods) will fix it
 
Ronald M said:
There is little wrong with the Epson software. Take the time to learn it.

Now call it up in PS E 2 and do the final corrections.

I found that the Epson SW tends to have some quirks. I have the one which came with the 4180 Photo Perfection. One, its hard to override certain tasks that it does. For instance, it often reads running scratches as the the edges of the frame. More than several times have I gotten "panorama" crops (e.g, getting a 15x36 mm scan instead of the full 24x36) from otherwise full frame negatives.

I particularly like Vuescan. It allows more flexibility and speed. Exposure, colour and contrast adjusments are more variable. It also allows "preview scan saves": pre-scan the whole strip at the desired resolution, and then save the selected frames, one by one, without having to run the scanner again. The Epson SW also tends to decide on how to crop the frame. Sometimes this means, for example with 6x6 cm negatives, getting more of the film's edge and having the opposite side of the picture area cut off. Vuescan allows one to "draw" the actual frame one wants to include in the scanned file. This is quite important for odd-sized formats which the original SW sometimes fail to recognise.

:)
Jay
 
ZorkiKat said:
Vuescan allows one to "draw" the actual frame one wants to include in the scanned file. This is quite important for odd-sized formats which the original SW sometimes fail to recognise.

:)
Jay


I did not know it until recently, but my Epson software (4490) can actually do the same, so maybe yours can to? I believe it's the little arrow next to the preview button, there you can select to draw the scanning frames manually. :)
 
Following Rich's post, this time in colour.

It's likely that this is the "blue" scan which Kat first got- blue, pale, low contrast and unsharp, with a scratch or two:

157627611.jpg


This is an example of a colour negative whose "profile" isn't recognised by the scanner. Film is Mitsubishi ISO 200 colour film. After levels, contrast, and hue adjustments, plus a bit of sharpening, and some "healing" (with the healing tool) to remove the dust spots, this is how the finished scan looks:

157627587.jpg


Jay
 
jvx said:
I did not know it until recently, but my Epson software (4490) can actually do the same, so maybe yours can to? I believe it's the little arrow next to the preview button, there you can select to draw the scanning frames manually. :)

Thanks jvx for pointing that out. I'm already "at home" with another scanner software. :)

Jay
 
Thanks, folks, Jay's sample pic is a lot like what I'm getting out of my scanner, though the color cast isn't that bad. The blues and sometimes reds are just a little off, coupled with unsharp pics makes the scans rather dull and unremarkable to look at (not that they are spectacular, but at least I can blame my photography skills--or lack thereof-- not the equipment, for the lameness of my photographs :p ). I'll put up some samples when I get home from work. Have to read up on that vuescan, this is the first time I've heard of it.
 
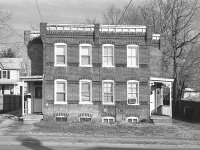
Here is a sample Epson 35mm scan where I cropped off a frame and scanned it at 1200 dpi.

It looks way oversharp, but when I open it PS it looks fine. I may try another post with no sharpening.
 

Attachments

  • epson contact005.jpg
    epson contact005.jpg
    821.1 KB · Views: 0
Yes, the Epson software is able to produce decent results. But for the best results you need post-processing. (see attachments)
I have the Epson software and Silverfast AI.
For B&W and slides I prefer Epson, for colour negs Silverfast.
The main culpid for colour cast after scanning is not setting the scanning frame correctly. If the frame includes neg. borders, they are taken in consideration by the correction algorithm.
In the Epson software uncheck all extra options (grain, noise,...) do this in the PP!
As for PS Elements I would recommend the 123di Ebook.

Wim
 

Attachments

  • epson.jpg
    epson.jpg
    96.4 KB · Views: 0
  • final.jpg
    final.jpg
    87.3 KB · Views: 0
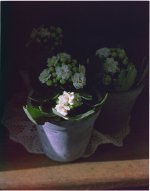
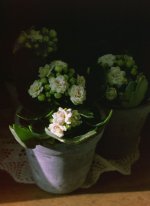
Below are samples of what I got from my scanner.

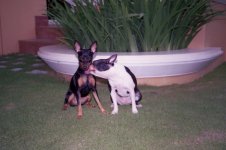
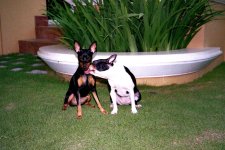
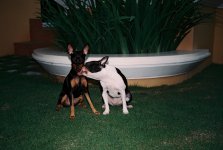
I can't remember the scanner settings when I did the dogs' pic, but I didn't fiddle with color, etc. and the other was done at professional mode, 1200 dpi, 24 bit color at best scanning quality. Both were accidentally inverted when scanned, so I flipped them photoshop, but that's all...
 

Attachments

  • img024.jpg
    img024.jpg
    507.3 KB · Views: 0
  • flipped.jpg
    flipped.jpg
    378.9 KB · Views: 0
Last edited:
The dogs' pic really has me stumped, I'm attaching below the best I could make from photoshop experimentation(resized), which isn't as sharp as the Fuji minilab scan I'm attaching below as well.
 

Attachments

  • resized2.jpg
    resized2.jpg
    326.5 KB · Views: 0
  • 000012.JPG
    000012.JPG
    602.5 KB · Views: 0
BTW, Rich, what tools did you use on that pic?

Jay, I'll take you up on that one of these weekends soon:)
 
Back
Top Bottom