Adventures in DIY Case Making

the.ronin

Established
Local time
2:15 PM
Joined
Feb 19, 2013
Messages
112
I've been looking high and low for a case, even a half case, for my Fuji GSW 690II and now for a Olympus 35RC in the mail. But everywhere I look these cases are made out of Hong Kong or Germany or Korea and, just in my own humble opinion, a bit pricey! In these searches I would come across a few DIY project posts and I have to think that it is not that complicated. Time consuming, perhaps, but I'm ok with that.

So this will be my DIY adventures thread and it may last all of this post or become something of a reference point for others. We shall see lol.

First thing is supplies. I am still scavenging the interwebs for anything that might be relevant along with some comments or open questions I have:

* leather - what thickness would be appropraite and is there a particular type thats better suited for this?

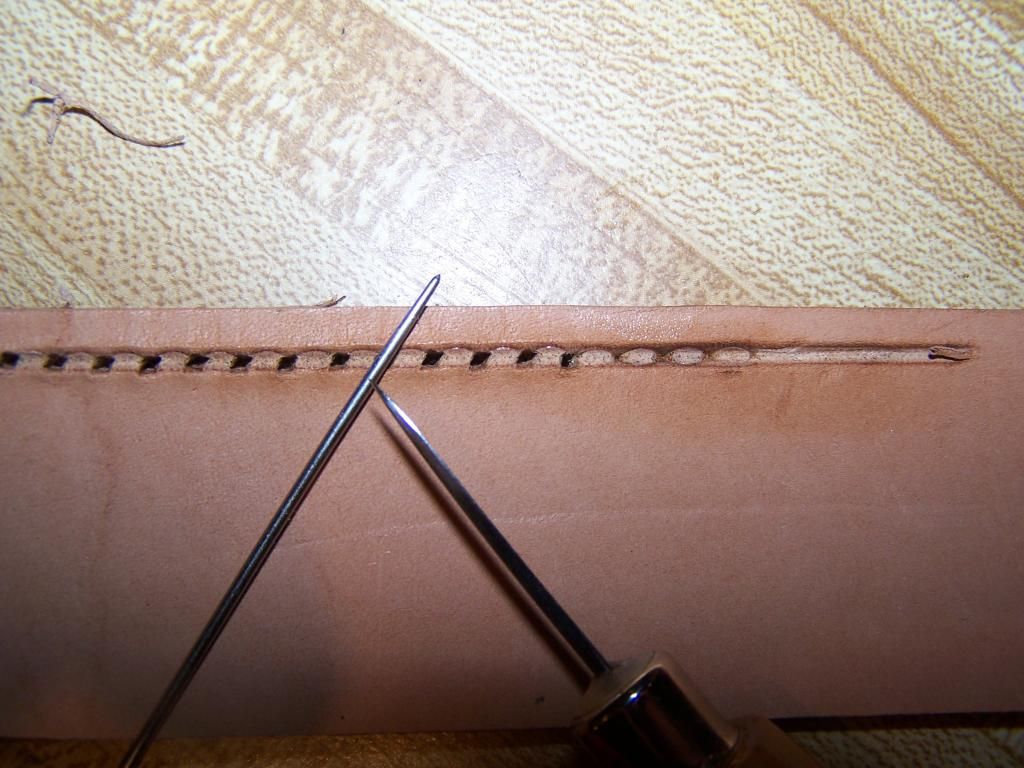
* groove tool - saw a DIY using a tool to make grooves for the stitching holes which made things look a lot more cleaner vs. DIYs that did not use this.

* stitching tool - looks like a industrial "KFC spork" lol.

* beveling tool - like the groove tool, this appeared to give a really clean finish to the exposed edges of the leather.

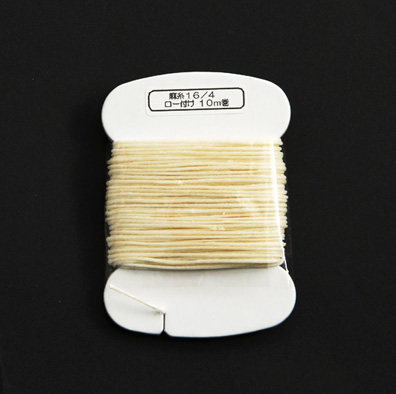
Ok so that's all the tools I've come across so far. I know I'm missing more like appropriate needles, the thread, etc. which I plan to research more.

As far as how, I plan to start by tracing the panels onto paper manila folders. These don't have to be pretty, just to ultimately have enough panels patchworked together so I have something to trace onto the leather. Using the paper panels will also allow me room to experiment.

Beyond that I have no idea lol. I am continuing to do research but wanted to share in case other hearty souls out there want to join me or have already done this and have advice to share.

Onward ...
 
Not much to add, but having thought of this as well -I found a bunch of stuff on Amazon some time ago. From tools to reference books ... I almost bought some of the semi-prefab kits that they sell just to get a feel for it. Never did, yet!
 
Thank you burancap ... I suspected I wasn't alone in at least wondering if this was something worth doing. Those kits look very tempting. I am meaning to head over to Michaels (big arts and crafts store chain) and seeing what basic but good tools I can find.

The one area that is starting to worry me is the base of the halfcase and how that stitching gets done. I intend to do all stitching by hand to keep costs down.
 
Do you have any prior experience with sewing/clothing design? Tooling/stitching leather isn't difficult, but designing and fabricating a tightly-fitted 3D structure (half-case) out of 2D material is significantly more challenging. I speak from experience here, having made a couple phone/PDA cases when I was younger.

Not trying to discourage you at all! Just pointing out that unless the satisfaction of doing it yourself is a goal, it's likely to be cheaper (in terms of effort and frustration as well as monetary cost) to just buy a case from Artisan & Artist/Mr. Zhou/whoever. Those cases are actually very reasonably priced considering the cost of the materials and tools used to make them, as well as the skilled labor required.
 
Look for online tutorials for leather sheath making (for knives). Similar enterprise, and more common. I actually have started doing some leatherwork, with cobbled together tools. It's fun and challenging.

With that said, for one case, you are not going to see much cost savings. The tools can get expensive, (as can rivets, snaps, setters, and other fittings, etc.) and a 24" sheet of appropriate leather is going to run a little coin as well. If you plan to make many cases, obviously, that initial cost gets absorbed.
 
I had sort of arrived at the same conclusion, okto. Still an interest, but I am waiting for that VERY rainy day.
 
okto, no leather nor sewing experience whatsoever LOL. :D

I did try reaching out to a number of case makers including those you mentioned. Either they do not do it for my cameras or they want me to send them in ... to Asia lol. I am a tinkerer by nature but price is a concern. So if it turns out materials-wise, the price doesn't make sense, I'll likely drop this project. But I don't mind putting a decent amount of sweat equity (blood equity too seeing that needles are involved! lol) into this at all.

Back on mission, I did come across some UK crafts forum called ... wait for it ... "Bushcraft" lol that had some very insightful discussions on proper leather sewing. I'm hoping I can get some brains from them on this project.

Having gone through a few DIYs already, I really can't think this is that difficult except for sewing that bottom piece which was the crux of my question to the Bushcraft (lol I can't even type that without smirking a little) people.
 
Years ago I used to shoot muzzle loaders and wanted to make myself a custom hunting bag from leather. So I took a short course in leather work. It was run by a local organization that provides such hobby classes as photography, painting, language, cooking, wine appreciate etc etc courses for a small fee. It was great as I had tutor on hand for any tricky bits and to ask questions but mostly did the work out of class. If you have something like this in your city you may find it beneficial. In fact I am sure you will.

I recall in addition to what you have mentioned was a little tool that looked like a small cowboy spurs on a handle. This was rolled along a line and left a line of pin pricks to evenly mark the points where stitches are inserted. Of course you could do it with a ruler and a pen to mark each stitch location but the other is much quicker and more accurate. Sturdy needles are needed of course and suitable thread. I think the bevelling tool you mention is called a "skiving knife" from memory. You will probably want to line the interior with baize material from a hobby shop. I imagine that will best be applied after you have cut the leather and before you stitch it. Tricky think is to allow for it in your calculations so the case is neither too tight or too loose. Have fun.
 
I might be able to offer a little insight on the topic. I don't make cases, nor have I attempted, but I run a little leather camera strap business, and have picked up a few things along the way.

First off, this book is an excellent source of information, and it's probably at your local library.

http://www.amazon.com/Art-Hand-Sewing-Leather/dp/1892214911

As far as tools go, the basics for stitching begin with something to provide a groove for the stitches you're going to make. You can use a stitch groover to cut a small recess for the stitches to sit in (if they sit below the surface of the leather, they are far less prone to wear and breakage), or use an adjustable creaser to basically emboss a groove into the leather (which I do on my particular work). The adjustable creaser looks like this:

8072-00-L-a.JPG


and a stitch groover is something along these lines.

$(KGrHqJ,!ooE+1sfw5JiBP-4)h7bLw~~60_35.JPG


Next, after you've laid out the grooves for your stitches, you need to space/mark them. The tool for this is called an overstitch wheel. It also comes in handy to finish your work/pack stitches down, after you're done stitching.

stitch.jpg


After you've laid out the stitches, now it's time to actually poke holes. You generally poke holes one-by-one, as you place each stitch. I find if you try to poke all of the holes at once, you inevitably end up with misaligned pieces. In my camera strap work, however, where I'm sewing a piece of leather to cotton web, I find it more effective to poke all of the holes in the leather, then sew it to the webbing. The bit of the awl usually has a diamond or trapezoidal shape, and the holes are poked so the edges are pointing off-center, so the pressure from each stitch is brought to the outside of the hole, like so.

008-4.jpg


For the actual stitching, you will use a single piece of thread with a blunt needle at each end. The thread is generally beeswax-coated linen; the wax helps it pull through the work without breaking while locking each stitch in place. Al Stohlman's book says you must wax your own thread, and that store-bought thread is far inferior. I messed with this once, but found it to be a little too tedious and time consuming, and just buy it instead. The homespun stuff might be a little more pleasant to sew with, and I'm sure it has many devoted fans. The manufactured thread looks something like this.

53036.jpg


As far as the leather you need, I think you'll be seeking stuff in the 5-6oz range. See if you can find a local source of leather scrap from a luggage manufacturer, etc. This is a great way to get your hands on smaller pieces for a reasonable amount of money; otherwise you're locked into buying hides for ~$150. The leather I use in my business is all seconds from a high-end luggage manufacturer. The actual leather pieces I need to make are small enough that I can lay them out around imperfections, other cuts, etc.

Oh, as far as edge finishing goes, I have a process for my own work that is fairly easy and effective. For it, I modified a felt buff wheel for a Dremel tool by carving a groove into it (easy enough to do if the tool is running and a knife is handy). I then apply gum tragacanth (though water has a very similar effect) to the edges, and run the felt buff wheel over it at a low speed. I repeat several times until the edge is smooth enough for my liking.

Overall, I find it to be a very rewarding and satisfying craft. It takes a bit of patience, but it's a nice feeling using something every day that you made (and taking pride in it). Feel free to shoot me a PM if you need any further info; I'm by no means anywhere near an expert or master, but might be able to offer a pointer.

Here's some of the stuff I've made, by using these basic techniques:

8673284468_fbc189b4f3_z.jpg


8681451019_d46bd03c80_z.jpg


8682560056_06fc6fd16b_z.jpg
 
Back
Top Bottom