ghost
Well-known
http://www.ajaxnetphoto.blogspot.com/
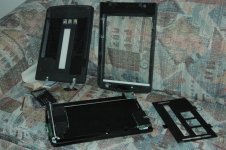
should be very interesting for owners of flatbed scanners looking for better scans.
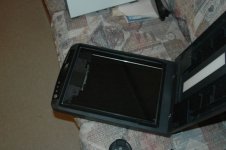
should be very interesting for owners of flatbed scanners looking for better scans.
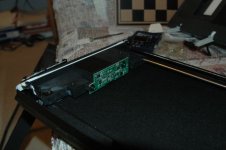
I don't think he's imagining things, but when I've seen issues like that on my flatbed it was caused a smudge on the glass or a negative that wasn't completely flat in the holder. There's too many variables in play and I'm not sure from reading the blog that he adequately controlled for them (first reposition the negative, rescan, clean glass, rescan, then paint surfaces, etc.). I have a feeling cleaning the glass surfaces did more good than the paint.ghost said:"Immediately, there was a noticeable improvement in the final scans, particularly in the area of shadow detail where the Heidelberg had not previously been able to extract much detail. Contrast went up and with it, apparent sharpness."
i see no real reason to think he's imagining things.
DougK said:I don't think he's imagining things, but when I've seen issues like that on my flatbed it was caused a smudge on the glass or a negative that wasn't completely flat in the holder. There's too many variables in play and I'm not sure from reading the blog that he adequately controlled for them (first reposition the negative, rescan, clean glass, rescan, then paint surfaces, etc.). I have a feeling cleaning the glass surfaces did more good than the paint.
If I could afford to sacrifice my scanner should something go amiss, I would. I'm willing to wait for more evidence before I come to a final judgement on the whole issue. Seems strange, though, that scanner manufacturers hadn't thought about this issue and accounted for this in their designs.Trius said:Doug: Do some controlled research on your own and report back!
ghost said:maybe the glass was dirty from the start? naw.