Another GSN help DIY fix thread....

Kapa

Established
Local time
11:43 AM
Joined
Apr 29, 2006
Messages
120
Yeah I know, another thread about an Electro fix... but spare me your time. I picked up a GSN cheap recently, and yeah it was too good to be true. Shutter blades arn't moving, not even at the default 500th. Pretty sure it's not pad-of-death syndrome. I've had a few of these before and done the basic cla and battery chamber adapter so kinda vaguely familiar with them...

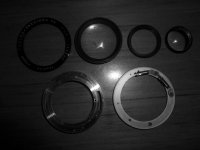
I followed Matt Denton's diy Electro fix but have still become stuck. have done a thorough google/youtube search, to no avail. Successfully - un-screwed lens elements, to be left with the black ring (see crap pics). Thats where I'm stuck- I cant remove this ring to access the shutter beyond- in the vague hope I'm going to be able to to adjust/fix the shutter. Have put drops of lighter fluid on blades to- no go.... Any help would be appreciated :eek:

The first pic is the parts I have removed- the 2nd the black ring that wont budge.... :mad:
 

Attachments

  • P1030088.jpg
    P1030088.jpg
    18.4 KB · Views: 0
  • P1030092.jpg
    P1030092.jpg
    21.9 KB · Views: 0
Hey mate, you probably have this but there's a manual you need to follow for lens dissassembly. http://www.scribd.com/mobile/documents/19302555

Sorry to say but if you plan to remove the shutter blades you gotta dismantle the whole lot from the front and the back and peel back the leatherette so a it's best also to do the pod fix at the same time. Following the manual and taking pics as you go is essential for the first time.

If you're lucky it might have something to do with the self timer mech being jammed. you can remove that in one peice and test shutter without opening up the camera body. I found that the timer mech can have bent teeth (can be fixed with patience) and on one camera the bottom screw that holds down the timer mech was going in too deep and pushing on the shutter ring impeding the effectiveness of the shutter. this screw is not on all models, some have a post locator instead of a second screw.

Unfortunately I can't make out much detail from the pic as I'm on the iPhone now but the diagrams in the manual might shed more light.

Cheers Paolo.

PS: this is my GS. should be close to your GSN. The three screws on the brass centre have to come out to let you into the mechanics of the lens. Sorry my pics aren't that great either cause they were done on the phone.

7bf34a1f-e6be-2336.jpg
7bf34a1f-e708-2451.jpg
 
Last edited:
No probs. The lens strip down is very detailed - page by page.
Caution: take a very good look at the springs and take pictures or video during disassembly. Those little springs are a pain to work out if you forget how they are supposed to be positioned cause they are the only parts which cannot be clearly identified on the diagrams. not that they are omitted it's just the technique to put them back in position is not clear.
 
Thanks heaps Paolo- I didnt have that service manual. Will give it a crack.... Also, thanks for pointing out regarding the self timer- as it may be just that. It certainly seems jammed.... Cheers
 
All good Kapa,
I had just two bent teeth on the timer mech in one of mine. It was extremely hard to see but a tiny screwdriver and some persuasion to re-space the two offending teeth fixed it. It will work without the timer mech so you can remove it entirely if it just plain refuses to work. Better than tossing the camera!

Fingers crossed. :)
 
Hi kapa,

It's hard to tell from your pix, but it looks like you have individual pieces of glass from the front lens element. Is this correct? If so, then you have a bit of a problem. The front element should unscrew in one piece, opening access to all the goodies inside the lens barrel. With the black piece blocking things, which I assume to be the rear of the front element group, you can't get to the brass ring which holds everything together. :bang:

Russ
 
Yes, usually the entire front lens group comes out together. You can get the remaining ring removed by reassembling the lens assembly, and adding a drop of glue to the threads in the black ring. Thread the lens assembly in tightly, let sit overnight, and then try to remove the lens assembly as a single unit.
 
Back
Top Bottom