B&w

Bill Pierce

Well-known
Local time
10:43 PM
Joined
Sep 26, 2007
Messages
1,407
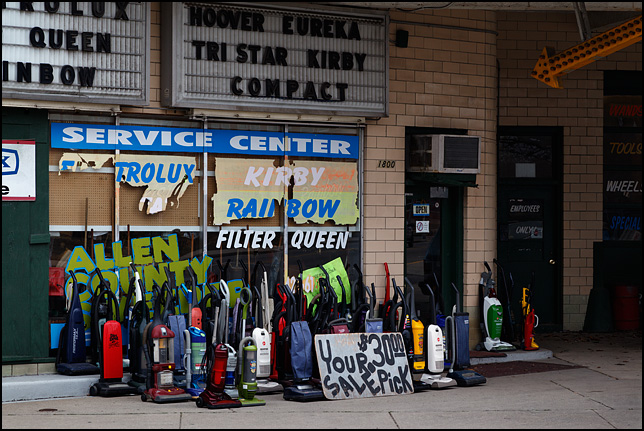
The great majority of digital cameras record their images in color. Although there have been monochrome consumer cameras, most noticeably from Leitz, in the one test that I am aware of, viewers shown images form the b&w Leica files and converted color files from a Sony and asked to pick the best, pretty much split their vote with neither file type scoring a dramatic win - good news for all of us who use cameras with color sensors but like to print some of our work in black-and-white.

Which brings up the question of what is the best way to convert that digital color file to black-and-white. Most of the mainstream processing programs can do that conversion, and there are specialty programs like Silver Efex Pro, Tonality Pro and AccuRaw Monochrome especially set for b&w conversion that may offer features not found in the mainstream, all purpose processing programs.

(One of the all purpose programs, Iridient Developer, does have a special b&w setting which slightly improves the sharpening in b&w. Since this program in general does an especially good job with Fuji files and Fuji is the only other camera manufacturer outside of Leitz that makes cameras with a built-in bright frame finder, Iridient may be of special interest to RF Forum members)

So what is the best way to make b&w conversions? I wish I knew because I really like black-and-white and in many ways want to emulate the look of silver prints. But there are so many options out there, that it is difficult to choose. For now, all I can say is to emulate silver add considerably more clarity than you would for a color print and consider the unthinkable, losing a little of the darkest shadow detail.

I would really like to hear what others are doing and, most of all, why they are doing it. HELP!!
 
I would be very interested in hearing the discussion too.

I shoot color exclusively now, both film and digital. I can't help but think that in the color image, all of the information to make a good B&W image is in there, as well as the chroma information. It's my impression that modern color print film has the dynamic range of about the same as the legacy Kodak and Ilford B&W films, with modern digital sensors being a bit tighter.

If anyone disagrees with the above, please say so.

I think we had a similar discussion here about 10 years ago. (May have been on APUG.) I remember that my impression of those so-called B&W converters was kinda like Hamburger Helper, in that you can always create something just as tasty with what you have lying around in the kitchen without resorting to a more expensive pre-packaged thing.

In my not so humble opinion, likewise, you probably have all of the tools necessary with Photoshop or Gimp. We just need to figure out what to use and how to do it best. :)

I've tried doing a simple switch to greyscale mode and a desaturate, either with the selection named as such or simply turning down the saturation to zippo. All appear to have about the same effect.

What I have done in addition are thing such as adjusting the colors to emphasize the sky, like a virtual red filter and such.

I've never been able to really get that classic Tri-X type subtle but noticeable film grain look. I realize that we're dealing with dye clouds and not grains of metallic silver. I've tried the Photoshop "film grain" filter and never had any real luck. LOL, I'm not even sure if Gimp has one or not. :)

I do use unsharp mask but I never considered it to be a part of B&W conversion.

Those are my comments, anyway ... :)
 
I went through this recently. Software does add some fancy look in bw, but camera sensor is still beneath of it. To me it is about finding camera which has SOOC bw good enough for light tweaking. It doesn't have to be Leica or any expensive camera. I like bw from small, old 8MP Lumix P&S, well, with Leica zoom in it.
 
The best tonality from digital files converted to BW that I have found is from Topaz BW Effects 2, and at $60 it was the least expensive of the third-party BW plugins for Photoshop until Google began giving away Silver Efex Pro.

As for grain emulation, they all suck. I never use it. I just accept that digital shot at low ISO speeds has no grain. My 5DmkII shot at 1600 or 3200 has noise that, converted to bW with no noise reduction used, does look like natural grain!
 
allen-vacuum-2-bw.jpg

Converted in Photoshop using Topaz BW Effects 2 plugin.

allen-vacuum-2.jpg

The Original.


allen-vacuum-1-bw.jpg

Topaz

allen-vacuum-1.jpg

Original
 
Just for giggles here, I've been playing with your first vacuum image above in Gimp, trying to get it as close to the Topaz image with minimal adjustments. Using curves to lower the blue and green slightly, I seem to be able to get it fairly close.

One thing I noticed is that your B&W image is still in RGB mode instead of greyscale. Is there a particular reason for this?

The full resolution image is in grayscale. I post photos to the web in sRGB because grayscale images do not always render correctly in all browsers.
 
I work in several steps.

1. Using Lightroom I adjust the White Balance if necessary and then convert the image to B&W and make quick adjustments in the Basic Panel (Exposure, Contrast, Clarity, etc.), and make a snapshot of that.

2. I then click on one of the VSCO presets — for me a good reference point is Trix+2- in the VSCO Film 06 Push & Pull package — and edit the Basic panel in Lightroom and make a snapshot. I compare this snapshot to the earlier snapshot, and if one of them looks good — it helps to have darkroom experience to know what you want and what is possible in a good B&W print — I work on the better one until I'm finished, if necessary doing some selective burning and dodging using the Lightroom Radial Filter Tool. I then make the final snapshot.

3. Now, if the final snapshot still doesn't look as good as I think it should be, I go back to the original color file (after White Balance adjustment) and reduce its contrast to make it flat, the way I would want a film scan to look and bring that into Silver Efex. (It's better to bring a low contrast file into Silver Efex) Then I apply one of the presets, usually no. 11, and then adjust Contrast and Structure and anything else that is necessary. And then I exit SEFEX, which saves the file, and apply some final fine editing in Lightroom. Usually, the SEFEX file ends up to be the best one, but not always. SEFEX takes some time to learn, particularly not to apply the sliders in large moves.

The three sets of steps may seem to be time-consuming, but they are not: the first and second steps are very quick once you're comfortable in Lightroom.

The picture below is an example of the usefulness of SEFEX. Actually, this is a film shot, Tri-X shot at ISO 400, that was developed by a lab in 1:100 Rodinal using one hour stand development. The lab made a mistake and developed two rolls in a tank that was too small to have enough Rodinal for two rolls in a 1:100 dilution — you need 3.5-5.0ml of Rodinal for per roll. The result was that the film was so severely underdeveloped that the "TRI-X" logo along the edge of the film was barely visible: this frame would not have been printable with an enlarger in the darkroom. When I brought the scan into Lightroom the histogram was a mere sliver on the x-axis. And when I made even a 1-point movement in any of the Lightroom sliders there were huge changes in the contrast or brightness of the image — I had very little control. Nevertheless, I managed to get a reasonable image of which I made a snapshot.

I then brought the original flat scan into SEFEX and it was like magic: when making editing changes with the sliders or applying a preset it was as if that mere sliver in the Lightroom histogram had, in SEFEX, been spread out over the whole histogram. The result was the image below — compared to the snapshot I made in Lightroom the rendering of the lace blouse has much more contrast and acutance against the subject skin, and the some goes for the plaid pattern of the subject's apron; and the canvas on the right of the frame was barely visible in the Lightroom image.

As for other software I've tried MacPhun Tonality, which I think is useless. I haven't tried Topaz B&W effects but, looking at the manual, I see that it doesn't have a clarity adjustment, for which you either have to use the Lightroom Clarity slider (which doesn't break up the adjustment for the various sets of tones in the images) or use Topaz Clarity software.


Chiang Mai

_______________
Alone in Bangkok essay on BURN Magazine
 
The SOOC (straight out of the camera) M9 black and white jpegs are really quite nice. From M9 DNGs in Lightroom, my usual, in the Develop module I click black and white top right, and then run down the right pane, increasing contrast slightly, raising shadows, lowering highlights, or increasing, depending, and darken the blacks. I've used Silver Efex occasionally, mainly for a border, or the control point exposure options. Almost never bother with grain.

U28906I1371787803.SEQ.0.jpg
 
31929213360_9313e5a2a8_c.jpg


32164313625_d52b41746d_c.jpg


I have been a fan of Capture One since it was available free with the M8, more recently they added a versatile grain feature which I would never defend against the real thing but can add to removal of that digital perfection where necessary.
The B/W conversion is totally customisable including split toning and a number of what they call "styles" are pre-loaded to get you started free 30 day trial.
Above from Phase One back oh Hasselblad H1, not that the electrons care.
 
The full resolution image is in grayscale. I post photos to the web in sRGB because grayscale images do not always render correctly in all browsers.

Really? I was not aware of that. I've been posting images on the web in greyscale as long as I've been using the web! I usually use Seamonkey (our systems geeks call it "Firefox on steroids") as a browser and the greyscale images definitely display properly.

When I do make it in (it's a snow day here, actually ice) I'll have a few people who use various browsers try one of the images. I'm very curious.


You're probably right that it doesn't matter. I had issues in the long ago past, but have not tried it in a decade. Virtually all devices can display an sRGB image reasonably accurately.

Also, I never post BW images that are truly neutral. I impart a slight color tone to all of them, just as I did in the darkroom. A grayscale image cannot be toned!
 
Getting stuff to resemble the original in B&W while maintaining contrast from one color to another in the original image is something I do not want to leave up to a plug-in to interpret for me.

In Lightroom, I can set Hue, Saturation and Luminescence for each color and this is how I approach the image. I'm sure other software can do this too but LR is my tool of choice.Here's what I did when editing Roland's landscape shot in the Post-Processing Challenge, have a look at the right in the menu:

Ferider_file2.png


All saturation I set to 0. But, that way I still get to change Luminescence of individual colors, so that I can decide how to bring contrast in specific parts of the image. Also, I can still use the brush (top right) to influence local contrast. I use Clarity and Blacks to further influence the outcome, and leave the Contrast slider alone because I do not need the general impact on contrast, but use the localised contrast alterations instead.


This allows for the creation of images with a consistent outcome (a 'style' if you wish) while lighting conditions in the original might vary considerably. I feel I'm getting there when it comes to finding my personal 'signature look' in both color and B&W and for B&W this is an approach that gets me there.
 
While I realize most people make pictures for posting online, I'm speaking of processing digital for printing, not for viewing on a computer screen. Truthfully, I'm perfectly happy with my B&W digital photos being converted from Raw files in Lightroom with a little extra tweaking of contrast and clarity. Even OOC JPEG B&W can look good with a little finessing. Digital B&W doesn't have to look like film B&W to look good. Personally, I love the tonality of digital B&W. With currently available digital printing materials--pigment inks, matte rag papers and quality inkjet printers--it's a fairly simple process to surpass the quality of chemical darkroom prints done 40 years ago. The key word there is "simple". We often get so involved in the process and tools we forget we're just trying to make a picture that looks good.
 
Bill, you posted on this topic a couple months ago. I recall it well because you elaborated somewhat more on discarding shadows, and I have been experimenting with that approach and liking it. I think Richard's photo above is a good example of this. Now when I look at photo posts I see what looks like excessive shadows everywhere. It seems to have become a digital aesthetic, especially among MM users, which is my main rig.

I find LR and Sliver Efex plenty good enough. I'm not willing to complicate my workflow with another tool for whatever marginal improvement it might offer. Sliver Efex offers a better conversion starting point than LR, I feel. In Silver Efex I typically use the default preset, make a few global and local adjustments, and then go back to LR. I like Silver Efex's amplify sliders and have found no counterpart in LR. And I like that it's clarity sliders are specific to tonal area. I find LR's gradient tool especially handy. I confess to not being very standardized in my post method and tend more to play around and see what looks good.

I don't think of myself as emulating film, but I do try to tone down the relative cleanness of digital. Chris' shots above, for example, are too clean for my taste, though I understand his intention to let digital be digital. I suppose most of all I value a rich and extended middle gray range. Again, Richard's processing is particularly pleasing to my eye.

Here's one of mine from the GR. I wanted to keep the solid dark background, but her clothes were quite high contrast, so I raised shadows and lowered highlights.

There's no grain added, but ISO was 3200. I've got a 12 x 18" print on my wall and it looks great. Which I think raises an interesting point for grain lovers. We have the option to shoot at very high ISOs, so it's worth considering which looks better with our particular camera – noise or fake grain.

John

31967076100_a8908e5471_b.jpg
 
The combination of LR CC and Silver Efex 2 serve me well for monochrome rendering of digital camera raw files.

For raw from Fujifilm XTrans II cameras, LR CC's Camera Monochrome film simulation Profiles are almost good enough for final production (prints) and certainly are perfectly fine for image selection (editing) and casual on-screen display.

It's been a long time since I converted Nikon or Panasonic raw to monochrome. For these I used a workflow very similar to the one described above by johannielscom. LR has changed quite a bit since then so I'd have to experiment with the more recent features of LR's Development module if I ever work with those raw files again.

For photographs that survive the editing stage, Silver Efex Pro 2 is useful. I'm not very interesting in simulating film emulsions (though I have done this). The dodge and burning tools are far superior to LR's.[1] I am not patient enough to create identical functionality in Photoshop. I optimize other rendering aesthetics (tonality, micro-contrast, etc.) either in LR or Silver Efex Pro 2. But I always dpodge and burn in Silver Efex Pro 2.


[1] When color work requires significant dodging and burning color I use NIK Viveza 2. This strategy also id effective when selectively correcting color cast differences when scenes are lit by light with different color temperatures.
 
I appreciate all who have posted their suggestions, workflow, and examples, and hope to learn from all of you the best way to do this!

I am an old black and white film shooter, having begun in the early 70's, still shoot film as time allows, and until 2 years ago still taught wet lab processes at the local community college. Recently i decided to expand on that black and white thought process - sort of - but in a digital workflow. I have purchased an XP2 and an X100 which have been dedicated to black and white JPEG only. My current software (PS5) does not allow the Fuji RAW files to load as black and white (or I don't know how to accomplish that), so that's why I ended up shooting JPG only - at least until I update the software or find another solution. My goal is to become as proficient in the digital approach to b/w as I am currently in the wet lab. I still maintain my personal wet lab space, but use it mostly for alternative processes.

I understand the digital norm would be to shoot in RAW or RAW+JPG, then convert to b/w in post, but the b/w JPEG is how I've begun. I like being able to see the image in black and white in the viewfinder and the monitor. For me, that is the key element in choosing this equipment and method of working. If anyone has a better idea on how to get the highest quality black and white images using the equipment I have, I would be most grateful to hear about them!

I am most comfortable with PS, and a bit with Lightroom, but have recently downloaded the Silver Efex plugins, which I've yet to use.

So far I have printed about 200 of these digital photos on a Canon Pro-1 printer, and am pleased with the outcome. I've been printing color digital with my 4880 Epson for several years with great results, but have yet to run any of these b/w files through it.

Thanks in advance to anyone who might have a tidbit or suggestion on getting me further in my quest, and I look forward to how others are doing it.

Best,

Mark
 
Back
Top Bottom