wupdigoj
Established
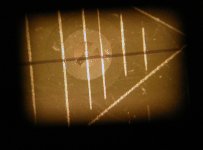
The cuts in the tape are what give you something to focus on; sanded film doesn't.[/quote]
I am sorry, I didn't explain myself (i could do much better in spanish 🙂). I didn't sand the film, but made lines in it with a needle or something like that. I have used also a pen, but the lines are not narrow enough.
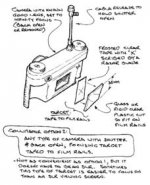
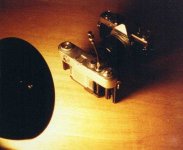
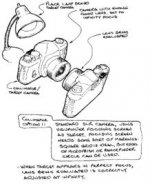
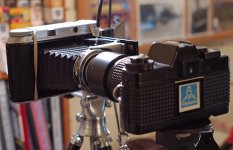
I have something new. Checking the camera again, I have noticed that the frontal lens, the one you use to focus, turns a little when the shutter is released: the helical is very free, and the compur rapid is very energic. I think this can be, at least partially, the cause of the unsharpness, as in the SLR I used the focal plane shutter, not the compur. I will grease the helical to make some resistance, and I think I will give this camera a last chance. The attached pictures are taken with the same lens, one in the bessa, and the other one in a SLR 35 mm camera.
I am sorry, I didn't explain myself (i could do much better in spanish 🙂). I didn't sand the film, but made lines in it with a needle or something like that. I have used also a pen, but the lines are not narrow enough.
I have something new. Checking the camera again, I have noticed that the frontal lens, the one you use to focus, turns a little when the shutter is released: the helical is very free, and the compur rapid is very energic. I think this can be, at least partially, the cause of the unsharpness, as in the SLR I used the focal plane shutter, not the compur. I will grease the helical to make some resistance, and I think I will give this camera a last chance. The attached pictures are taken with the same lens, one in the bessa, and the other one in a SLR 35 mm camera.