Designing a new film scanner; need your help

Designing a new film scanner; need your help

  • $600 or less

    Votes: 65 29.3%
  • $800

    Votes: 40 18.0%
  • $1000

    Votes: 46 20.7%
  • $1500

    Votes: 34 15.3%
  • $2000

    Votes: 24 10.8%
  • $3000 or more

    Votes: 13 5.9%

  • Total voters
    222
wow, excellent progress!

if the stitching and focusing can be done quickly and painlessly, cultural heritage institutions might be a potential market.
 
Great stuff! I'm glad my neg came in handy. Yes it's expired but always refrigerated.

So with the finished product, we assemble ourselves from a bit list etc.? Sounds like a half the fun :)

Cheers - John
 
Sell license to Kodak this is how probably Logmar did with their 8mm camera. There will be great interest in home telecine machine with that magnification.
 
What we're up to now is rebuilding the chassis, as I alluded to in some other recent posts. Every dimension of the earlier chassis is increasing slightly, the supporting panels are increasing in thickness (for rigidity), the aesthetics are changing slightly, etc.

A whole bunch of fresh mechanical parts were ordered, along with several meters of 20x20 V-slot, which forms the frame of the chassis. Just yesterday I finished cutting it to the required lengths, and I confirmed that you can infact cut it comfortably with a hacksaw (i.e. you don't need an expensive dropsaw), and drill holes in it properly with a power drill (i.e. you don't need a drill press or whatever they're called). Interestingly, oiling the blade of the hacksaw made it so much easier than otherwise.

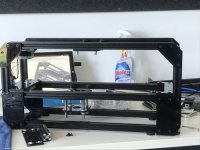
So now, after scavenging some stuff from the previous chassis, we now have a pile of bits that will form the main section of the final scanner. The main thing left to do is to use a laser-cutter (my uni has a couple) to chop up some acrylic for the side supports, that should be done by next week, and then we can immediately begin assembling it together. Pics of it should follow.

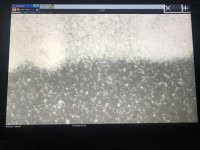
I've also been working on the software/electrical side of things too, I've been involved in some other projects recently using OpenCV, which I think will be super suitable for fast image previews and maximum-quality final image output.

Regarding kodak licencing - I mean it's not a bad idea, but I'd prefer not to mess with that sort of businessy stuff regarding film anymore, otherwise I'd have to take this project a bit more seriously which might kill the fun factor.

Anyway, a brief update for now.
 
Any news or new samples?
Where are we at?

Funny you should ask now.

Other than time, everything is on track.

Within the past week, uni exams have finished (meaning I can work on this again), a whole bunch of lasercut stuff arrived (assembly began today on the final version, pics below) and I had a new idea for how to do the holders.

Basically a big roadblock has just been passed (the acrylic arriving) and now I have lots more time to work on it, so expect regular and interesting updates. I'm going to try to pump out some more samples/tests or pics over in about 6 hours or so.
 

Attachments

  • IMG_0457.JPG
    IMG_0457.JPG
    51.6 KB · Views: 0
thanks!
I kept building it today, bloody hell there are a lot of bolts, then threw on the same 'private wharf' negative as earlier and got the same sort of results. Over the next few days I anticipate finishing the electronic focusing system, which will make doing tests a lot easier.

Here are some more pics! Still a couple of end panels to go on

30939889971_d6e8a51f6d_b.jpg


30939890251_bf43bdb907_b.jpg


31054004695_b3ea1a3dd2_b.jpg
 
Looking good, quejai.
For all Sydney RFFers, there'll be a lunch and/or dinner meetup on December 3. Look for a post in the Australia and NZ Regional Club sub-sub-sub-subforum.
 
Thanks for the update.
Its already looking like a professional machine.
Looking forward to your next posts.

Still scared for dust though when i see all those open spaces.
 
This is an amazing project, every iteration has shown not just more promise but also just how diligent and clever you are. Well done and good luck with this!
 
Thanks all
Dust - Yes there is a fair bit of surface area isn't there. I do plan to make an enclosure, with a fan to keep dust out, and to deal with dust on the film the current idea is to get some dust-absorbing rollers from cleanroom suppliers, and just roll the film against that before putting it in the scanner. That's the initial method, although calebarchie and I are both working on more integrated electrostatic approaches that will take more time to develop. Be aware that Kodak's standard method for cleaning motion picture film involves dipping it in some solvent - I'm not all that familiar with this, but that approach could be used here too for more stubborn dirt.

Getting the electrofocus system to work is taking more time than I was intending, but today I realised that I had something done up a bit too tight which was making other things stick.

Also, another test. On the sensor 1 pixel corresponds to 1 micron on the film, not sure what that is in ppi. The 20x lens was used. This is beyond any useful resolution and has fully passed into silly territory. 400iso ultrafine extreme in 35mm, photo taken on my phone of a computer screen. Also the negative has been inverted here, showing a high contrast area.
 

Attachments

  • IMG_0531.jpg
    IMG_0531.jpg
    25.7 KB · Views: 0
Back
Top Bottom