jbharrill1
Established
First off let me say I have a feeling this has been asked here a few times judging by how many times I saw it asked on other forums when I googled it, but I could find no definitive answer. I used the search feature with no luck so here we are.
I'm using an epson v600 and wanting to keep the rebate/black border around the edges of my 35mm scans. I asked one person via direct message on instagram and he says that he makes prints that have the rebate and then scans those. That's obviously the best way but I don't always have access to an enlarger/darkroom except maybe once or twice a month, and a lot of the images I'm scanning I really would rather not print just to scan them later. That's a lot of paper.
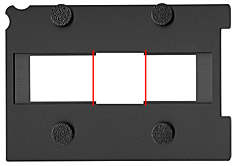
The other options I've found are filing down the film holder, using lomo's digitiliza mask, or buying some AN glass and sandwiching the negs between the glass? (I'm still a little confused on how that last method works) I've heard the digitiliza mask does not work with the epson v600. I feel like my best option is to buy a new 35mm film holder for the epson and file the edges down because I want the option of getting a borderless scan or a bordered so it makes sense to have two. BUT won't epson's software still cut out the black border? Whenever I load the negatives in the holder I always see a little bit of rebate on the top and bottom of the neg but when scanned it's gone. I'm assuming the software just crops where it starts to see that the frame is going all black therefore indicating the edge of the frame. So even if i have a few extra millimeters would the software not do the exact same thing, making it borderless again?
Any help is greatly appreciated, well I guess any help besides "just add it in post." 🙄 That is one option that is definitely not an option.
Thanks guys!
I'm using an epson v600 and wanting to keep the rebate/black border around the edges of my 35mm scans. I asked one person via direct message on instagram and he says that he makes prints that have the rebate and then scans those. That's obviously the best way but I don't always have access to an enlarger/darkroom except maybe once or twice a month, and a lot of the images I'm scanning I really would rather not print just to scan them later. That's a lot of paper.
The other options I've found are filing down the film holder, using lomo's digitiliza mask, or buying some AN glass and sandwiching the negs between the glass? (I'm still a little confused on how that last method works) I've heard the digitiliza mask does not work with the epson v600. I feel like my best option is to buy a new 35mm film holder for the epson and file the edges down because I want the option of getting a borderless scan or a bordered so it makes sense to have two. BUT won't epson's software still cut out the black border? Whenever I load the negatives in the holder I always see a little bit of rebate on the top and bottom of the neg but when scanned it's gone. I'm assuming the software just crops where it starts to see that the frame is going all black therefore indicating the edge of the frame. So even if i have a few extra millimeters would the software not do the exact same thing, making it borderless again?
Any help is greatly appreciated, well I guess any help besides "just add it in post." 🙄 That is one option that is definitely not an option.
Thanks guys!