ornate_wrasse
Moderator
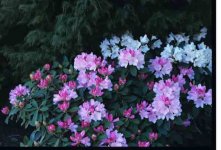
I finally set up my Nikon 9000 scanner that arrived a few weeks ago and scanned my first images. I did not attempt to adjust any settings, just scanned the file and saved it as a jpg. Much to my surprise, the file turned out to be 23 megabytes! I had expected a file this size or larger if I saved it as a TIFF, but didn't expect it to be this large saving it as a jpg.
It's the first time I had my 8.5cm Nikkor f2 out on my M6. I was very pleased with the performance of the lens.
Are there any steps I can take to reduce the file size if it's just for the web?
Naturally, I reduced the size so I could attach it to this post
Ellen
It's the first time I had my 8.5cm Nikkor f2 out on my M6. I was very pleased with the performance of the lens.
Are there any steps I can take to reduce the file size if it's just for the web?
Naturally, I reduced the size so I could attach it to this post
Ellen
Attachments
Steve M.
Veteran
I have some from a Nikon 8000 I used to have that are 300 or 400 MB TIFFs. Scanned them at max resolution in RGB. Huge files. Had to buy a much bigger and faster computer to handle them. Now I enlarger print and they are just tying up a lot of space on my HD.
Just don't scan them at max resolution. When you get ready to scan there should be a dialog box that allows you to downsize the scan size. If all else fails, read the manual.
ornate_wrasse
Moderator
Just don't scan them at max resolution. When you get ready to scan there should be a dialog box that allows you to downsize the scan size. If all else fails, read the manual.
I guess I was so eager to get going that I didn't even look at the resolution. I'll have to pay attention to that in the future
What resolution do you scan your images at?
Ellen
craygc
Well-known
6x7 scans at 4000 dpi of 16-bit RGB give a nice ~550 MB tif file
Even on the 4000 dpi 135 format scanners, a 16-bit RGB is around 120 MB
Time to upgrade the hard drives
Even on the 4000 dpi 135 format scanners, a 16-bit RGB is around 120 MB
Time to upgrade the hard drives
zgeeRF
Established
I had the same experience when I got my Coolscan. Now I scan at maximum resolution but I specify the size to be 1200 dpi (instead of 5,400 etc). The jpegs of this size are quite small. If you need large prints you can always re-scan at maximum size TIFFs. Otherwise like Steve says prepare huge hard drives and lots of "computing"
ornate_wrasse
Moderator
Yikes! I just purchased a fairly large external drive a few months ago.
Guess I need to go shopping again.
Thanks.
Ellen
Guess I need to go shopping again.
Thanks.
Ellen
johannielscom
Snorting silver salts
Here's a time and cost effective approach to naming your scans and storing your negatives, so that you can find anything you look for quite quick if a bigger re-scan is necessary. I scan everything at web resolution first but instantly scan keeper shots at top resolution (3200 dpi on a Minolta IV) as well. Works for me.
Any question on that article, just ask.
I'm scanning 6x9 negatives in 3200 dpi 8-bit on an old Epson GT9600 transparency flatbed scanner, thought my 73Mb TIFF's were big...
But, I easily get 40x60 cm prints from those scans 
Any question on that article, just ask.
I'm scanning 6x9 negatives in 3200 dpi 8-bit on an old Epson GT9600 transparency flatbed scanner, thought my 73Mb TIFF's were big...
Leigh Youdale
Well-known
I still use a wet darkroom occasionally but I have to admit that since buying an Epson V700 scanner and Epson R2880 printer I'm scanning more.
I've run some tests in the last two weeks using 120 B&W film of five different brands and determined that whilst the theory of scanning at high resolution to original size (i.e. 6x6) and then resizing (enlarging) later to print or other output sounds fine, there is, in fact, a degradation of image quality when you resize - it can be seen with an 8x loupe on a side by side comparison. I can also detect a (very) slight difference in print quality between 300 dpi - the usual recommendation - and 600 dpi, so I scan to the latter in the knowledge I can always drop the output resolution. For all practical purposes 300 dpi is really enough though.
I turn off the auto sharpening in the scanner, and scan at 600 dpi output to the final print size I intend using and save as a TIFF file. Any sharpening I do in Photoshop pretty much at the end of any post processing. I know then what I'm doing and not trying to work with something the scanner imposed on the original file. If I decide later that a different, larger, print size is needed I'd rescan the original negative.
Of course, I'm only using one channel with B&W. If I was scanning colour in three channels then my file size would be three times as big!
Share: