Tokoza
Member
ColorPerfect plugin gives nice result with color negatives. For negatives "scanned" with dslr you first convert raw with Make Tiff and then process this file in the plugin application. Profiles for different films are given that probably makes the color adjustments more easy and correct.
http://www.colorperfect.com/colorperfect.html?lang=en
Swift1
Veteran
reviving this thread;
I've always asked myself the reason to shoot different type of color films while the output can be manipulated in the way we want.
For instance; what is the real difference between shooting with expensive Kodak Portra versus cheapy Kodak Gold?
Some local labs here scans and processes in a way that almost every film looks the same.
Someone please enlighten me in this matter.
If scanned properly, each different film stock will have a look that is characteristic of that emulsion.
Carriage
Established
Didn't we just say there is no properly though?
charjohncarter
Veteran
Didn't we just say there is no properly though?
I don't know who we is, but Swift1 is right.
Try his scanning method and you will see.
froyd
Veteran
reviving this thread;
I've always asked myself the reason to shoot different type of color films while the output can be manipulated in the way we want.
For instance; what is the real difference between shooting with expensive Kodak Portra versus cheapy Kodak Gold?
Some local labs here scans and processes in a way that almost every film looks the same.
Someone please enlighten me in this matter.
Had the same question when I started scanning and somebody here gave the advice to relax and work on scan with a pleasing color rendition. He argued that barring extreme manipulations the scanning process would preserve the relationship between colors characteristic of a specific emulsion.
In practice I find it much easier to get the "Portra look" when scanning Portra, than when scanning Gold and pushing sliders, but maybe that just speaks to my skill set more than anything else.
rogue_designer
Reciprocity Failure
For professional gigs, with negative film - shoot a color checker frame. That will also give you adjustments for your lighting. Otherwise, do what looks good to you, man.
Swift1
Veteran
Didn't we just say there is no properly though?
I would question what "correct" color is, but for me scanned properly means scanning and editing to get the most out of a negative while keeping a fairly neutral overall balance.
IMO, yes there is properly.
Carriage
Established
I gave this another go using the droppers on the levels tool (using GIMP)

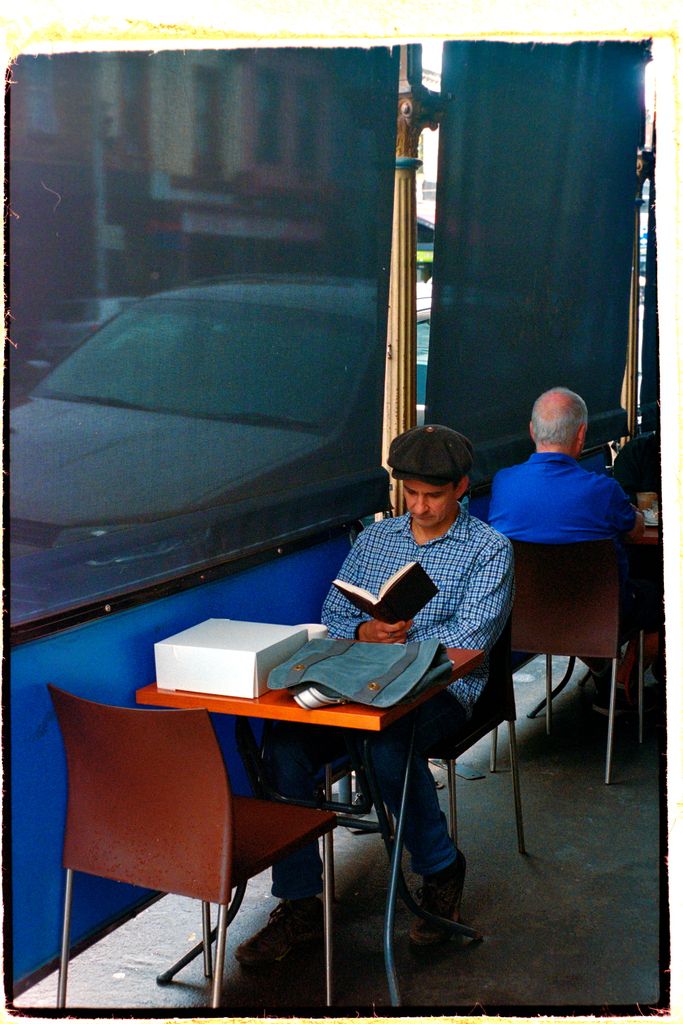
Black point was the edge of the negative. White point was the front of the box and used a chair leg on the side away from the blue panel for the midpoint. Maybe it's a bit red now? Is the lab scan "wrong"? The shirt and satchel seem very blue in what I do compared to the lab scan.
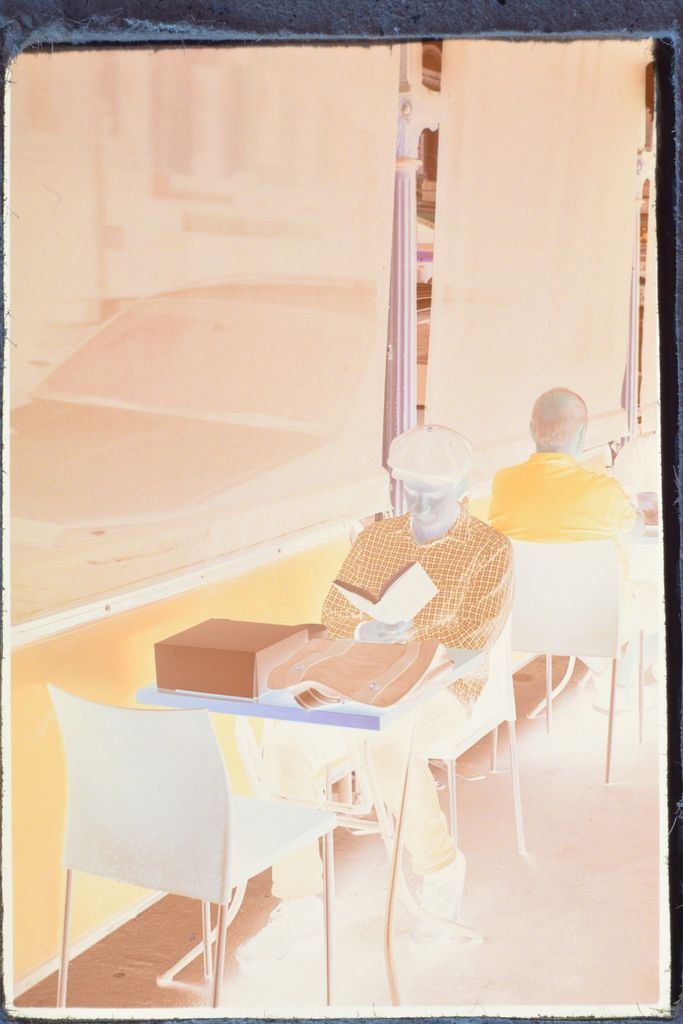
Here's the photo of the negative if people are interested or want to show me how it's done.

sojournerphoto
Veteran
Somewhere on filmshooting.com there's a longish thread about removing the 'orange' mask. The challenge is that the mask is built from the underlying colour layers andso isn't easily removable using curves or white/black point settings.
Something I'll try at some point
Mike
Something I'll try at some point
Mike
Tokoza
Member
If you upload raw I can try to convert with ColorPerfect.
Carriage
Established
Is this the one you're talking about sojournerphoto?
http://www.filmshooting.com/scripts/forum/viewtopic.php?f=1&t=24780
Swift1
Veteran
So I downloaded your photo of the negative and had a quick go ate inverting it.
Here's what I came up with.
My method,
Open in Photoshop.
Invert
Run Levels, holding Alt key adjust bright and dark point of each channel until just starts clipping within frame. Adjust midpoint of each channel to visual taste. I think I set Green midpoint to 1.23, Blue to 1.18, Red to 1.00 (??).
Then adjusted main tone curve to visual taste.
This was just quick and dirty, but I think it's fairly neutral.
edge100
Well-known
There is no "correct". There is only "pleasing".
It has always been this way.
Carriage
Established
Thanks Colton. That does make me lose confidence with the lab I've been using and again question if the effort is worth it for C41 though.
Swift1
Veteran
Thanks Colton. That does make me lose confidence with the lab I've been using and again question if the effort is worth it for C41 though.
I wouldn't stop shooting C-41 film for anything, but I also would never let anyone else scan my film
rogue_designer
Reciprocity Failure

Lacking a known reference value, I opened the shot you provided. Cropped to make sure there was nothing external to the film edge, Inverted it, converted to adobe RGB then opened it in camera raw. All adjustments to white point, color balance, etc are then made in that engine, before outputting. Convert to sRGB for web.
Similar to other results.
One thing you can do, for the future. Is to shoot a color checker card under a few conditions on the same roll. Then use those known values to work up a standard averaged out correction for that film.
GarageBoy
Well-known
Where is the swift1 guide?
Swift1
Veteran
Where is the swift1 guide?
Here is my scanning writeup
http://www.coltonallen.com/getting-the-most-from-color-negative-film-with-your-epson-flatbed/
icebear
Veteran
If correct/accurate color is needed (product shots) then a colorimeter is needed at time of exposure to have a measured reference point how a certain surface reflected the light, i.e. what color it had. You can then adjust the image in post processing to match that value exactly and you have the correct color. I just searched the web and it seems with omnipresent digital WB these meters are no longer available (e.g. Gossen Color Pro3F, Sekonic C500, Minolta IIIF)
If pleasing "natural looking correct" is what you want to achieve then I would not do this in the scanning program but with the dropper tool in e.g. LR and choose a neutral grey area in the frame. Usually some spot of street surface. As you try different spots, you'll be surprised how much difference the choice of that "neutral grey" area will make. If the canvas bag on table itself or just the enforcement straps were grey this surface can be used. As for the ground surface, there is different light and reflections from the blue trap material. If the manual WB at time of exposure (for digital capture) is not delivering a neutral image, that's what I use to get it fixed.
Prest_400
Multiformat
In his site, under "Articles". I suppose he'll be fine to have it linked here:Where is the swift1 guide?
http://www.coltonallen.com/scanning-color-film/
It helped me learn quite a bit the process, though I do not adjust the individual color channel levels... Then I end up messing up color and well :bang:
I discovered through a video tutorial that the "Show output" button in the preview actually did that, as it just fuctions when it is pressed. Now at least I get the histogram right. Before, I used to just put the white and black points. But I obviated that this let me finely adjust the values of these!
Because oftentimes the white point when put to the edge of the input histogram does not put the output histogram to the proper place and in negative the highlights go yellow-brown. Colton's tutorial does not mention it, perhaps it is down to some software-hardware combination. Instead, I have to keep using the "show output" and have the input whitepoint slightly inside the histogram end.
I scan with a V550. Portra often scans nicely and when properly exposed does not require corrections. My scanner does have a color cast in deep shadows (blue in negative, red in positive) that I remove afterwards using RawTherapee. The latter I use to add sharpening and adjust some color to taste.
PS: Thanks Colton a lot for the tutorial! I just read through again and I obviated that the settings can be saved. After a few frames, it is tiring to adjust output 10,240 to 0,255 and the histogram itself.
Share:
-
This site uses cookies to help personalise content, tailor your experience and to keep you logged in if you register.
By continuing to use this site, you are consenting to our use of cookies.