--s
Well-known
asked by a rff-member about my drying method shown in the latest print thread, i decided to document the workflow and open a new thread here.
the problem is known. while fb prints have a more beautiful feel and look about them compared to rc papers, they are much more work, and especially getting them flat is challenging.
i´m using wet tape to fix them on a board while drying, and they come out as flat as they were when they were unused resting with their siblings in the package.
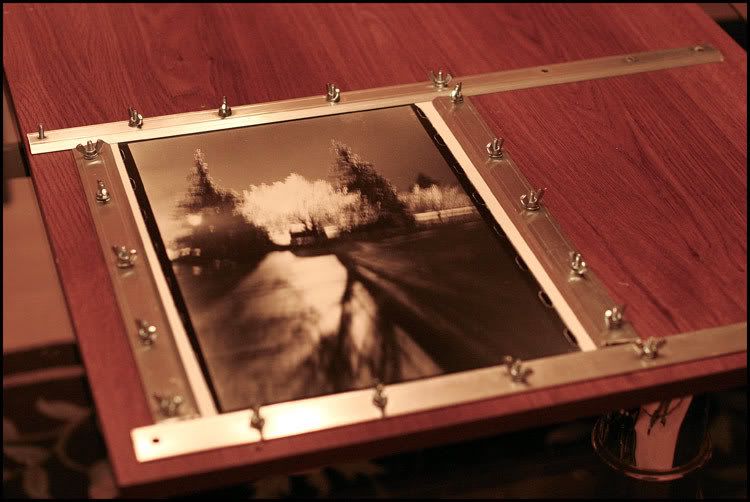
as you need a little space for the tape, the prints don´t use the full paper size, a margin of ca. 15 mm has to stay under the frame.
the board i use is of resopal, ideal for glueing the wet tape upon.
more things i need:

the tape is the type used by artists to hold the aquarelle paper, you can buy it at the artists supplies. i prefer a width of 40-50mm.
the sponge is for wetting the tape, just drag the tape over the sponge. the tape should not be soaking wet.
the use of the safety pin i´ll show soon.

after drip-drying the prints (they should be taken from the line before the curling begins), i lay them out on the board.
when they were on the line, i prepared the tape, tearing stripes from the roll long enough to overlap the board.

i fix the prints with the tape, carefully striking out air bubbles from under the tape.
as the whole matter is airtight, it is necessary to pin a few holes into the prints, otherwise they would come loose prematurely.

the prints now need three days of rest. dry them slowly, best is a room not too warm, as a cellar, too fast drying causes the tape to be torn apart, leaving the prints curling again. three days!!!
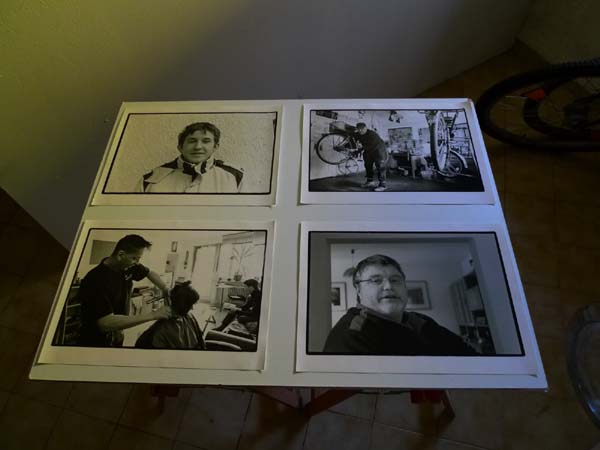
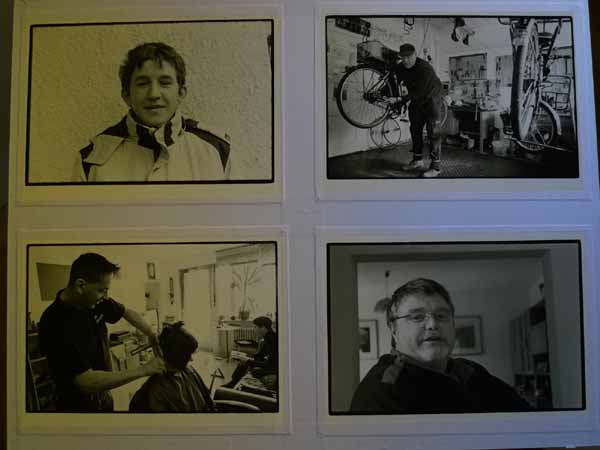
after the three days i cut along the paper edge to make the prints plopp out of the drying tension (the paper shrinks quite a lot).

and here i go, four more flat fb prints.

last words: that´s not my own method, i´ve learned it along the line of old traditions.
the problem is known. while fb prints have a more beautiful feel and look about them compared to rc papers, they are much more work, and especially getting them flat is challenging.
i´m using wet tape to fix them on a board while drying, and they come out as flat as they were when they were unused resting with their siblings in the package.
as you need a little space for the tape, the prints don´t use the full paper size, a margin of ca. 15 mm has to stay under the frame.
the board i use is of resopal, ideal for glueing the wet tape upon.
more things i need:
the tape is the type used by artists to hold the aquarelle paper, you can buy it at the artists supplies. i prefer a width of 40-50mm.
the sponge is for wetting the tape, just drag the tape over the sponge. the tape should not be soaking wet.
the use of the safety pin i´ll show soon.
after drip-drying the prints (they should be taken from the line before the curling begins), i lay them out on the board.
when they were on the line, i prepared the tape, tearing stripes from the roll long enough to overlap the board.
i fix the prints with the tape, carefully striking out air bubbles from under the tape.
as the whole matter is airtight, it is necessary to pin a few holes into the prints, otherwise they would come loose prematurely.
the prints now need three days of rest. dry them slowly, best is a room not too warm, as a cellar, too fast drying causes the tape to be torn apart, leaving the prints curling again. three days!!!
after the three days i cut along the paper edge to make the prints plopp out of the drying tension (the paper shrinks quite a lot).
and here i go, four more flat fb prints.
last words: that´s not my own method, i´ve learned it along the line of old traditions.