How's my scanning/developing

Pete B

Well-known
Local time
10:06 PM
Joined
Mar 12, 2010
Messages
1,222
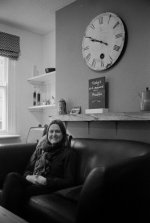
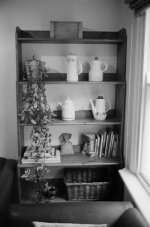
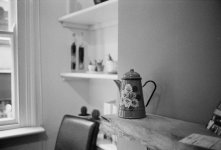
I took some test shots primarily to check focus of a new to me 35mm pre asph, but also to revisit developing and scanning. When I look at members scans on RRF I often see rich blacks and tones. My scans often seem a little lackluster. How do these images seem to you? Are they OK? Is there a problem with development? Is there a scanning issue?
The film is HP5+ @ 250. Incident meter.
D76 1:1 in a large tank (800ml for one film)
20C, 13 mins.
Scanner is Plustek 8100 using Vuescan.
Sorry for the small files.
( Don't worry about the composition, I was checking the focus!!)
I'm grateful for any pointers/tips.
Pete

Photos removed in favour of larger images further down thread!
 

Attachments

  • RRF-0003.jpg
    RRF-0003.jpg
    102.1 KB · Views: 0
  • RRF-0004.jpg
    RRF-0004.jpg
    113.6 KB · Views: 0
  • RRF-0005.jpg
    RRF-0005.jpg
    109.2 KB · Views: 0
Yes I know, How can I get around the problem?:bang:
Do I need to upload to flickr?
Pete

Yeah. Copy the BBcode from the share menu and paste it directly in the body of your post. I usually use the Medium 800 pixel size...
 
Nice, those larger images are much easier to see...

Your photos look fine. I don't shoot that film, but looks nice. The grain is more visible than I like. Not sure if that is the look you are going for or not, but I would use a mask to avoid sharpening areas without detail.

Im sure you already know, but photos with large areas of bright sky will tell you how even your development is...

Its nice to see the Plustek delivering nice looking scans. I used one until I got a Pakon and had no complaints.
 
Thanks Will. I have a Pakon too but as I was wanting to check focus, I used the Plustek for a bigger file.
I like the soft tones of these scans but I wonder how others get their rich tones without unnecessarily high contrast. Perhaps the film stock HP5+ has some bearing on this?
Pete
 
Hmm, do you have any examples of photos with the tones you are thinking of? Im interested to see myself.

Personally I REALLY like the results I get from scanning DELTA 400. Post-scan I make adjustments with ACR, and sometimes do some fine tuning in PSCS3. One useful tool I have been messing around with the past year or so is luminosity masks
 
In my opinion, the photos are exposed well, but developed slightly too long, which is being given away by substantial grain and somewhat dense highlights - try cutting the dev time to 11 mins or even to 10.
Moreover, it looks like you are not editing properly in PS with curves- the tonal separation and blacks could be better, can you describe your post processing?

I wondered about the time for development. It could have been more like 13.5mins by the time I'd poured in the stop bath. I had difficulty finding a time for HP5+ in D76 @250 so figured I'd try the full 400 dev time as I recalled someone on RFF stating they believe the times typically quoted by the massive dev site are too short. I'll try cutting time to 11 mins next time.
I also wonder about my PP skills. I took Vuescan's DNG into Lightroom, and adjusted eposure to about the right level, then used the highlights, shadows, whites, and Blacks sliders as little as possible to achieve what I felt was the best balance with no clipping. Can you describe where I'm going wrong/ your process?
Pete
 
I do not use Lightroom. Two things you could try are local sharpening ( local contrast enhancement) - perhaps in LR this is called clarity slider, and then if you want deeper blacks, you really need to CUT OFF the bottom few percent of gray (all values between 0 and 10 on the curves histogram set to 0). Also, make sure your monitor is calibrated, it could be too dark relative to average, and when you publish the photos they could appear lighter than desired.
 
and then if you want deeper blacks, you really need to CUT OFF the bottom few percent of gray (all values between 0 and 10 on the curves histogram set to 0).

Doesn't this just block out the lower tones?

This is clarity at 33 on the camera raw Photoshop plugin (is this what you mean by local contrast enhancement) :

clarity.jpg

Doesn't this reduce tonal separation in the shadows?

Pete
 
Thanks Chris. I've enjoyed looking through your site over the years, and watching your videos. Thanks for the reminder about curves. I think it's easy to over do things with PP, and I worry that I lose the natural nuances of the film by my heavy handedness in the midtones losing information in the shadows and highlights. On your link, you mention applying 3 curves adjustment layers to the image of the house with cars. Can you say a little more on the subject? i.e. are the curve adjustments global or localised?
Pete

The reason I did more than one curves layer is that I couldn't get the tones exactly as I wanted them with just one. All of them on the example image (below, for those who wonder what photo Pete B and I are discussing) are global adjustments.

neopan-1600-1.jpg


After doing the global adjustments, I usually do some local adjustments to balance out the tones. Looking at the example photo, I would darken the white van a bit, and slightly lighten the car on the extreme right edge of the photo. To do that, I would use curves adjustment layers with layer masks.
 
Back
Top Bottom