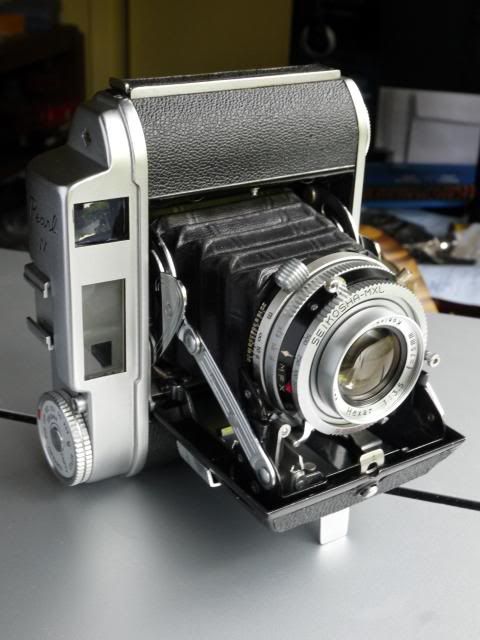
I just picked up a Pearl IV. For folks who have one, how do you like it? Any tips/tricks or things to look out for? Mine did not come with a case so need to figure out some kind of strap solution -- as the IV has no lugs and the case is the strap.
I had two here recently, both with issues, managed to make one good one out of both. One had a gear in the advance train with several stripped teeth. I suspect a nincompoop was responsible for breaking the gear when the camera was nearly new, still, I suggest being a little gentle when winding film just in case. [
Photo Added]
The rangefinder is a fairly conventional set up for a period Japanese camera, vertical adjustment is on the mirror perch, horizontal near the shutter, easiest accessibility ever. The finder eyepiece must be unscrewed from its threads in the rangefinder/viewfinder unit in order to remove the top cover. It has been temporarily re-fitted in the image below, in order too inspect clarity and adjustment of the finder and patch.
Like many Japanese rangefinders of its time the beam splitter is a simple sheet of coated glass affixed diagonally across the finder window. [
Photo Added]
I cleaned all the optics to achieve a brighter view. The beam splitter should on no account be touched directly. All you can do in situ is swab some cleaning fluid across the surface—this improved matters noticeably.
During cleaning, I noted some of the finder glass was a little loose in the housing—even a little stray alcohol from the process of cleaning a beam splitter can weaken old adhesives—when servicing old rangefinders, generally, this is something to be aware of. After examining the alignment, I secured everything with tiny spots of epoxy, to ensure all optics remain securely in position (something also worth considering with other old rangefinders—Eg. Contax II/III/Kiev RF wedges). In the above image you may see some transparent spots of clear Selleys Araldite epoxy which will ensure the components remain fixed in the correct locations for many more years. Don't try cementing lens elements together with Selleys; it's no substitute for UV cure polyester or Canada Balsam. For mounting finder optics, cover glasses, on the other hand, it's just fine.
At the owner's request I also installed a small rectangular piece of yellow glass—hand ground to size and shape from a piece of broken filter glass—ahead of the rangefinder window, to make the patch contrast a little higher. [
Photos & Text Added]
The mostly opaque Pearl IV front cover glass. Note clear rectangle for light path to pivoting mirror. Black discolouration at edges is residue of original adhesive, invisible when piece is installed.
A vintage yellow filter has been removed from its mounting, breaking in the process. This is OK (even a plus) as a suitable piece must now be hand ground to shape and size.
Below, a fragment is in the early stages of being reduced and shaped to fit the clear window in the cover glass.
Later, the filter glass is placed over the window to check for shape and fit: should be satisfactory. Though opaque the outline of the yellow filter remains visible behind the cover glass. This added additional time to the task of shaping the filter, compared to a conventional RF window within a solid cover, which would have entailed less finishing to shape as any uneven edges would not have been visible. Thanks, Konica.
The finished Pearl IV. Helicals cleaned and lubricated, focus checked and adjusted, rangefinder calibrated, shutter serviced, struts checked and lubricated, bellows checked and light proof. I didn't shoot with it—wanted to get it back to its owner, (I prefer 6x6 to 645, anyway).
A few more repair notes viewable with the original image series here:
https://www.flickr.com/photos/43224475@N08/50955086151/in/album-72157718331401856/


