Avotius
Some guy
Break out either the Mad Scientist or Heretical Prize of the Year out because I just did something really neat.
Yes as the title said, I mated the lens from my old brick to my Canon 20D. The result, digital photos from the old Cintar 50mm 3.5 lens! How cool is that. A very strange coming together of Rangefinder and DSLR.
Please dont stone me for this one!
Anyway what I did was remove the lens from the C3 and then the little brass colored ring which easily unscrews from the body, which I didnt find out of course until I had completely dismantled the body....naturally being a guy I didnt bother to go look for instructions or anything online to help me out with this, I just thought...dead camera, lens (with fungus), digital camera...why not....
Anyho back to the construction, I then took a canon lens cap and placed the brass ring in the middle of it and used the edge of a screw driver to mark out how big the brass part was then used a little jig saw and cut it out, then used a rounded file to file down the edges and then stuck the brass part into the cap from the back. It fit nice and tight but later I will epoxy it in there so it doesn't slip about and need to test for any light leaks. After that I just screwed the lens back onto the brass part but not all the way so I can focus the lens by rotating it in and out on the lens mount and now I can look through the viewfinder of my 20D and focus the lens. My only problem at the moment is that I can only take pictures very close, about .5 meters, but that will change fast because im in the process of cutting off a piece of the outer lens barrel that seems to be there just to stop the lens from screwing in too far, that way I will be able to lower the lens farther into the body (it wont hit the shutter) and be able to hopefully focus it out to infinity.
All together to get to the point where the lens was on the canon body cap and on the camera taking pictures: 30 minutes. I spent several days thinking about how I could do this (again without any instructions, who needs instructions...) but in the end it was a lot easier then I thought.
So in the end what do I have...a very capable platform, the Canon 20D, with the small compact fun of rangefinder lenses, together in a strange marriage of rangefinder and DSLR that is both compact and just plain cool.
More shots coming but what I got here is:
First shot: The Canon 20D and Argus Cintar 50mm 3.5 lens together.
Second shot: The lens removed showing the brass lens mount planted into a canon lens cap.
Third shot: Quick test shot of a cat to see if it worked. Aperture 3.5, distance about .6 meters, ISO 3200, 1/40 second (its night here right now)
Fourth shot: An early test shot of the lens after I cut out a piece of card paper to fit over the camera mount and cut a small hole for the lens to fit in, just wanted to see if it could be done.
After I get out and have some time to shoot the set up here some more ill post some more shots, whats up here now really is just quick snaps to see if it worked or not. Well, looks like it did! This is the first time I have ever "made my own lens" type thing, so this is pretty cool for me.

Yes as the title said, I mated the lens from my old brick to my Canon 20D. The result, digital photos from the old Cintar 50mm 3.5 lens! How cool is that. A very strange coming together of Rangefinder and DSLR.
Please dont stone me for this one!
Anyway what I did was remove the lens from the C3 and then the little brass colored ring which easily unscrews from the body, which I didnt find out of course until I had completely dismantled the body....naturally being a guy I didnt bother to go look for instructions or anything online to help me out with this, I just thought...dead camera, lens (with fungus), digital camera...why not....
Anyho back to the construction, I then took a canon lens cap and placed the brass ring in the middle of it and used the edge of a screw driver to mark out how big the brass part was then used a little jig saw and cut it out, then used a rounded file to file down the edges and then stuck the brass part into the cap from the back. It fit nice and tight but later I will epoxy it in there so it doesn't slip about and need to test for any light leaks. After that I just screwed the lens back onto the brass part but not all the way so I can focus the lens by rotating it in and out on the lens mount and now I can look through the viewfinder of my 20D and focus the lens. My only problem at the moment is that I can only take pictures very close, about .5 meters, but that will change fast because im in the process of cutting off a piece of the outer lens barrel that seems to be there just to stop the lens from screwing in too far, that way I will be able to lower the lens farther into the body (it wont hit the shutter) and be able to hopefully focus it out to infinity.
All together to get to the point where the lens was on the canon body cap and on the camera taking pictures: 30 minutes. I spent several days thinking about how I could do this (again without any instructions, who needs instructions...) but in the end it was a lot easier then I thought.
So in the end what do I have...a very capable platform, the Canon 20D, with the small compact fun of rangefinder lenses, together in a strange marriage of rangefinder and DSLR that is both compact and just plain cool.
More shots coming but what I got here is:
First shot: The Canon 20D and Argus Cintar 50mm 3.5 lens together.

Second shot: The lens removed showing the brass lens mount planted into a canon lens cap.

Third shot: Quick test shot of a cat to see if it worked. Aperture 3.5, distance about .6 meters, ISO 3200, 1/40 second (its night here right now)

Fourth shot: An early test shot of the lens after I cut out a piece of card paper to fit over the camera mount and cut a small hole for the lens to fit in, just wanted to see if it could be done.

After I get out and have some time to shoot the set up here some more ill post some more shots, whats up here now really is just quick snaps to see if it worked or not. Well, looks like it did! This is the first time I have ever "made my own lens" type thing, so this is pretty cool for me.
JohnM
Well-known
1) You are mad.
2) Wow, that is very cool - thanks for posting it.
Really nice results. Love reading this sort of stuff and seeing the results.
2) Wow, that is very cool - thanks for posting it.
Really nice results. Love reading this sort of stuff and seeing the results.
ppro
-
Interesting to see the image quality. Franken-what?
Avotius
Some guy
Update: It took a few hours but I was able to cut off part of the outer lens ring to make the lens focus farther away so now instead of half a meter it will focus out to about 2.5 meters, still not far enough. I need to figure out how I can alter the thing more so it will sit farther into the body (plenty of room before the shutter) so I can focus farther out. If I can at least get it to focus wide open out another 3-4 meters then it should be ok when I stop the lens down to shoot to infinity, so I hope at least. We will see because the lens is now about 80mm long on this body.
W
wlewisiii
Guest
Marvellous. Given how hideous the brick was in use there had to be something that kept them selling millions over decades. It wasn't just price - it was the fact that the lens could deliver.
Thanks for sharing this project.
William
Thanks for sharing this project.
William
Wimpler
Established
I have used the cintar lens on my pentax SLR using a pentax helical extension tube. That might be another interesting option, especially for pentax DSLR users.
Avotius
Some guy
Test Time!
Now we get to see how well this worked.
Canon 20D test camera had everything set to 0. Mirror lock up on, 2 second timer. Camera 2 feet from target. Camera on Benro Carbon Fiber tripod with Velbon wide base ball head. Shot in RAW and converted in photoshop then saves in jpg format at 100%. All pretty standard stuff, nothing fussed with, no sharpening, etc etc...
The conclusions are pretty obvious.
Very simple scene here (f16):
A few samples from around the scene in key areas of interest:
Top left bar code
Now we get to see how well this worked.
Canon 20D test camera had everything set to 0. Mirror lock up on, 2 second timer. Camera 2 feet from target. Camera on Benro Carbon Fiber tripod with Velbon wide base ball head. Shot in RAW and converted in photoshop then saves in jpg format at 100%. All pretty standard stuff, nothing fussed with, no sharpening, etc etc...
The conclusions are pretty obvious.
Very simple scene here (f16):

A few samples from around the scene in key areas of interest:
Top left bar code


Last edited:
Avotius
Some guy
Middle left boat
Middle right lens


Middle right lens


Avotius
Some guy
Upper middle film
Enjoy!


Enjoy!
pesphoto
Veteran
Pretty cooll stuff, I must admit. Seems llike youre having fun with it. Can we see more outside pics taken with this combo?
Avotius
Some guy
Overall my conclusions is that the lens wide open isnt so great but usable for portraits because of the soft effect on faces.
At f11 it has its highest contrast.
At f16 it seems to have the highest resolution but contrast takes a small hit.
At f11 it has its highest contrast.
At f16 it seems to have the highest resolution but contrast takes a small hit.
Avotius
Some guy
pesphoto said:Pretty cooll stuff, I must admit. Seems llike youre having fun with it. Can we see more outside pics taken with this combo?
Yes you can, tomorrow I will be taking the camera and lens into the outside world and do some shots with it, I will post them tomorrow.
ps. tomorrow is the first day of the symester (im a photography major), wait until I walk into class sporting my new bessa and leica lens and my 20D with argus lens. Most of the people in my class dont know the difference between a lens and a camera....
Avotius
Some guy
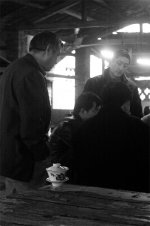
As promised, outside pictures. Kind of. I took these in a old tea house today.
My tea cup with a few leaves floating in it.
A Chinese style bench stool, lots of character.
Something scratched into the top of the old wooden table.
My tea cup with a few leaves floating in it.

A Chinese style bench stool, lots of character.

Something scratched into the top of the old wooden table.

anhtu
Member
nice work Avotius!!
Last edited:
Avotius
Some guy
oscroft
Veteran
Isn't there a mirror in front of the shutter?I need to figure out how I can alter the thing more so it will sit farther into the body (plenty of room before the shutter)
erikhaugsby
killer of threads
oscroft said:Isn't there a mirror in front of the shutter?
Not if you can permanently lock up the shutter. How that is done on a 20D I do not know, but I would love to be informed if someone figures out how.
kathytoth.ca
ktoth.ca
This is a very interesting idea. Congrats on getting it together! Looking formward to more shots
Avotius
Some guy
oscroft said:Isn't there a mirror in front of the shutter?
yes but I still got a good 10mm before the back of the lens gets close to the mirror, the beauty here is that after I figure out a way to lower the lens farther in it will be all good, but for now it works out perfect for what I use it for, which is close up photos.
The mirror on the 20D is pretty small so there is no problems with it smashing into it yet, also on a 30V film camera there has been no problem either, I dont know how happy my gf was when I was testing that on her camera (since I sold mine) to see if the mirror would hit the lens...
lkkang
Newbie
thanks for all the valuable feedback and sharing ... appreciated...
Having read all , I have also tried to figure out a little bit the technical difficulties behind this... yes, I am now enlightened !!!
But, why there is no a simple "glass" adapter that is able to does the light diversion, so that even if the lens should be mounted further away from the CMOS senor ( keep away from the mirror ), and that the glass lens adapter will correct the focus distance back again. based on my collage physics lesons, it is definately technical possible..
Anyway, I will also look into ways to play with the EOS400D firmware, should I have a break thru with this, I could resign from my present job and then start a whole new venture into this...
thanks again for all the information provided.
Kang
Share:
-
This site uses cookies to help personalise content, tailor your experience and to keep you logged in if you register.
By continuing to use this site, you are consenting to our use of cookies.