Metering for night stuff

CCCPcamera

Established
Local time
4:26 PM
Joined
Feb 19, 2008
Messages
125
I've been experimenting with colour film photography at night. I'm finding it difficult to meter for what I want. Often I want to get light tails, sometimes I just want to take pictures of people in cafés. Does anyone have some tips? All the stuff I can find online assumes you have a digital camera and can test things endlessly. Obviously not helpful for film. I want to know how to use my meter more reliably. Thanks!
 
Tri x or HP5 and and meter the highlights and let shadows go black.

Or pull processs, ie 200 and cut development 20%. Print on diffusion enlarger.

A spot meter is best

Flash the print to bring highlight so it prints easily with lowest contrast filter.

Set blacks with high contrast.

Commonly known as split grade printing which I do not normally do.

Go and shoot some popular scenes just to work out a system. Then go back and fire for effect.

Pick one f stop like 5.6 and always use it. All you have to do is remember shutter speed.

No high contrast film like TMax or Delta. You will always be fighting contrast. Stick with one film/developer. Tri x and D76 or Diafine for EI 1000.

The more you do, the less exposure problems. Bracket to start and keep a notebook.

Kodak Portra for color. 80B filter for correct color. Will cost 1.6 stops.
 
.. superia 800, f2.8 and as slow as you can hold .... or a d700 set to 'Auto' then sort it out in photoshop?


3032327338_f6e9029fb9_b.jpg
 
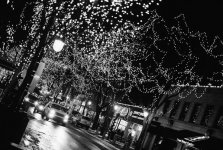
With colour negative film at night, you'll have a hard job overexposing, so don't be afraid to give it as much exposure as you can.

For light trails, you obviously need to think about how long it takes for the trail to be as long as you want it to be and give it enough exposure. Don't be afraid to overexpose by many stops, even if your meter says '1 second at f/8' don't be afraid to give it 8 seconds, that's only 3 stops overexposure, easy for a modern colour negative film like Portra 400.

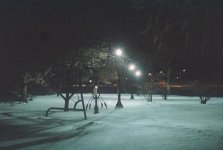
Honestly, I've done better listening to my gut than my meter at night.

For cafes etc. I'd just open up the lens to f/2 or as fast as you can go without compromising your desired DOF too much, and use as slow a shutter speed as you feel you can hold steady. With a modern 400 or 800 speed colour film, that should probably be OK.

Perhaps my advice isn't the technical advice you're after, but I've found that the darker it gets, the more unreliable my meter's advice becomes.
 
For what it's worth, I've burned highlights with Kodak Gold 400 at night if the scene included lit cafe interiors and the exposure was much slower than 1/15 and f2, two stops over the metered interior light of 1/30 f2.8... then again that was based on the minilab prints, the negs might have held a little more highlight detail.

Unless particularly dim, most diners and cafe have indoor evening lights of EV 5-6 (1/15 to 1/30 at 2.8 on iso 400). If you want detail to show up in the lit windows, I would not overexpose too far from that...unless, of course, your focus was on exposing detail on the darker outside environment.
 
You can work and refine your technique until your night photos look like they were shot in the daytime. Then you realize it is much simpler to just come 12 hours earlier or later.

Night scenes have a very large tonal range. Our brain expects to see blocked up shadows or burnt out highlights, sometimes both. Accept that and do not get hung up on technically eliminating it if you want your photos to look like night photography.

Your meter will never tell you the correct exposure. Only your brain can do that, maybe with some info from your meter. You need to decide what part of the photo needs to have the proper exposure, then be aware of what will happen to the highlights and shadows by knowing the range of your film. Only then can your brain figure out the exposure to give your photos the look you want.
 
I have done some night time street photography and had fairly good success by metering with a spot meter. This works if your subjects (people) are illuminated by a light source such as an overhead street lamp or something similar. If the subjects are in near darkness with no source of illumination, you have to take a different approach to metering. I am still working on how to best meter for such a situation.

I have found the Black Cat exposure guide ( http://www.amazon.com/Black-Extended-Range-Exposure-Guide/dp/097889930X ) to be an invaluable help for shooting at night. It is sort of like a circular slide rule that gives you exposure settings for dozens of different night scenes - neon lights, fireworks, lighted fountains, rides at a fair, etc.

The Black Cat claims to be only a guide and it recommends bracketing, but I have never found a need to bracket; I have always just used the exposure it indicates and have found that exposure to be very accurate.
 
These all boil down to what I said, trial and notebook.

I assumed darkroom prints, perhaps wrongly.

If you scan, then HDR techniques work . HDR does not mean cartoon unless you make it that way. Lights and darks can be scanned from a single frame at different exposures, then combined. Or you can make a series of under to over and scan all at normal scan exposure and combine as if you made in a digital camera.

Layers can be easily combined with a luminosity mask . Alternative is masking with burn and dodge applied to the mask on individual layers. Luminosity is self masking by luminosity value and is all feathered and really easy to work.

This works with monochrome and color.

I would not strive to make it look like daylight because you will not get there and the charm is having some dark areas without detail. I do not like blown highlights.
 
Night scenes tend to be very forgiving for exposure. A small table tripod can do wonders, since it's hard to handhold below 1/8, whereas a tabletop tripod can get you into the 1-5 second range easily. A sensitive incident meter is usually effective for indoor venues such as cafes. Light streaks usually require you to close down the lense in order to have a longer exposure -- for those "rivers of light" shots of streets, you sometimes need 30 seconds to a minute or more at something like f/8 depending on the conditions. Bracketing can help you get the hang of it. Another interesting technique is to set about f/11, open the shutter for a three or four minute exposure using a cable release on bulb, and use an electronic flash on f/5.6 or f/8 to "paint" the scene (taking care to make sure your body is not between the flash and the camera, which would create a ghostly silohutte of you.
 
Thanks for the comments, guys.

To clarify, I don't want to expose to "make things look like daytime". Quite the opposite. I've always found things at night more photogenic than during the day. I want black. Lots of black - punctuated with colourful lights/interesting lit details.

I just finished two rolls of plain Kodak 200 colour film. I'll have it developed soon. I made a bunch of exposures with different shutter speeds/aperture combinations. Mostly I was trying for light trails, people in windows, and neon signage.

We'll see how they turn-out.
 
Fred Parker's Ultimate Exposure Meter; or Kodak's table of exposures from an available light photography guide. Meter is useless.
 
It sure seems like the more I play around with meters, the more I discover they are easily confused. I'm getting better at gauging exposures without a meter, but I still often fall-back on it. I suppose optimally I'd be better at metering accurately, and only when I can't make a good guess.
 
I personally carry my phone and a meter app for most of my night work on film. I have yet to be let down by the results. I was trying to carry an old Nikon D100 body with a beat up lens with lots of aperture choices so I could do a few test shots, then set the film camera up to do the real work. But that was too much work, and I always have my phone with me.

Since you are looking for lots of dark spots and blacks with the lights leaping out of the shots, you might actually get pretty good results if you just meter in your head based on what your daylight exposure would be (Sunny f/16 rules) and then add a 1-3 seconds extra to it to make the lights pop. If your camera has a metering system, you can aim it at a bright light source that is similar to your subject and take some readings and use them as a base to go from. And then just shoot a bit over for happy glowy shots.
 
In this scene, it was tricky to meter because all the lights in the background gave me a faster speed than I thought I needed to lift out as best I could the lady's face. While she was lit by those lights her face was dimmer than the lights themselves. So I dialled down the shutter speed (from recollection, I think this was 1/15; btw it's Portra 400 pushed one stop).

10360402113_7e893647c5_b.jpg

Beer-drinking pretty lady | Flickr

There's a rather cool iOS app called Expositor which is basically a Sunny 16 list with some added bells and whistles. It goes to EV-6 and may give some suggestions as to how long the shutter needs to be open at various stops.
 
A lens that is sharp at f/2 or wider, using an ASA 400 film, you can take good exposures with 1/60th or 1/30th shutter speed. You can do this easily handheld using a rangefinder, or even a lot of SLR cameras.

Sorry, not a color film ...
10617540505_8834564100_c.jpg

Taken at f/1.7 and 1/60th shutter speed on an Ilford XP2 (400 ASA).
 
Go to your search engine and enter "New Jiffy Calculator". Print it out and use it. I find it works quite well with outside photos at night.
 
About meter limitations... I've avoided them by using a Sekonic L-308. These are the results with my newly acquired M4, 'cron 50mm and Kodak 400 (color and chromogenic).

attachment.php

Campus, late at night, looking overxposd.

attachment.php

Jefferson St in Naperville IL, during the holidays.
 

Attachments

  • 001A Naper Xmas Lights.jpg
    001A Naper Xmas Lights.jpg
    75 KB · Views: 0
  • R1-04527-016A.jpg
    R1-04527-016A.jpg
    24.2 KB · Views: 0
Back
Top Bottom