New Film Holder for Camera Scan

ColSebastianMoran

( IRL Richard Karash )
Local time
10:34 PM
Joined
Sep 15, 2010
Messages
2,734
Location
New Hampshire USA
This from Andrew Clifforth in the UK.

Looks pretty good to me; I have one on order and will post results when I get it. Film holder, spacing, and diffuser. Rig this over a video light for a camera-scan solution. 35mm and other formats.

image006.jpg


Clifforth Film Holder
 
Looks like a very good, and reasonably priced solution. Especially if you don't want to or just don't have the means to put together a DIY version... which takes time and effort, and may even cost more in the end...


Personally, I took the painful way to build my own film holder... My idea was a little different, in that the film is actually "floating", it has no contact with any surface below or above. I wanted that because I was tired of dust getting trapped, and I was inspired by the slide holders from DiaSpeed.
It looks like this, second shot with a 6×7 slide mounted:

film-holder.JPG


film-holder-with-6x7-slide.JPG


It's a little bit of fiddling to get the negative into the holder, but after a bit of practice, it goes pretty quick.

And for 35mm strips, I have found a very good solution. An old Nikon SA-21 film adapter for their scanners. I got it from a university surplus sort of bin... all you need to do is remove the plastic cover, which reveals a few gears that can be turned by hand to move the strip. I mounted a diffuser on the bottom, and added a little block of wood to keep the device level.

I don't have a picture of mine, but the SA-21 looks like this:


Nikon-SA-21.jpg


Just sharing my own experiments and ideas 🙂
 
I never would have even thought of using one of the Nikon transports for this..clever thinking. I think my scanner is finally pooping out and that might be useful in the interim.

Sadly I don't have access to machine tools anymore, but built a similar rig from foam core and matte board, and it's...passable. Nowhere near the precision needed for this type of work.

I ended up springing for the Negative Supply holders since I've got a couple very large archiving projects on hold, but I like the simplicity of this, and Hamish Gill's.

A while back I posted a thread musing on why there aren't any good batch scanners (Noritsu, Nikon, Minolta, etc) on the market anymore, since the DSLR scanning was still a 'DIY-ed from a shoebox and copy stand' affair. Glad to see more off-the-shelf solutions for those of us who don't have an entire machine shop in their garage.
 
He is asking a bit for it, but it looks worth the price for custom tooling, basically. I may have to consider it. Half a mm play may not be good, though... DOF in these situation is less than that.
 
He is asking a bit for it, but it looks worth the price for custom tooling, basically. I may have to consider it. Half a mm play may not be good, though... DOF in these situation is less than that.


I was wondering too... that might cause trouble, especially if you don't want to shoot at f8 or f11 or so.


Another thought I had was to simply use a broken film camera and run the developed film through it. If the camera uses removable lenses, one would just have to remove the lens and door, put the light source on either side and shoot from the other. Any thoughts on that? I think it could work, as long as one still has the negatives uncut. The film should be perfectly flat when running through the camera back...
 
I use a negative holder from an enlarger. The issue I find is stray light from the light table underneath. I have to make a black card roll to sit on top of this up to the lens. Otherwise it all works reasonably well. I'd much prefer a 'proper' film holder though.

A dead camera seems a pretty good idea but the same kinds of issues might arise - keeping it perpendicular, keeping it in one spot, not damaging the film, dust, stray light etc.
 
...


Another thought I had was to simply use a broken film camera and run the developed film through it. If the camera uses removable lenses, one would just have to remove the lens and door, put the light source on either side and shoot from the other. Any thoughts on that? I think it could work, as long as one still has the negatives uncut. The film should be perfectly flat when running through the camera back...

Interesting idea. Maybe with a Lucite diffuser as a pressure plate? I guess with 35mm you would have to wind the film into a cartridge to maintain tension and for an SLR, lock down the mirror (maybe "B").
 
When I was fiddling with this in 2008, I found that I was getting interference light from the sides. That is why I used a bellows slide holder for 35mm film (which really held the negative flat). And everything was fine but when I tried to do 120 there was reflected light as well in my case piped light through the clear plastic. Have any of you had this problem (as alluded to by Montag)?
 
I'm currently using an Amazon Fire tablet as a light source, lego bricks as risers and sandwhiching the negative film between ANR glasses
 
When I was fiddling with this in 2008, I found that I was getting interference light from the sides. That is why I used a bellows slide holder for 35mm film (which really held the negative flat). And everything was fine but when I tried to do 120 there was reflected light as well in my case piped light through the clear plastic. Have any of you had this problem (as alluded to by Montag)?


I use a Lomography Digitliza film holder with no issues whatsoever.
Just plonk it on a lightpad, shoot it with my camera held in a copy stand.


Important, I have to do this at night and/or in a dark room (not darkroom but that would also work!)
In daylight you will get reflections.
 
I use a simple black cardboard shade to prevent extraneous light from getting into the capture when I'm going for best quality and for when I can't darken the room. I lined th3 interior with adhesive backed black flocking I got at a hobby store. Easy to make for a couple of dollars.

G
 
I use a Lomography Digitliza film holder with no issues whatsoever.
Just plonk it on a lightpad, shoot it with my camera held in a copy stand.


Important, I have to do this at night and/or in a dark room (not darkroom but that would also work!)
In daylight you will get reflections.
San Francisco shot from Russian Hill? Fairly recent, since the new Bay Bridge from Treasure Island to Oakland is already in place... I live in SF, so it looked all quite familiar 🙂


It's funny that so many people mention stray light. I have really not had any issues with it. For MF negatives, I do use a couple of thick black cardboard pieces to block the light on the sides. However, a while ago I made some tests when I just had a light table and negatives on glass, and didn't notice a difference between using a cardboard cutout to block the light on the sides or nothing at all. Maybe I just got lucky, I don't know.


Reflections are a different thing though, that would mean that there is another light source than the one from the bottom. It's certainly best to kill all lights in the room except your light source when DSLR-scanning.
 
Since we are posting some examples.. here is one of mine. BW is a lot more fun to scan, no color conversion issues etc.

And in case I haven't raved about it enough yet... I am using a Sigma SD-1 for my DSLR scanning. I really think it's great for this purpose... but you be the judge (click the image to see the large version):


Recommendation: Kaiser Compound Negative Carrier

Recommendation: Kaiser Compound Negative Carrier

I am currently testing what Kaiser calls a "Buchbildbühne" (lovely German word), or Compound Negative Carrier in English. It is basically supposed to be used as a film holder in their enlargers.
They also sell the "FilmCopy Vario", which is meant exactly for the purpose of DSLR scanning. But that is basically the same part with some added extras, like a rubber mat which covers the surrounding lightpad (tailored for the slimlite plano), and a proper foot, both things you can easily DIY. Other than that it is the same thing as the Compound Carrier, which is much cheaper, hence I got that.

It takes different film masks from 35mm to 6x9 and there are even masks for 24x66mm pano shots. And it has adjustable bands in case you you want to further mask certain parts of the frame (e.g. when scanning 6x4.5 in a 6x6 mask). You can even get a mask template to make your own cutouts (given you can make such precise cuts in the sturdy plastic.

Pretty cool.

Only negative for me so far: While the 35mm mask has guarding rails, the 6x6 does not. You have to be carefully checking for proper alignment when scanning those, especially since I stitch several photos for my MF scans. But I have an idea for makeshift film guards.

An overview of the product range can be found here: http://www.kaiser-fototechnik.de/en/produkte/2_1_sortiment.asp?w=1365
 
What I would be interested in is some info on how you people align your cameras when scanning. Especially when stitching, you want perfectly level alignment of your camera and film. Even with a copy stand and a focusing rack I find it annoying to adjust everything until I shoot straight down, relative to the film.

I am curious, how do you do it?
 
Which of the Kaiser "Buchbildbühne" and negative masks are you planning to use? Plz spezify order number. Where do you buy those? Thanks in advance.
 
To align the camera to the film, there are two methods I have tried and both seem to work quite well:

1) A circular "bulls-eye" bubble level
You put it onto your light source, or, if you dare, right onto your negative (maybe do that with a disposable one), and align your setup until it's dead center. Then place the bubble level onto the screen of your camera and do the same (adjusting the camera only, of course, not your table...).

2) A flat mirror.
Place it onto your light source or negative holder. Look through your camera and focus it onto the circular opening of your lens. Now you should be able to adjust your camera until the lens is exactly in the middle. Guide lines in your focusing window should help with that.

I had never any problems using either of these methods. If you shoot at f8 or so, you should be fine. Much more important, in my opinion, is that the negative is perfectly flat.

In regards to moving the negative and keeping it aligned when making stitch shots, I use a microscope stage. It took me a while to find a nice one; I got lucky and found a very old one from Leitz, which has a 4" opening and glass window, which is perfect for putting the light source underneath. Unfortunately the Leitz table is very hard to find. But there are a few from Nikon, that are very similar.

Ideally you would want one that has a large aperture opening, so that you can put an LED pad underneath. And it should have manual adjustment controls for shifting the table. These micro adjustments move very slowly, but don't worry about it... all you need to do is make some small spacers, out of wood or metal for example, that move the stage by the amount you want. Place these in between the micro adjuster pin and table when making the stitched shots. This works very well for me...

Good luck!
 
A few images of my setup with the Leitz stage... click on any of them to see a larger, more detailed image.

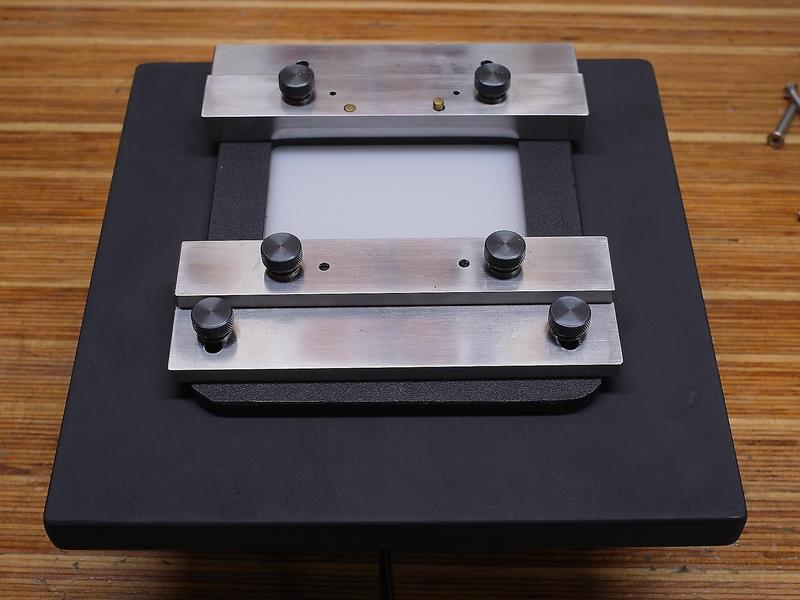
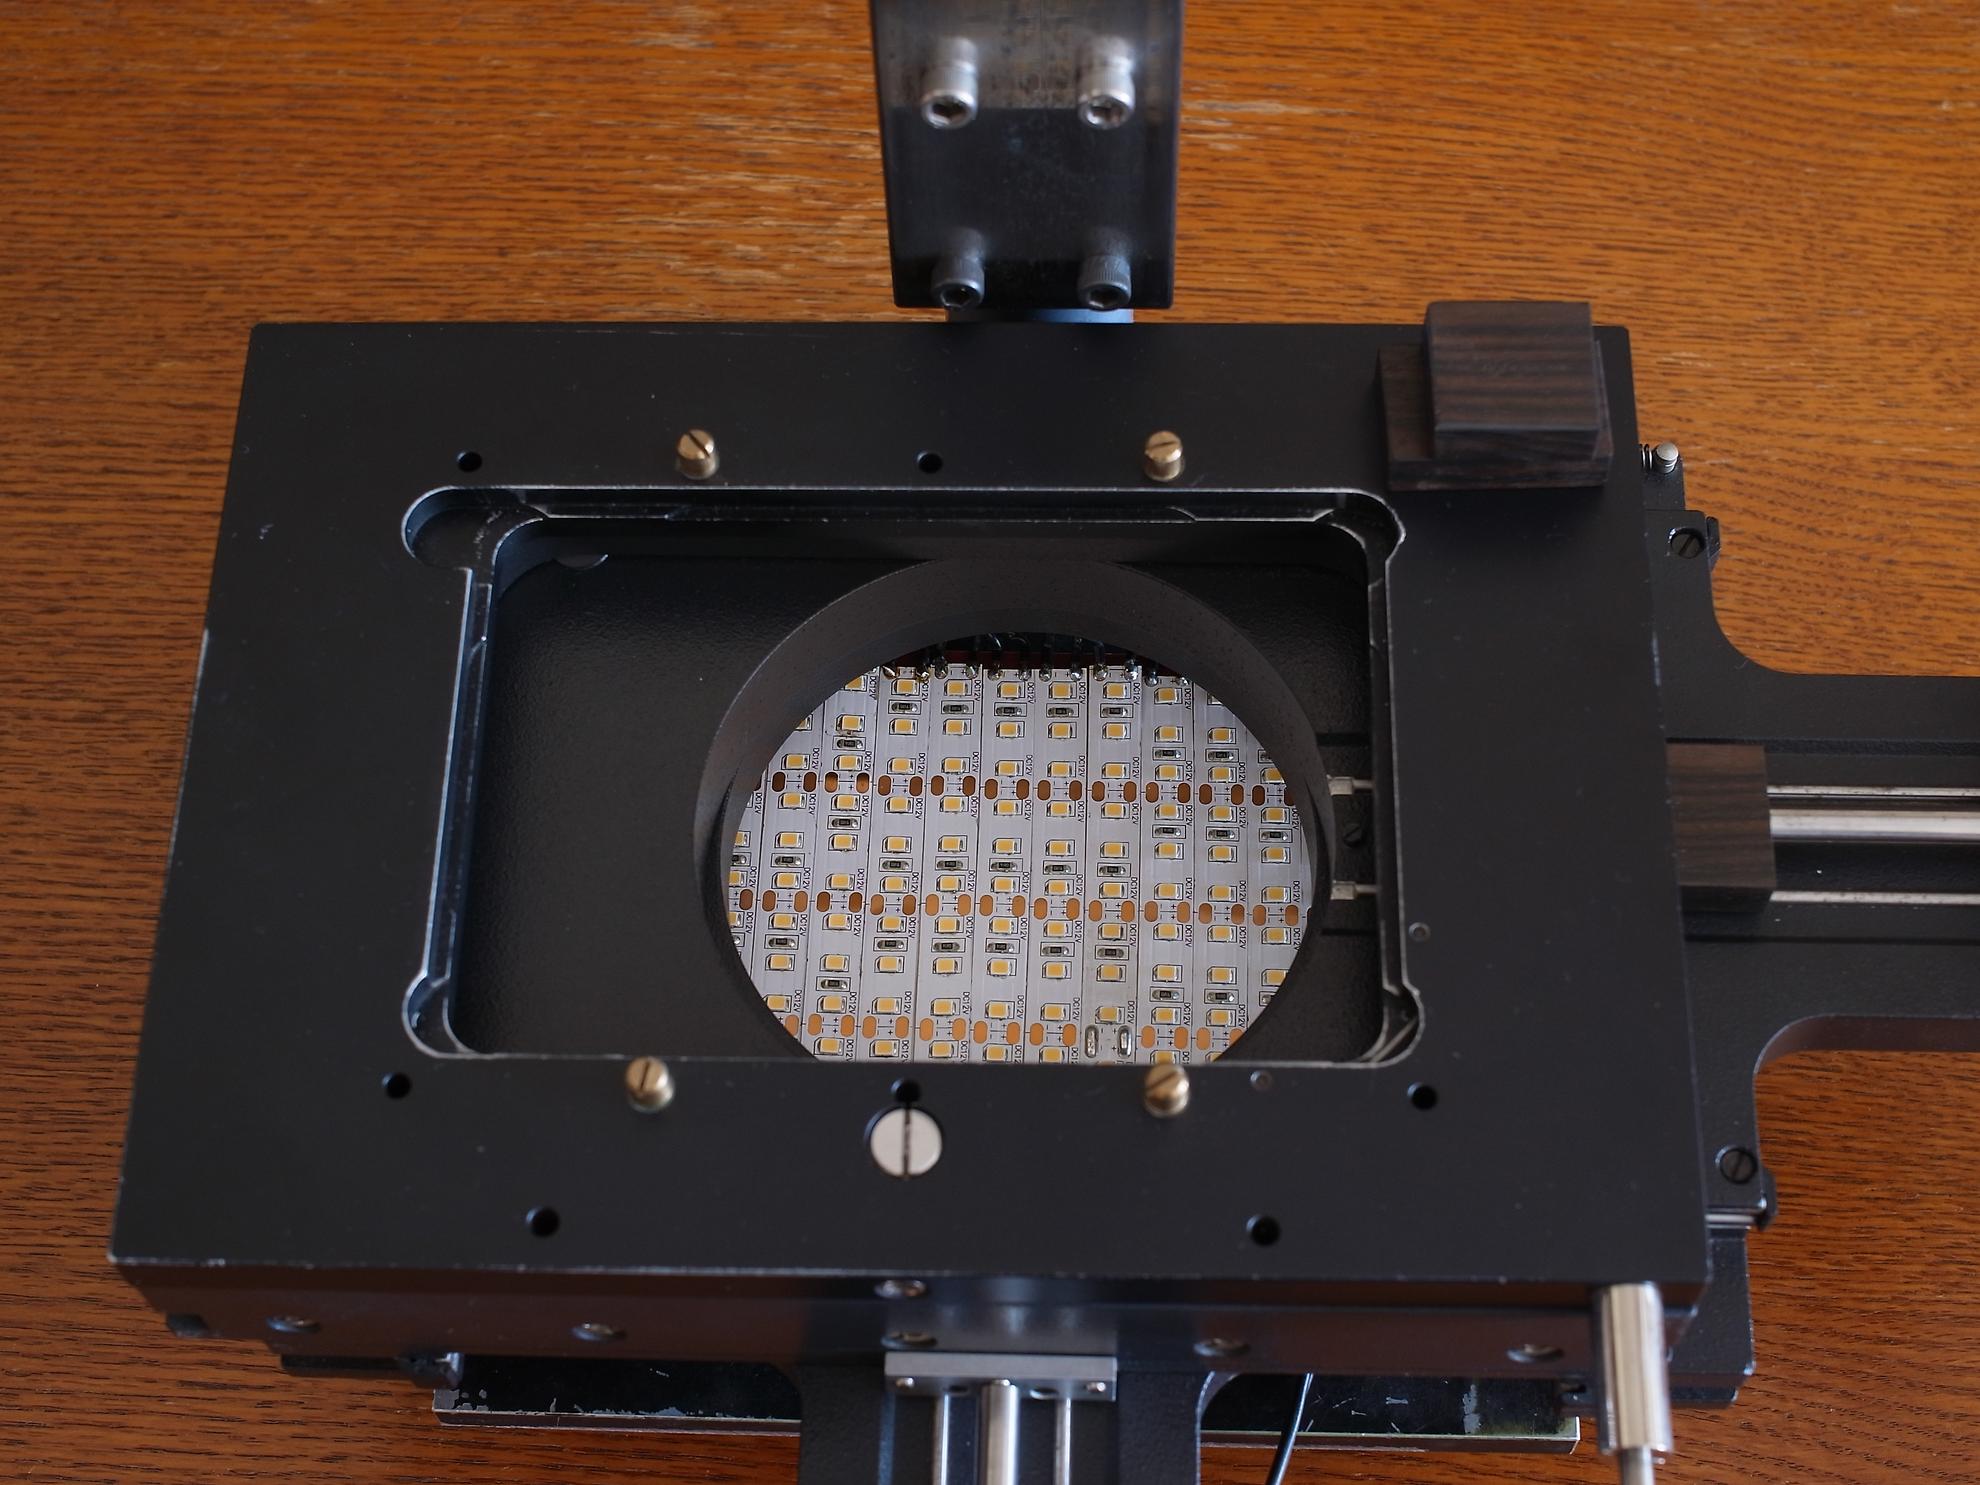
This first image shows the Leitz stage with the glass window, which is masked (necessary for 35mm scans). Notice the dark wooden spacer I made, one of which is placed between the micro adjuster pin and table:


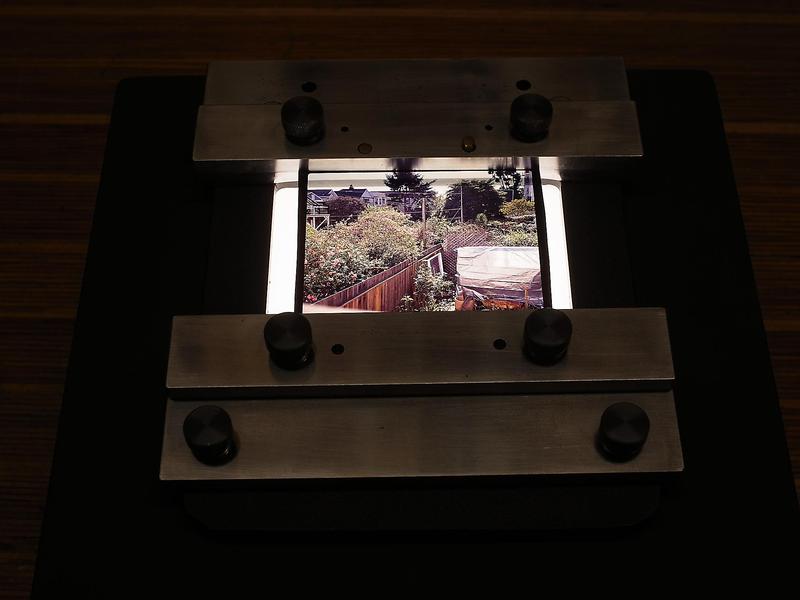
On the next image you can see the LED light source underneath. It's made up from a bunch of cut-off strips from a roll of Yuji LED flexible strip.


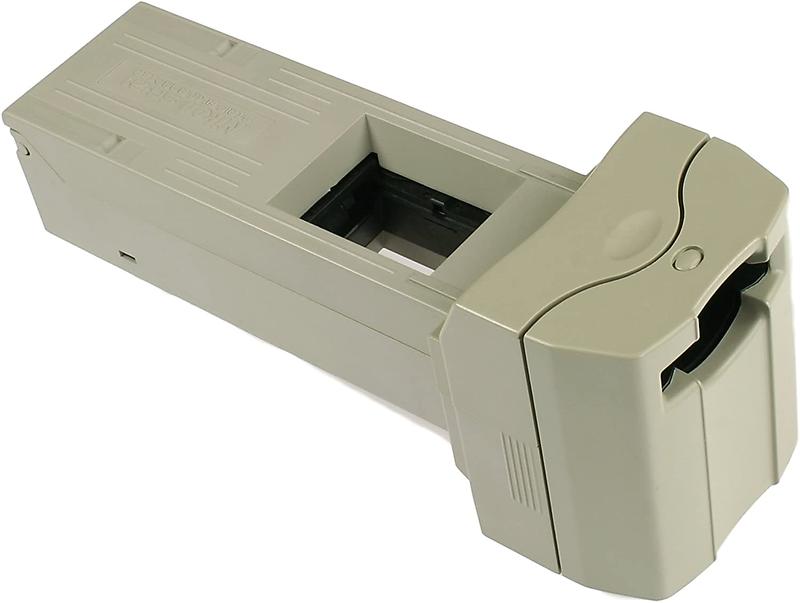
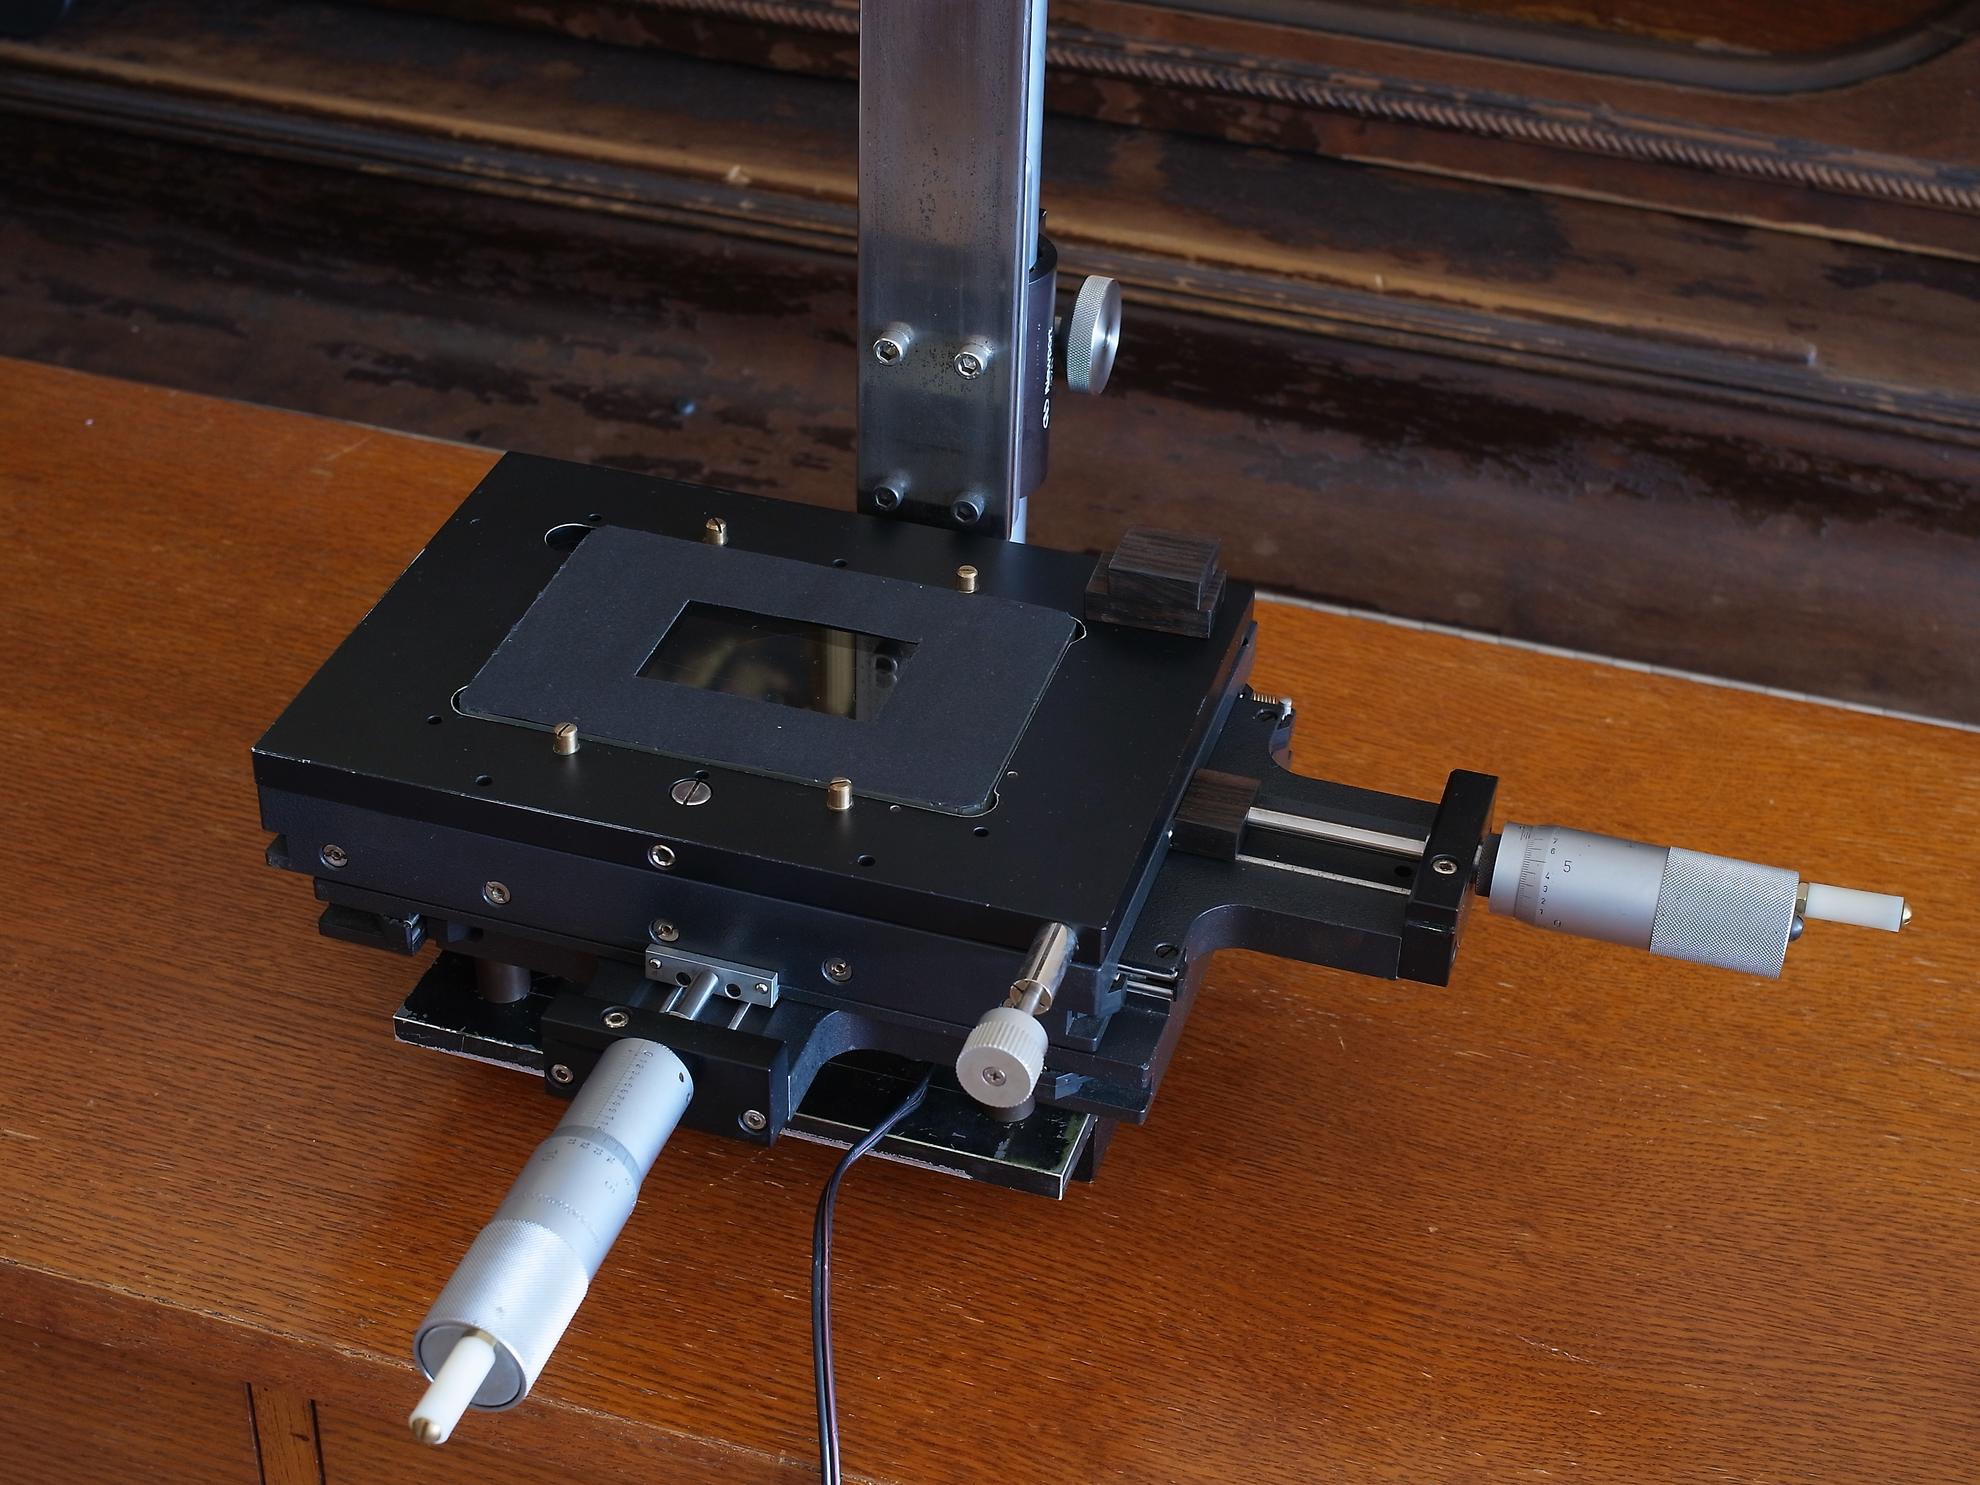
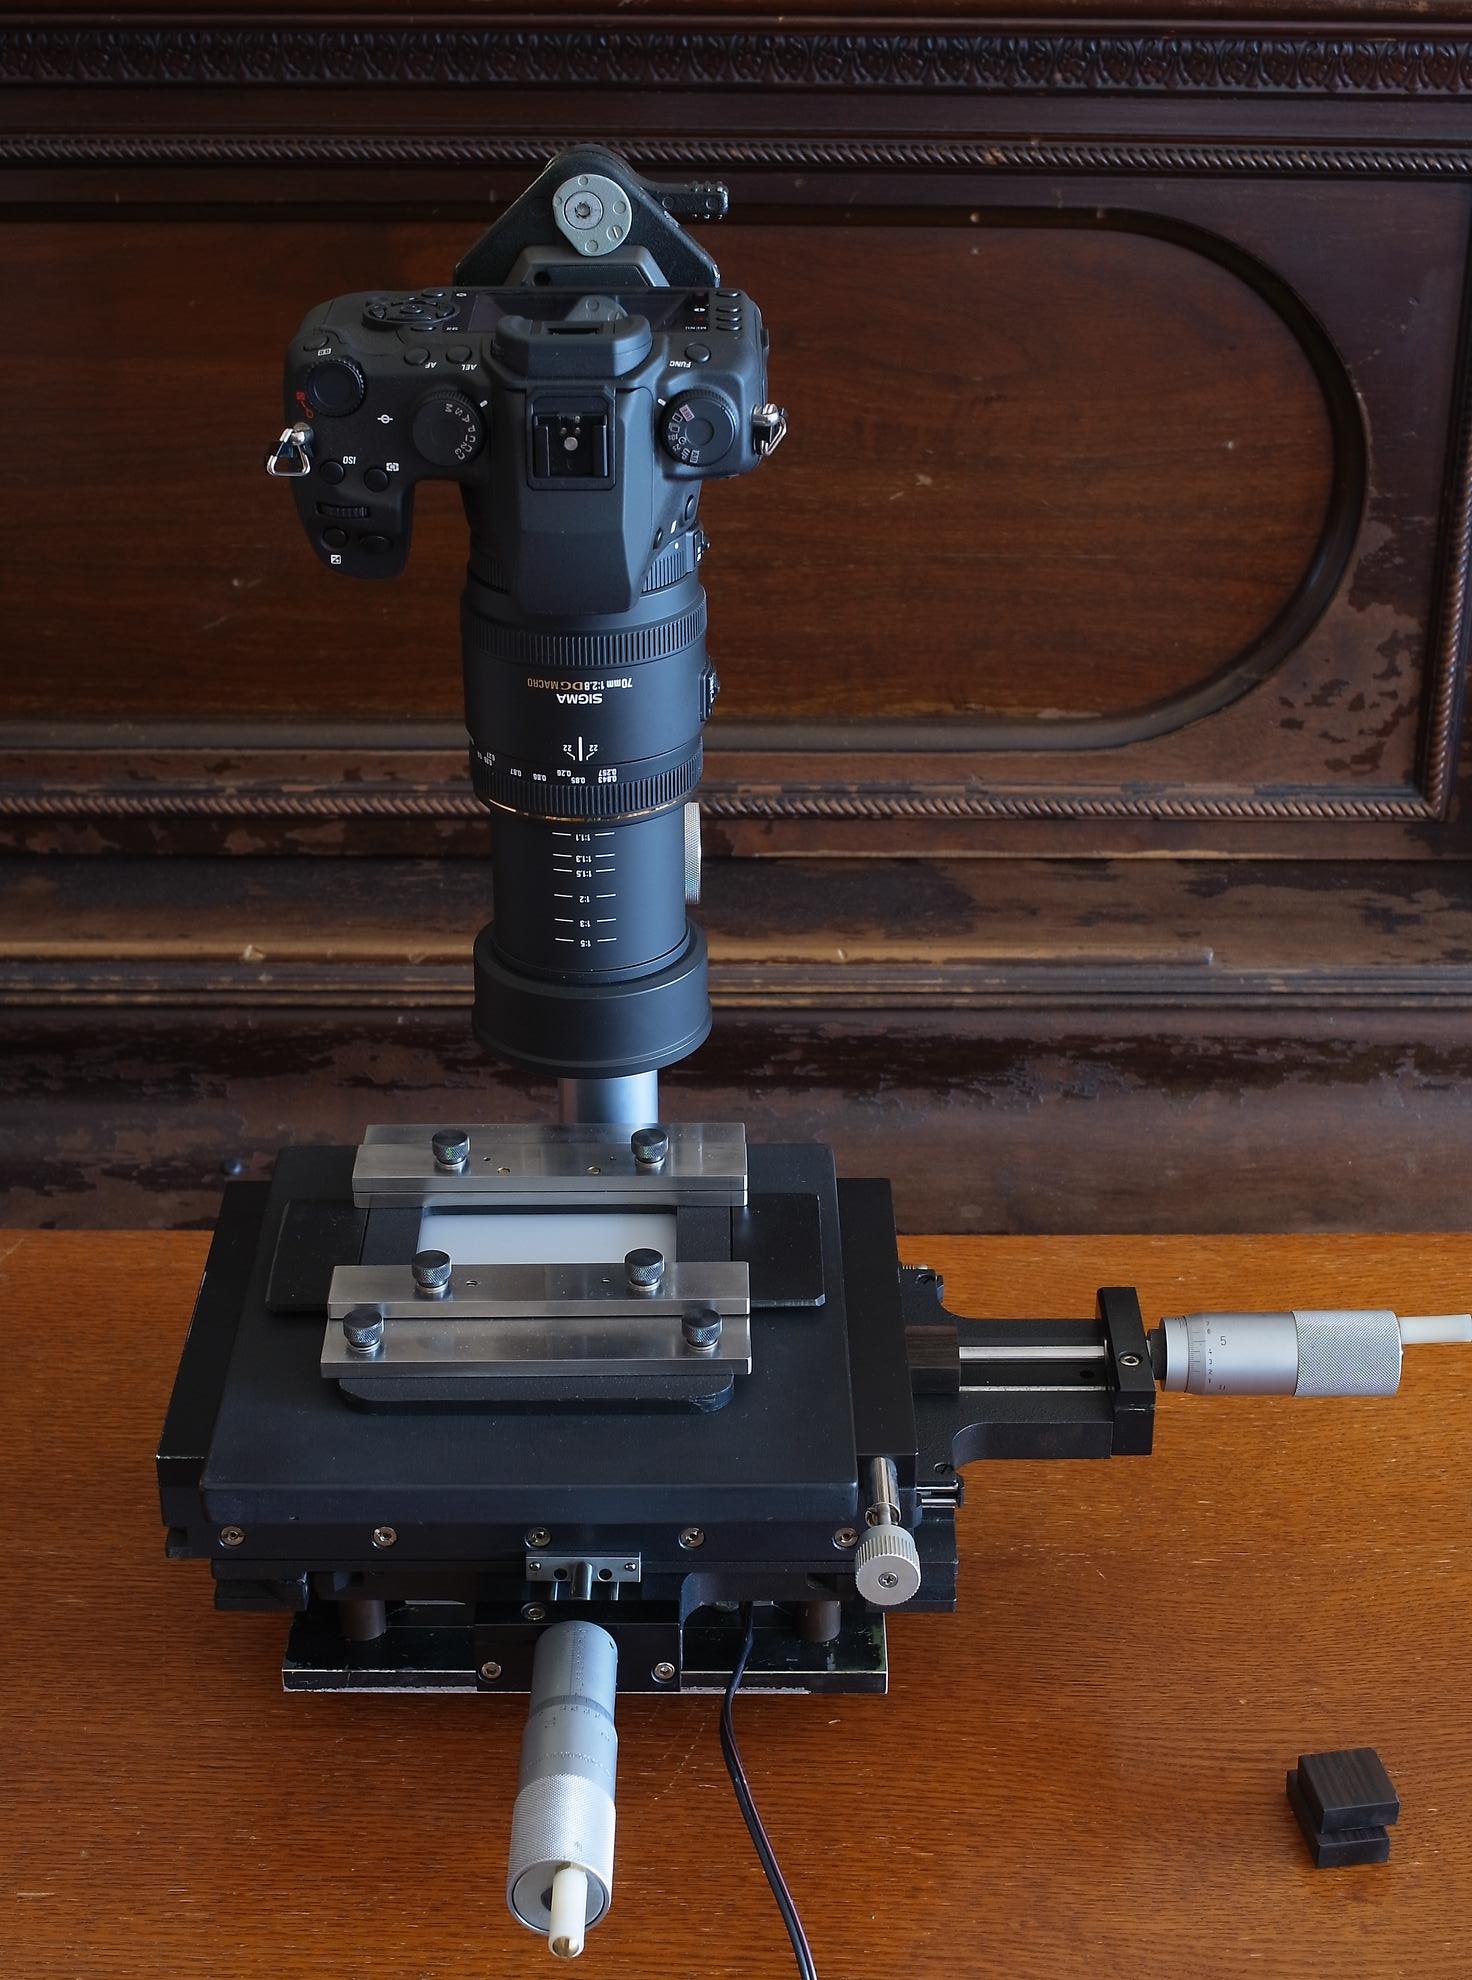
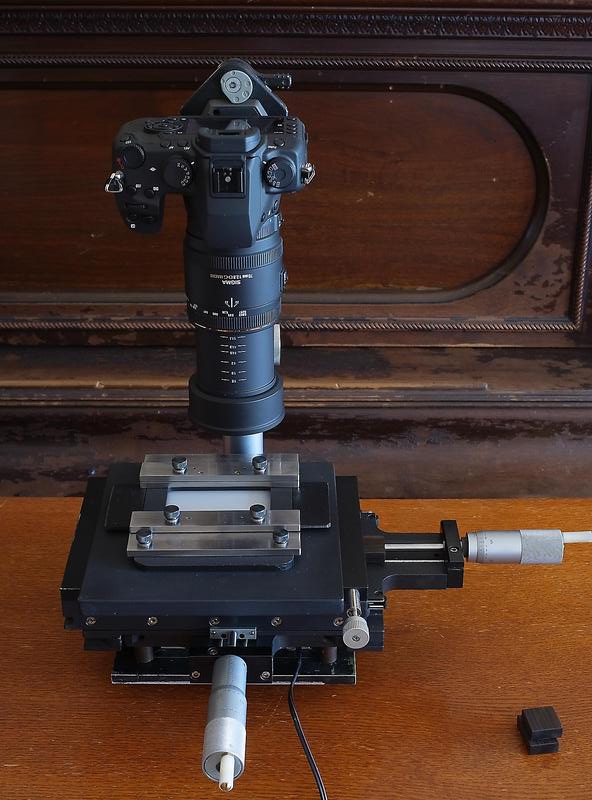
Another pic, now with my camera mounted, and the medium format film holder (see earlier post) on top of the stage. It aligns through holes that fit onto the brass pins of the stage:


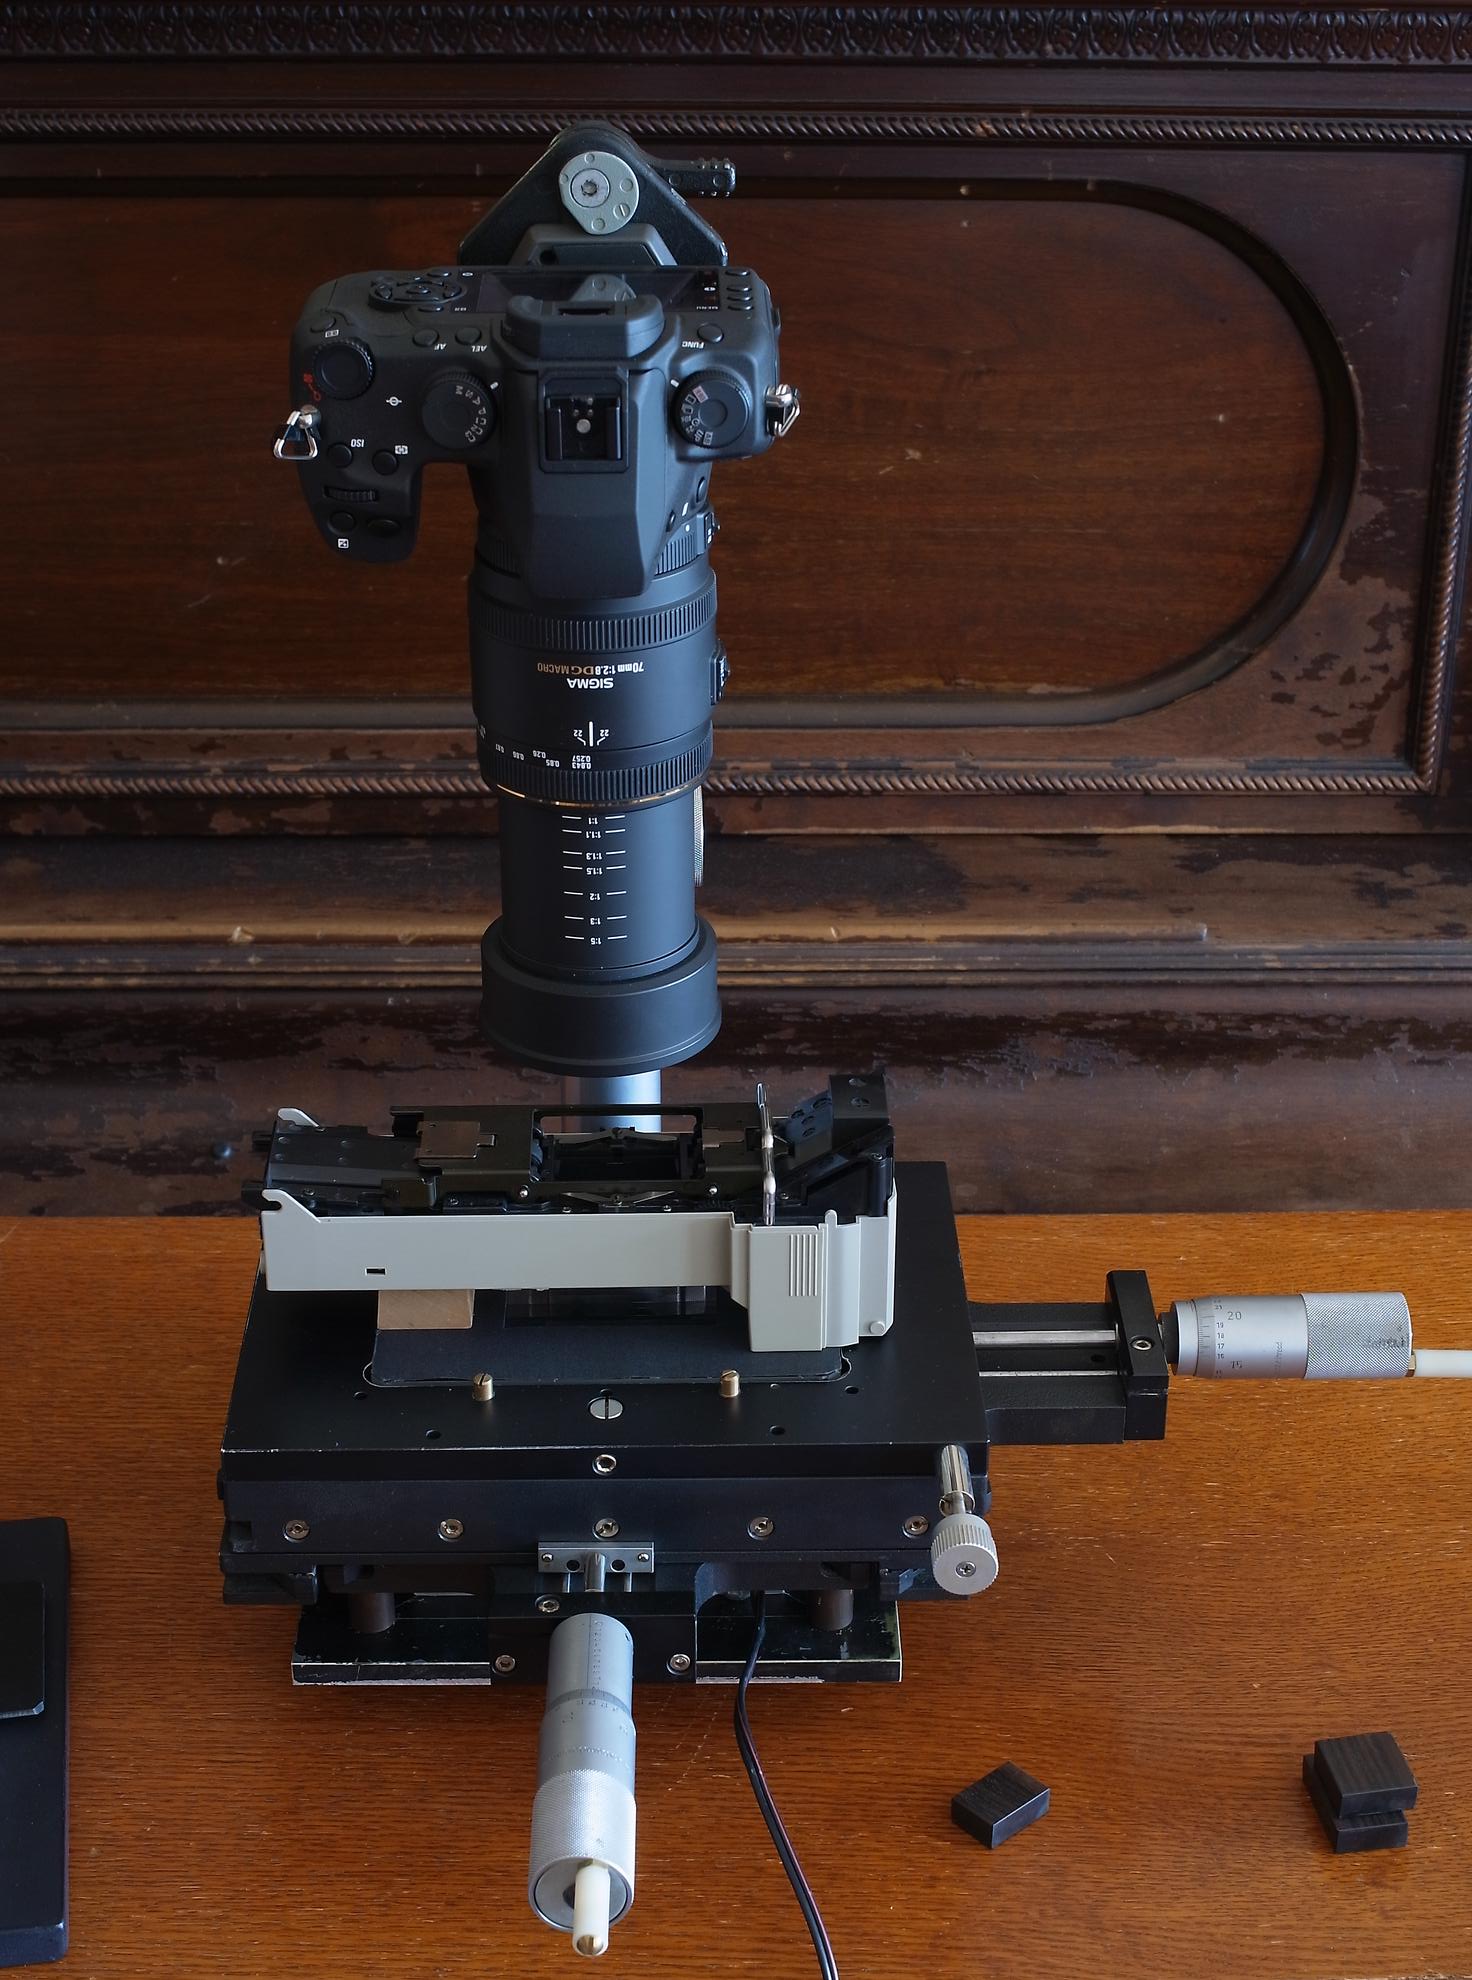
Last but not least, here my setup when I shoot 35mm film, using the Nikon 35mm adapter (see above post):


Now you know all my secrets 🙂

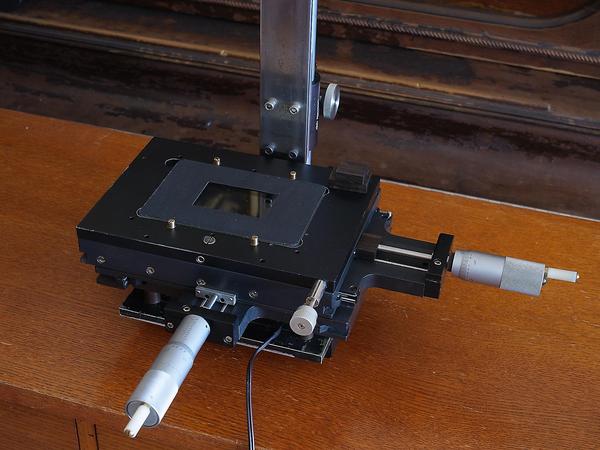
I am not saying that this is the greatest setup there is, but it is one that works really well for me. It is also fairly compact, yet very stable. However, it's very manual... if you want to get really serious about this, you may want to look into automated setups, that use motors for moving the negative etc.

There is lots of room for experimentation, I am only sharing my personal solution and 'hope to inspire others 🙂
 
... Half a mm play may not be good, though... DOF in these situation is less than that.

I don't think the half-mm hurts much. Film rests on the lower side of that slit, unless something strange is happening in the setup.

And, there is curvature of the film.

I do my cam-scan of negatives at f/5.6 and this usually keeps the whole image area in good focus.

However, with my very best lenses, optimal resolution is wider open; I have to do a focus bracket to take advantage of the extra resolution.
 
Back
Top Bottom