Patman
Established
Here is a tutorial on achieving the Orton effect for those of you that are interested.
There are many ways to simulate an Orton slide sandwich (a technique created by the Vancouver Island photographer, Michael Orton). You can do it using a technique for slides by overexposing two separate images and then, in the computer, stacking the images together in software and blending them. Personally, I prefer to take my existing digitized photos (either from film scans or digital camera files) and running them through the process below to see if they work as “Orton Images.” Here is the step-by-step recipe for making Orton images in Photoshop:
1. Open any image you wish to try the technique on. Make a duplicate of the image (“Image” > “Duplicate”). Close the original image.
2. Lighten the image as follows: “Image” > “Apply Image” Then, in the dialog box that comes up, change the bending mode to “Screen” and the Opacity to 100%. This will give you an appropriately overexposed image.
3. Duplicate this overexposed image (“Image” > “Duplicate”).
4. Blur this second image (“Filter” > “Blur” > “Gaussian Blur”) and in the dialog box use a Radius setting of 15 to 50 pixels – the higher the pixel setting the blurrier the photo and the more ‘painterly’ the image (but you can go too far!). Experiment with different settings, for my tastes and for the size of my digital files, a radius of about 25 pixels works perfect.
5. Now select the move tool from the Photoshop tool bar (or just press “v” on your keyboard for quicker access to the move tool). Hold down the “shift” key and use your mouse to drag and drop the blurry image onto the sharp one (don’t let go of the shift key until after you release the mouse button or the images won’t be in perfect alignment).
6. Bring up the layers palette in Photoshop (“F7” is the keyboard shortcut). Under the word “Layers” in the layers palette will be a menu box of blending modes. Change the blending mode from “normal” to “multiply”.
7. Now ‘flatten’ the two layers by pressing “CTRL+E” or by clicking on the sideways triangle in the layers palette to select “flatten image”.

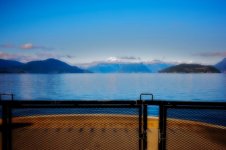
Click on image to see full picture (313kb) There, you now have an Orton image - if you like your new masterpiece, save the file!
Related Links
There are many ways to simulate an Orton slide sandwich (a technique created by the Vancouver Island photographer, Michael Orton). You can do it using a technique for slides by overexposing two separate images and then, in the computer, stacking the images together in software and blending them. Personally, I prefer to take my existing digitized photos (either from film scans or digital camera files) and running them through the process below to see if they work as “Orton Images.” Here is the step-by-step recipe for making Orton images in Photoshop:
1. Open any image you wish to try the technique on. Make a duplicate of the image (“Image” > “Duplicate”). Close the original image.
2. Lighten the image as follows: “Image” > “Apply Image” Then, in the dialog box that comes up, change the bending mode to “Screen” and the Opacity to 100%. This will give you an appropriately overexposed image.
3. Duplicate this overexposed image (“Image” > “Duplicate”).
4. Blur this second image (“Filter” > “Blur” > “Gaussian Blur”) and in the dialog box use a Radius setting of 15 to 50 pixels – the higher the pixel setting the blurrier the photo and the more ‘painterly’ the image (but you can go too far!). Experiment with different settings, for my tastes and for the size of my digital files, a radius of about 25 pixels works perfect.
5. Now select the move tool from the Photoshop tool bar (or just press “v” on your keyboard for quicker access to the move tool). Hold down the “shift” key and use your mouse to drag and drop the blurry image onto the sharp one (don’t let go of the shift key until after you release the mouse button or the images won’t be in perfect alignment).
6. Bring up the layers palette in Photoshop (“F7” is the keyboard shortcut). Under the word “Layers” in the layers palette will be a menu box of blending modes. Change the blending mode from “normal” to “multiply”.
7. Now ‘flatten’ the two layers by pressing “CTRL+E” or by clicking on the sideways triangle in the layers palette to select “flatten image”.

Click on image to see full picture (313kb)
Related Links