d_ross
Registered User
d_ross,
If you are using the 4"X5" neg holder, then you are scanning one 6X6cm frame per 4X5 carrier. In other words, two 6X6cm negs per loading. Is this correct?
That's right Gerry, I find the extra time it takes of little importance when I'm making larger scale works, and it does make a big difference to the scan.
Doing that and scanning to a target print size @300dpi I get scans from the v700 that compare very well with many much more expensive scanners, including drum scanners in the wrong hands. I have been scanning my own negatives for many years now, but to this day I find I'm still learning little things that improve them.
Gerry M
Gerry
That's right Gerry, I find the extra time it takes of little importance when I'm making larger scale works, and it does make a big difference to the scan.
Doing that and scanning to a target print size @300dpi I get scans from the v700 that compare very well with many much more expensive scanners, including drum scanners in the wrong hands. I have been scanning my own negatives for many years now, but to this day I find I'm still learning little things that improve them.
Thanks for the info. I'll give it a try.
gm
brbo
Well-known
Doing that and scanning to a target print size @300dpi I get scans from the v700...
I've heard this before, but never understood why would scanning to a target print size make any difference. And IRL never got a better scan* following that advice.
AFAIK, scanner absolutely doesn't care about it. It gets "sample at X frequency" command from driver and has absolutely no idea if the user specified a target print size @XXXdpi, final pixel size or resolution. Scanning program is responsible for resampling the data it gets back from scanner. I really doubt Vuescan or Epson scan has a resampling algorithm that is significantly better than those available in Photoshop.
I would really love to see a comparison of final scans using 'files size' (with used resampling algorithm specified) vs 'target print size' options, though.
* That is, I never got more detail out of the negative. Perceived sharpness varies with selected resampling algorithm, though. And I'm talking strictly about downsampling. Upsampling is another matter, but then I'm even more certain that scanning programs have absolutely no chance in beating specialized programs/algorithms for making up missing data.
d_ross
Registered User
I've heard this before, but never understood why would scanning to a target print size make any difference. And IRL never got a better scan* following that advice.
AFAIK, scanner absolutely doesn't care about it. It gets "sample at X frequency" command from driver and has absolutely no idea if the user specified a target print size @XXXdpi, final pixel size or resolution. Scanning program is responsible for resampling the data it gets back from scanner. I really doubt Vuescan or Epson scan has a resampling algorithm that is significantly better than those available in Photoshop.
I would really love to see a comparison of final scans using 'files size' (with used resampling algorithm specified) vs 'target print size' options, though.
* That is, I never got more detail out of the negative. Perceived sharpness varies with selected resampling algorithm, though. And I'm talking strictly about downsampling. Upsampling is another matter, but then I'm even more certain that scanning programs have absolutely no chance in beating specialized programs/algorithms for making up missing data.
All I can say is try it, especially if you make large prints, I print my work 60cmx60cm and 80cmx80cm, I made several comparison scans when I first purchased the v700 and always got a better file to a target size @300dpi. I will add that when I got my own scanner the man who did my drum scans for me prior told me this was what to do as it meant there would be no resampling of the file size post scanning.
brbo
Well-known
I said that I did try it and unfortunately can't say that I noticed any improvement.
If you do the math you will find that if you specify a target print size and print dpi you will never hit the exact native resolution of the scanner so there will always* be some resampling (in you case in the scanning software which is not better at resampling than Photoshop or similar software). Btw, what algorithm did you use for resampling for the scans that turned out inferior? At what resolution did you scan?
* Unless you are really really lucky with your selected print size, dpi, film format, scanner's resolution...
d_ross
Registered User
I said that I did try it and unfortunately can't say that I noticed any improvement.
If you do the math you will find that if you specify a target print size and print dpi you will never hit the exact native resolution of the scanner so there will always* be some resampling (in you case in the scanning software which is not better at resampling than Photoshop or similar software). Btw, what algorithm did you use for resampling for the scans that turned out inferior? At what resolution did you scan?
* Unless you are really really lucky with your selected print size, dpi, film format, scanner's resolution...
I guess this just goes to show that what works best you is the best thing to do
d_ross
Registered User
the scans that I compared this method to were made at 3200dpi ( which I believed to be the native resolution the v700 always scans at) to the original negative size being 6x6 and then resizing them in PS up to the print size I scanned to in the others @300dpi, in every case I had a much cleaner crisper file with the target print size @300dpi.
brbo
Well-known
No.I always thought that the scanner only ever scanned at its native resolution and everything else was resampled...
3200dpi is one of the native resolutions for V700 in the 'mechanical' sense. That is, this is one of the discrete values that the stepping motor can move at. V700 reaches it's max. real resolution (around 2300dpi) when scanning at higher 'nominal' resolutions 4800 or 6400 (4800dpi being the optimum choice as you gain nothing with scanning at 6400, but 4800 still gets more real data from negative than scanning at 3200).the scans that I compared this method to were made at 3200dpi ( which I believed to be the native resolution the v700 always scans at) to the original negative size being 6x6 and then resizing them in PS up to the print size I scanned to in the others @300dpi, in every case I had a much cleaner crisper file with the target print size @300dpi.
Now to solve the puzzle of the magic 'scan to target size' setting...
As you say your target is 60x60cm and I bet you scan 120 6x6 negatives. Considering the size of the image of the 6x6 format (and my math being correct) your requested resolution is just a bit higher that 3200dpi. I don't know what scanning software you use, but I know that is such cases Vuescan then orders the scanner to scan at first next higher native resolution (4800) and then downsamples to the requested resolution.
So, you effectively scan at 4800dpi and get all the detail the scanner is able to pull from the negative. As a bonus you also get some sort of sharpening (as a result of downsampling). On the other hand, when you scanned the negative at 3200dpi you didn't get all the detail from the negative and then you had to actually produce additional pixels with upsampling in PS to reach your desired print size. No wonder this scan looked worse/softer.
But, I agree. Use what works for you. 'Scan to target size' works for you because your alternative workflow involves upsampling. And it doesn't work for me (or somebody else) that initially picks high enough scanning resolution to avoid upsampling later in the workflow and uses appropriate downsampling algorithm when needed.
jvr
Well-known
I've heard this before, but never understood why would scanning to a target print size make any difference. And IRL never got a better scan* following that advice.
AFAIK, scanner absolutely doesn't care about it. It gets "sample at X frequency" command from driver and has absolutely no idea if the user specified a target print size @XXXdpi, final pixel size or resolution. Scanning program is responsible for resampling the data it gets back from scanner. I really doubt Vuescan or Epson scan has a resampling algorithm that is significantly better than those available in Photoshop.
I would really love to see a comparison of final scans using 'files size' (with used resampling algorithm specified) vs 'target print size' options, though.
* That is, I never got more detail out of the negative. Perceived sharpness varies with selected resampling algorithm, though. And I'm talking strictly about downsampling. Upsampling is another matter, but then I'm even more certain that scanning programs have absolutely no chance in beating specialized programs/algorithms for making up missing data.
Fully agree. The best (technical) way to do it is to scan at the physical scanner resolution and then resize using whatever algorithm we want/like.
That said, if using the resizing algorithm that comes with the scanner software works ok, why not use it?
A good thing to use this approach is that the scanner software may use a resolution half (or even 1/4) the physical resolution, if that's enough to get 300 dpi - or whatever - at print size. It may be faster and/or consume less memory.
Anyway, theoretically, the best in terms of detail and tonality would be to scan at the max resolution and then resize.
Lss
Well-known
I see there is already a lengthy debate about the first item, so I will not discuss it. The second thing (facing plus sign) really depends on the unit. The exact focusing height/distance varies from scanner to scanner, which is why you can and should fine-tune. For your unit, turning the stands to face the plus sign is the best option (or close to it).2 things to remember, scan the negs to the desired size ie 80x80cm for you @300dpi, this is better than scanning at 4800dpi original size then resizing in PS, and, make sure the film holder stands (small clips on the under side of the neg holders)are facing the plus sign. they come from the factory facing the negative but sharpness is increased when they are facing+ but you need nice flat negatives.
k__43
Registered Film User
I've a V500 which has similar specs as the V700 and I temporary have a Plustek8200 for 35mm to compare it with
I was always satisfied enough with the flatbed but now that I've seen the difference to what a film scanner can do I disgust the scans that come out of the V500. I had a 8800f before and can say it's not better and not much worse than the V500.
It might seem ok for 120, but actually all I can think is what would a real scanner make with those Mamiya 7 shots?
I find the work flow described before ok where you scan all with the flatbed and then scan the keepers with the plustek. actually one might think that the resolution of a flatbed is sufficient for the internet but even scaled down you can see the difference.
I'm so looking for the plustek 120! hopefully it will be in the reflecta M5000 price range
jvr
Well-known
I've a V500 which has similar specs as the V700 and I temporary have a Plustek8200 for 35mm to compare it with
I was always satisfied enough with the flatbed but now that I've seen the difference to what a film scanner can do I disgust the scans that come out of the V500. I had a 8800f before and can say it's not better and not much worse than the V500.
It might seem ok for 120, but actually all I can think is what would a real scanner make with those Mamiya 7 shots?
I find the work flow described before ok where you scan all with the flatbed and then scan the keepers with the plustek. actually one might think that the resolution of a flatbed is sufficient for the internet but even scaled down you can see the difference.
I'm so looking for the plustek 120! hopefully it will be in the reflecta M5000 price range
As I told on a previous post, I have both a V700 and a "real scanner" (a Minolta Multi Pro). With proper technique, the V700 will output a 2400 dpi scan from 120 film which is more than enough to print to A3+, and the difference to the Multi Pro (which is as "sharp" and "resolving" as my previous Coolscan 4000 ED - or better, if anything) almost zero.
Proper technique: flat film, adjusted height, correct sharpening.
Don't know about the V500, but the V700 is clearly better than my previous Perfection 3200 (used for 120).
This won't mean that a 2400 dpi scan (3200 dpi and resize) from the V700 equals a 4800 dpi from the Multi Pro, as much as you sharpen it, if you look at the fles at 100% (not at all!).
It's just that if you resize for screen or you print to A3+, the difference is much smaller than I realized it would be.
It's a different story for my Xpan negs/slides, that I usually print on roll paper (ie, larger).
jvr
Well-known
I've a V500 which has similar specs as the V700 and I temporary have a Plustek8200 for 35mm to compare it with
I was always satisfied enough with the flatbed but now that I've seen the difference to what a film scanner can do I disgust the scans that come out of the V500. I had a 8800f before and can say it's not better and not much worse than the V500.
It might seem ok for 120, but actually all I can think is what would a real scanner make with those Mamiya 7 shots?
I find the work flow described before ok where you scan all with the flatbed and then scan the keepers with the plustek. actually one might think that the resolution of a flatbed is sufficient for the internet but even scaled down you can see the difference.
I'm so looking for the plustek 120! hopefully it will be in the reflecta M5000 price range
Put it another way: if you already have a V700, and don't print to HUGE sizes, a "real scanner" won't make a ton a difference, if you take care of the details.
I never really tested the limits of my Epson R2400 and I tend to feed it with a 300 dpi file. But I almost bet I can't tell the difference between that and a 200 dpi file, even with a loupe (and I don't tend to look at A3+ prints with a loupe).
On the other hand, it's bliss to pixel-peep on a 4800 dpi scan of a Mamiya 7 shot from the Multi Pro, even if that resolution does not cover all the 6x7 area...
Come on, I have A3 prints from 6 Mpix files that came out my old Nikon D70s and look great!
k__43
Registered Film User
Put it another way: if you already have a V700, and don't print to HUGE sizes, a "real scanner" won't make a ton a difference, if you take care of the details.
I never really tested the limits of my Epson R2400 and I tend to feed it with a 300 dpi file. But I almost bet I can't tell the difference between that and a 200 dpi file, even with a loupe (and I don't tend to look at A3+ prints with a loupe).
On the other hand, it's bliss to pixel-peep on a 4800 dpi scan of a Mamiya 7 shot from the Multi Pro, even if that resolution does not cover all the 6x7 area...
Come on, I have A3 prints from 6 Mpix files that came out my old Nikon D70s and look great!
I don't print large but for 35mm I can tell the difference from my available scanner even after you scaled them down to a resolution fit for the net. Why wouldn't that be true for MF?
d_ross
Registered User
I have to disagree with the "if you print big the v700 is no good" comments here.
Of course it is totally dependent on your work and how you want it to look, but for me I'm happier with my own scans made from the v700 than I was with commercial Drum scans that cost me $100 each! I found the drum scans over emphasised grain, and found the v700 gives a more photographic look, but I'm not a pixel peeper either.
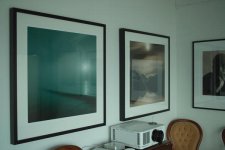
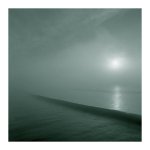
I print most of my work large scale, the photograph in the attached pics is 1 meter square image size and I have included an unretouched 100% crop from the original scan, the film was TMax100. I am convinced that learning the tricks of scanning is half, if not more, of the battle. But as with everything else you have to find a system and equipment that suits your aesthetic.
I use the Epson software with the v700, I tried a couple of others but they didn't appeal to me.
Attachments
jvr
Well-known
I don't print large but for 35mm I can tell the difference from my available scanner even after you scaled them down to a resolution fit for the net. Why wouldn't that be true for MF?
If you can really see a difference between what you call a "real scanner" and your V500 for web resolution (say 1280pix), something must be wrong with your V500 or how you use it. (I'm talking about resolution, you may prefer color and/or tonality, something that can be easily corrected on post).
Never tried a V500 but you mention, on a previous post, that it has the same specs as the V700. It should be ok for 35mm on Web (and probably even when printing large), let alone from 120 film.
Why the difference? Because the neg size is much bigger, so a much small enlargement. On the limit, take 8x10 (LF): a 150 dpi scan should give you a pretty good 1200x1500 file, more than enough for the Web.
I would say any scanner goes to 150dpi...
Now, take something like half-frame 35mm. To get the same pixel count you would have to scan at around 1500 dpi, more of a stretch.
With the Open (golf) going, still haven't got the time to make a few crops from the Minolta Multi Pro and my Epson V700 with and without sharpening at different resolutions, let's see if I can do it tomorrow. I will also include some 35mm scan to compare with my old Coolscan 4000ED.
But believe me: with proper sharpening, you could even prefer the V700 at 3200 dpi: since the grain is much less noticeable, tonality (especially with 400 ISO and upper film) will be more smooth, without any (drastic) loss of resolution. Several other posters referred that too: it looks more like film. In a good way.
At 2400 dpi is close enough for me to declare it a draw.
Again, if the V500 has the same specs as the V700, you should really try a better holder, some ANR glass and invest an hour calibrating height. Oh, and use Epson Scan: the sharpening algorithm seems very well suited to the scanner (suprise!).
Or maybe the V500 has the same specs as the V700 but it's different.
Or we were all very lucky with our samples of the V700 and pretty unlucky with the samples from other scanners.
johannielscom
Snorting silver salts
When upsizing your image to the print size in PS, try this:
instead of just at once upsizing it to the desired size, increase size by 10% a number of times until your required size is reached, then downsize to the actual correct dimensions.
Apparently the algorithm that PS uses is particularly good at creating an 11th pixel by 'reading' the original 10 pixels. Anything else is worse, too 'diluted'.
I'm learning lotsa new tricks in this thread, thanks to all posters!
ColSebastianMoran
( IRL Richard Karash )
Never tried a V500 but you mention, on a previous post, that it has the same specs as the V700.
...
Again, if the V500 has the same specs as the V700...
The V500 is NOT equal to the V700. Maybe there is an "optical resolution" spec which matches, but the results are not the same resolution.
I get nice sharp prints from my V500 scans up to 6x the linear dimension of the film; based on reports of others, the V700/750 produces higher resolution. The V500 will be fine for screen images from 35mm. I use mine for medium format.
k__43
Registered Film User
Yes the V500 has only about the same specs .. apparently the V700 has some more real life resolution.
I'd prefer actual sharpness over high pass filtering (or any other more clever method) in digital.
for the difference .. I'm not an exert but my guess is that when downsizing it is better to have more transients in the shot and the resizing algorithm might work better then .. I don't know really. You are prolly right when you pre-sharpen and then downsize the result should be equal-ish
jvr
Well-known
Epson V700 vs Minolta Multi Pro
Ok, finally got the time to post a few samples, all at 3200 dpi and no ICE, unless labeled otherwise.
Epson V700 with BetterScanning 120 holder + ANR Glass, Epson Scan
Minolta Multi Pro with Scanhancer, Vuescan.
Slide film, Velvia 100
Camera: Fuji GSW690 III, handheld.
Disclaimers:
1) The slide is a regular shot, no tripod, no critical focusing. (I will post a few deitals of some tripod test shots). So, some (probable) camera shake, some parts of image with less than stellar focus, some motion blur (leaves moving with wind). Real life, not optimized conditions.
2) Maybe using the Minolta Software the scans will be (even) better. If someone is kind enough to post a link to a version of Minolta software that runs on Lion, I would be happy to rescan and post.
3) I will be using links to my Dropbox, as attachments have to be so small that differences will probably be lost. If you can't see the files through the links, I will also post a link to the overall folder (files have descriptive names).
First, the overall image, so that you people can see the kind of cropping (enlargement) we are talking about. Scanned with the Epson, but at this resolution even with my old Coolpix 880 would be enough...
Scanned at 3200 dpi, no sharpening
Original size: 10459 x 6990 pixels
Resized in CS5 with Bicubic Sharper, no additional sharpening.
Auto Contrast (I usually scan with a bit of leeway both on highlights and shadows, overruling Epson Scan).
https://www.dropbox.com/sh/3gzlbnu822mhgjo/gTtuwkec6m#f:Epson Web.jpg
Next, a 732x837 pixel 100% crop to show some detail (try to find the cropping place. Hint: middle right):
Epson V700, no sharpening:
https://www.dropbox.com/sh/3gzlbnu822mhgjo/gTtuwkec6m#f:Epson Detail No Sharpen.jpg
Looks a bit fuzzy, especially when compared to the next one, from the Multi Pro, again with no sharpening:
https://www.dropbox.com/sh/3gzlbnu8...lti Pro No Scanhancer no Clean No Sharpen.jpg
Notice that the Multi Pro shows the grain in all it's glory (in fact, more than it should show but that is something I got used to with the Coolscan 4000ED). That's the price to pay for more "sharpness", at least without a drum scanner.
Using the Scanhancer does help with the grain:
https://www.dropbox.com/sh/3gzlbnu822mhgjo/gTtuwkec6m#f:Multi Pro no Clean no Sharpen.jpg
It also makes the scan look a lot like the Epson, with much lower local contrast.
So, it would seems that the Epson gets a beating...
Except that we can be really agressive with sharpening with the Epson:
https://www.dropbox.com/sh/3gzlbnu822mhgjo/gTtuwkec6m#f:Epson Detail Nik Sharpen.jpg
This was done using Nik Sharpener Pro plug-in with some tweaking, but using the Smart Sharpening tool from CS5 you get exactly the same results.
You don't even need to use CS5, the Epson Scan software does a good job sharpening:
https://www.dropbox.com/sh/3gzlbnu822mhgjo/gTtuwkec6m#f:Epson Detail High Sharpening.jpg
It enhances more the lower frequencies than the high frequencies. This means that prints will be good and pixelpeeping would be worse than it could be.
A simple Smart Sharpen filter of around 80% and 1 pixel on top of it gets it to the Nik Sharpener Pro territory:
https://www.dropbox.com/sh/3gzlbnu8...n Detail High Sharpening plus 80 rudius 1.jpg
If you compare the Epson + Nik version to the original Minolta scan, with no sharpening, probably you know will have a hard time telling the Minolta is better.
How about sharpening the Minolta? Well, you could...
But simply applying high frequency sharpening (the kind that makes small details pop on pixel level), grain will be too apparent, at least for me. And while sharpening on a lower frequency will indeed "show" more detail, that would happen anyway when sharpening (correctly) for printing...
Sincerely, I could get no better than what it was, without making grain to much apparent...
And with the Multi Pro and Scanhancer?
Well, it's much better than without Scanhancer:
https://www.dropbox.com/sh/3gzlbnu822mhgjo/gTtuwkec6m#f:Multi Pro no Clean Nik Sharpen.jpg
I can even see some pixelization, which may be an artifact of using Vuescan and not the Minolta software (or not...).
But is it heads-and-shoulders above the V700?
I dont' really think so: remember that this a really small crop out of a huge file, it would be like enlarging a 6x6.6mm crop from the negative at 3200 dpi, almost half a Minox frame!! (a Minox frame has 8x11mm).
If I repeated the whole process and resized to 2400 dpi before anything else (and I would still get a 5187 x 7729 pixel image: that's a lot...), I would say there would be no significant difference whatsoever even at pixel level.
Ok, but this is a handheld, quickly focused image. This means the details from the film will be less than with a tripod, optimal aperture, precise focus photo, right? And that would make the Multi Pro look better, because sharpening would reveal detail on the photo and not only random grain...
Well, that may be true (or not!) and that will be the subject of another post.
Here is the link to the Dropbox folder, if you can't follow the individual links:
https://www.dropbox.com/sh/3gzlbnu822mhgjo/gTtuwkec6m
Cheers!
Share:
-
This site uses cookies to help personalise content, tailor your experience and to keep you logged in if you register.
By continuing to use this site, you are consenting to our use of cookies.