Freakscene
Obscure member
It’s spratting; they are fishing for ‘sprats’ this is a fish like a small herring, scientific name Sprattus sprattus.This is one of the better ones in the batch.
View attachment 4831572
On the frame it is written: "Toilers of the sea. Hastings sprarting boat" .
View attachment 4831573
Freakscene
Obscure member
The middle one is definitely the Onze-Lieve-Vrouwekathedraal (Cathedral of Our Lady) taken from Groenplaats (Green Place). Beautiful.Fabulous images.
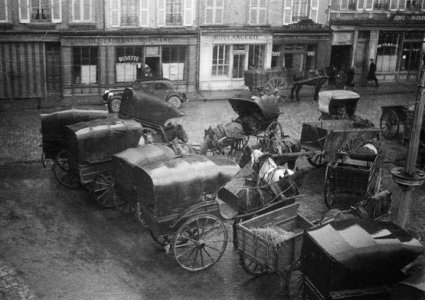
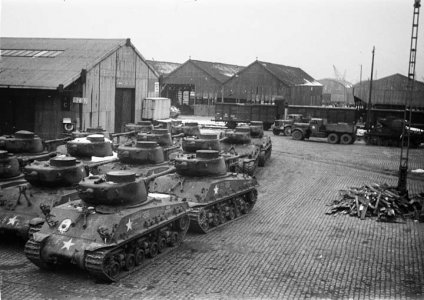
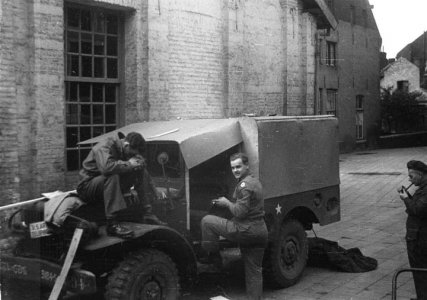
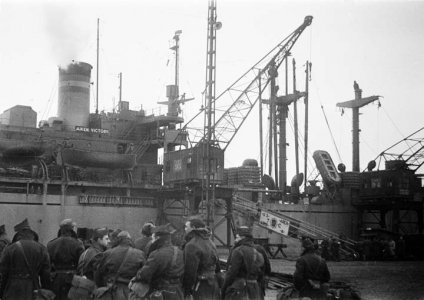
These were some of the photos my dad made during WWII in Europe. I believe these are in Antwerp.
Last edited:
x-ray
Veteran
Those are lantern slides. Unbelievable but when I worked for the Department of Energy, Oak Ridge National Lab, in the mid 70’s we still made lantern slides for projection at presentations.Perfect candidate for photographing rather than scanning. You can focus on the emulsion. Are they negatives or were they developed as positives?
I think they were 3.25x4.25 inches or may have 3x4 and Kodak still made B&W lantern slide plates. They were thin glass with an emulsion on one side. We printed negatives on them, often graphs and charts, and dektol was the recommended developer. They were then fixed, washed and when dry bound together with another thin piece of glass using a special heat resistant black tape. Sometimes a mask was sandwiched between the glass to create a dark border and make them look neater.
The projectors were quite large and ours were B&L and a carryover from WWII and may have been acquired through a surplus giveaway from the 1910’s.
I’ll have to see if I can find it easily but somewhere around here a have a child’s lantern slide projector that uses a tiny kerosene lamp. It’s in beautiful shape and in the original box with small slides and accessories and it works.
Freakscene
Obscure member
x-ray
Veteran
I have many rolls of 35mm nitrate film he shot during the war with a Russian copy of a Leica and Russian Elmar. I also have boxes of 6x9 glass plates around Europe during the war. I’ll try to locate my scans. Several years ago I scanned some of the better ones.
x-ray
Veteran
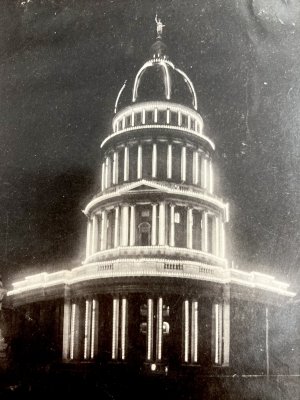
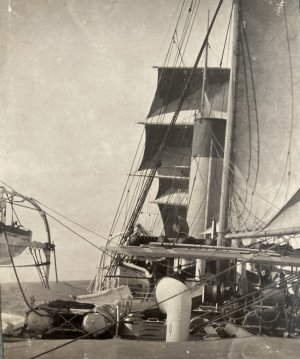
I believe the 1st shot is in Paris during the war. The others were in the camp he was in and the ship was the victory ship he came home in in 1946.
Attachments
dexdog
Veteran
I use this Honeywell projector, probably 1940s vintage, formerly owned by the Art Department at University of Ohio. I bought it about 15 years ago on eBay for $50. I re-wired it, works great. The thing is a beast, uses 1000 watt incandescent bulbs, probably bright enough to project images in a fair-sized auditorium. Good thing that the glass slides were bound with heat-resistant tape, a 1000 watt bulb gets pretty hot!The projectors were quite large and ours were B&L and a carryover from WWII and may have been acquired through a surplus giveaway from the 1910’s.


D
Deleted member 65559
Guest
x-ray
Veteran
I’ve seen a few of those around. Yeh the heat has to be pretty rough on slides. Have things ever come along way!I use this Honeywell projector, probably 1940s vintage, formerly owned by the Art Department at University of Ohio. I bought it about 15 years ago on eBay for $50. I re-wired it, works great. The thing is a beast, uses 1000 watt incandescent bulbs, probably bright enough to project images in a fair-sized auditorium. Good thing that the glass slides were bound with heat-resistant tape, a 1000 watt bulb gets pretty hot!
![]()
x-ray
Veteran
Lively couple and a fancy wedding. I think my parents were married in 1946. A lot of weddings about that time.My parents wedding in 1946.... photographer unknown (620? neg)....of course there was a formal studio portrait.View attachment 4831594
p.giannakis
Pan Giannakis
Reminds me of the opening scene of the documentary "After Hitler". This is how Berlin looked like. It is available online.View attachment 4831588
Berlin 1946. My grandfather had this; I inherited it when he died in 1991. I don’t think he had a camera, so he may have bought it.
p.giannakis
Pan Giannakis
x-ray
Veteran
Mackinaw
Think Different
These are from a box of 4X5 glass plate negatives somebody on my dad's side of the family took around 1915. All are from the Detroit, Michigan area. The car is a Studebaker. That's a brass-era Model T on the streets of Detroit. My great aunt and great uncle are on the far left and far right of the "peeling" photo. Great look-back at another time.


Jim B.


Jim B.
x-ray
Veteran
titrisol
Bottom Feeder
All the time travel we are doing here.... love it!
x-ray
Veteran
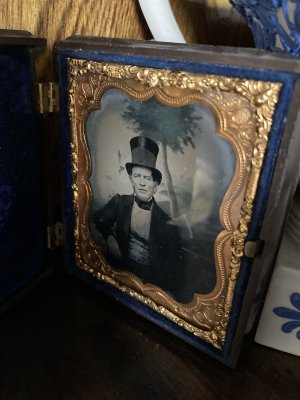
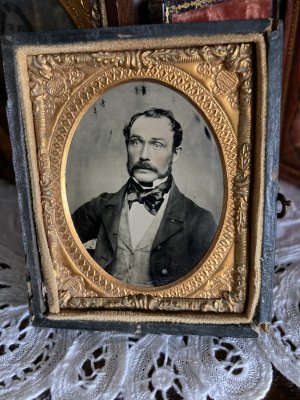
Here are two collodion images from around 1850-1870. Judging from the clothing I’d guess closer to 1850.
These are really fine examples of the art and in excellent shape. Although both images are collodion wet plate the gentleman in the top hat is an Ambrotype. Ambrotypes were made on deep ruby red glass rather than tin like the second image. There’s no advantage to one over the other that I’m aware of but I’d guess Ambrotypes were more expensive because the deep red color was due to gold in the glass.
Tintypes were exactly what the name implies. A thin sheet of tin coated iron or steel was coated with Japan black, an asphalt material, and baked on the back to protect it.
Just prior to exposing the plate, both materials were coated with a collodion, bromide and cadmium salt mixture along with diethyl ether and ethanol. The mixture was very viscous and poured on the plate and tilted back and forth to insure an even cost of the material.
Within a minute the mixture becomes tacky to the touch and then immersed in bath of silver nitrate. This has to be done under red light because this sensitizes the plate to light.
The next step is to take the “wet plate” and insert it in a special holder and expose it like film. All of this has to be done within a couple of minutes while the plate is still wet otherwise it won’t work.
While still wet, the plate is developed in what’s little more than vinegar and rust. Actually it’s acetic acid and ferrous sulfate, a food additive.
Development is done by holding the plate in your hand and pouring the developer on it while swirling the solution around to insure quick and complete coverage.
While watching the plate develop, at the point it looks right it’s immersed in water to stop development. Then it’s immersed in a potassium cyanide bath , extremely deadly, until clear and then rinsed for a few minutes.
When it’s dried it has to be coated with sandarac and lavender oil varnish and ethanol. This is done by heating the plate over a flame and carefully pouring the flammable mixture over the plate while swirling it to create an even coating. Doing this is necessary because the varnish seals the delicate image from deterioration and physical damage plus brings out the full tonal scale and color. Coating with varnish had to be done carefully because the varnish is highly flammable. I’ve made many wet plate images and have had a few burst into flames while varnishing. 😳
You might notice some plates are colorized. This was popular and was done with oil paint. Notice the face in the second image.
Sorry for the odd angle I shot these at but reflections are a problem and I didn’t want to remove them from the cases.
Attachments
Last edited:
D
Deleted member 65559
Guest
D
Deleted member 65559
Guest
D
Deleted member 65559
Guest
Share:
-
This site uses cookies to help personalise content, tailor your experience and to keep you logged in if you register.
By continuing to use this site, you are consenting to our use of cookies.