tobinharris
Established
Hello R-D1 forum
Well, its almost been a week since I got my R-D1 to discover life beyond "point and shoot".
One thing that's puzzling me is what to aim for with photoRAW, or any other PP toolset.
I recently went through a set ofimages at least 3 times, and struggled to get output I was happy with. Heres he set... http://www.flickr.com/photos/63003847@N00/sets/72157626983677374/with/5842558225/
(Taken with r-d1, cv 25mm f4 Color skopar, evening between 5pm and midnight, UK summer)
Exposures I kinda like...

The Candle by tobinharris, on Flickr

The birthday boy by tobinharris, on Flickr

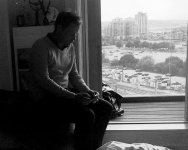
On the balcony by tobinharris, on Flickr
-
-
I don't like these... Balance seems off, but hard to get contrast and clarity.
-
-

Looking down by tobinharris, on Flickr

Handing out cake by tobinharris, on Flickr

Chilling' by tobinharris, on Flickr
I've learnt that I shouldnt blow the whites too much, and want achieve good contrast and clarity. But it's so tough finding a balance. And I've a lot to learn about metering and exposure, but I'm reading about the basics all the time now.
Where would you recommend I learn more about how to get this right? or is it just about taking time, practice?
As always, any thought, criticism, help appreciated 🙂
T
Well, its almost been a week since I got my R-D1 to discover life beyond "point and shoot".
One thing that's puzzling me is what to aim for with photoRAW, or any other PP toolset.
I recently went through a set ofimages at least 3 times, and struggled to get output I was happy with. Heres he set... http://www.flickr.com/photos/63003847@N00/sets/72157626983677374/with/5842558225/
(Taken with r-d1, cv 25mm f4 Color skopar, evening between 5pm and midnight, UK summer)
Exposures I kinda like...
The Candle by tobinharris, on Flickr
The birthday boy by tobinharris, on Flickr
On the balcony by tobinharris, on Flickr
-
-
I don't like these... Balance seems off, but hard to get contrast and clarity.
-
-
Looking down by tobinharris, on Flickr
Handing out cake by tobinharris, on Flickr
Chilling' by tobinharris, on Flickr
I've learnt that I shouldnt blow the whites too much, and want achieve good contrast and clarity. But it's so tough finding a balance. And I've a lot to learn about metering and exposure, but I'm reading about the basics all the time now.
Where would you recommend I learn more about how to get this right? or is it just about taking time, practice?
As always, any thought, criticism, help appreciated 🙂
T