miloss
Member
Hello all,
Can anyone tell me how to remove the front element on Elmar 3.5cm f3.5 m39 lens for cleaning its underside? It is hazy.
Thanks in advance!
Can anyone tell me how to remove the front element on Elmar 3.5cm f3.5 m39 lens for cleaning its underside? It is hazy.
Thanks in advance!
charjohncarter
Veteran
I have a Serenar 35mm f/3.5 which might be a copy of the Elmar. I regularly clean it if you can find out if they are similar I will send you some images of my disassembly workflow.
This is what mine looks like: https://www.ebay.com/i/233181697927...MIn_fA-sic5wIViobACh0JUA2SEAQYAiABEgI7avD_BwE
This is what mine looks like: https://www.ebay.com/i/233181697927...MIn_fA-sic5wIViobACh0JUA2SEAQYAiABEgI7avD_BwE
miloss
Member
Thank You!
Thank You!
Hello, and thank you. It does look very similar, in respect of the fact that there aren't ant lens spanner notches on the front ring, to which the spanner teeth would grip in order to turn it.
Yes, please send me the tutorial. My email is 1dsmark2 at gmail dot com.
Cheers!
Mike
Thank You!
Hello, and thank you. It does look very similar, in respect of the fact that there aren't ant lens spanner notches on the front ring, to which the spanner teeth would grip in order to turn it.
Yes, please send me the tutorial. My email is 1dsmark2 at gmail dot com.
Cheers!
Mike
charjohncarter
Veteran
Will do, but today I'm a little busy so you will get them tomorrow.
02Pilot
Malcontent
I'm not familiar with that particular lens, but if there aren't any notches on the front ring you usually need a rubber friction tool (hardware store drain plugs and rubber stoppers work fine).
miloss
Member
@02pilot
I am aware of the friction tool possibility. I just wanted to make sure I do it the right way.
I am aware of the friction tool possibility. I just wanted to make sure I do it the right way.
peterm1
Veteran
Even though the dress ring may have no slots for a lens spanner, there may be a further ring below it that actually retains the front element, that does have slots - this would be normal. Hence you will very likely need a lens spanner. If you do not have one, you may be able to do as others have done, and fabricate one from a pair of engineers dividers (by grinding the tip into a screw-driver shape or points depending on how the lens ring is configured). This type of arrangement may in any event be more convenient than using a normal commercially bought lens spanner given how small these Elmar lenses are.
When I disassemble a lens I tend to first put down a white or light colored towel as a working surface (white so I can see small screws etc). It protects lens elements if they are fumbled and dropped (quite common for me) and also prevent any tiny parts bouncing off the work table and then disappearing into a crevice at floor level. I then line up parts that have been removed from the lens in order of their removal (from left to right) then when reassembling them, I can just work backwards (from right to left). This makes the process easier especially if you are new to it. Also take note of how you have placed the lens element(s) - either front side down or front side up and stick to this pattern for all elements (if you need to take out more than one) so that you always know the correct direction of the elements when reassembling.
Of course with your task you may not have to bother so much, as removing a single front element is perhaps the easiest task that a neophyte lens repairer ever has to do. Especially in the case of the 35mm Elmar, given its optical layout. Oh BTW once you remove the retaining ring, a lens element will generally drop out of its mount by turning the entire lens upside down and tapping its face against the palm of your hand (to catch the element as it falls). If it does not come out easily you may need some kind of suction device (they can be bought for this specific purpose but a piece of sticky tape also works - bend one end over to stick to the face of the glass and pinch the other end and lift. With luck that will get it out). And another thought - the friction tool can also be extemporized by going to a big hardware store (lots of choices) and looking around. Often you can find rubber tips / protectors designed to go onto the tip / foot of something - feet of a ladder, feet of a chair, a walking stick or umbrella or whatever. They come in various sizes so its a matter of finding one that is the correct size for your specific needs. You want something soft and quite flexible. Rubber bathroom wash basin plugs sometimes work too although these are probably too big for your needs with this lens.
Examples:
https://www.google.com/search?q=bun...nAhVWzTgGHT1SB2UQsxh6BAhFECw&biw=1920&bih=937
The Elmar's optical layout.
miloss
Member
Peter,
Thank you for an extensive reply. I have one question. Is the dress ring the one that has engravings of lens name and focal length? Where do I grip on the front, the engraved white part or the tiny black circle inside , that has filter threads? That's two questions, sorry...
Thanks again.
Thank you for an extensive reply. I have one question. Is the dress ring the one that has engravings of lens name and focal length? Where do I grip on the front, the engraved white part or the tiny black circle inside , that has filter threads? That's two questions, sorry...
Thanks again.
peterm1
Veteran
Peter,
Thank you for an extensive reply. I have one question. Is the dress ring the one that has engravings of lens name and focal length? Where do I grip on the front, the engraved white part or the tiny black circle inside , that has filter threads? That's two questions, sorry...
Thanks again.
Miloss I have to admit that I was speaking in generalizations as I have not myself actually had to disassemble this lens specifically and its been a few years since I have even examined one. But looking at the picture linked below it looks as if the inner-most ring screws in to the outer (black) front ring and these are all surrounded by the chrome focus ring. I suspect this inner-inner ring is is what screws off to get access to the front element. Give it a try in any event - using a friction tool I doubt you can do damage or over stress it . I think you hold the outer chrome ring to prevent it moving and grip the lens. First set the lens to infinity (the infinity lock should hold it there)
https://www.flickr.com/photos/28867406@N00/11504200214
I have not found online instructions specific to disassembly of this lens but there are some on the 28mm f5.6 Summaron. Different lens and assembly but with some family similarities so you may get some tips from it.
https://www.youtube.com/watch?v=2Tvm4wQRX2o
Erik van Straten
Veteran
Before doing anything to this lens, get a copy of the booklet by Kuramochi Nobuyuki (Nobbysparrow): "How to Clean Old Leica Lenses and Accessories".
A great book in English with precise instructions how to open and to clean the elements of this great lens. Available via Nobbysparrow on eBay. He also sells the ring wrenches needed.
Erik.

A great book in English with precise instructions how to open and to clean the elements of this great lens. Available via Nobbysparrow on eBay. He also sells the ring wrenches needed.
Erik.
Dralowid
Michael
Just remember that the components of this lens may well have been undisturbed for the best part of eighty years.
It would be optimistic to assume that it will simply unscrew without effort, but then again, you may be lucky!
It would be optimistic to assume that it will simply unscrew without effort, but then again, you may be lucky!
ZivcoPhoto
Well-known
These are great lenses, I love mine, one a 1933 nickel on my 1933 black /nickel model III and a chrome 1941, both uncoated, and fairly inexpensively cleaned by DAG.
miloss
Member
Just remember that the components of this lens may well have been undisturbed for the best part of eighty years.
It would be optimistic to assume that it will simply unscrew without effort, but then again, you may be lucky!
Will there be air from 1934 Germany? Will I smell WW2 coming? Seriously, does he air trapped inside the lens stay there or circulates somehow?
miloss
Member
Thank you all for contributing to the answers to my task at hand! While waiting for answers, I browsed RF forum and found out about this guy who sells Leica manuals from Japan, nobbysparrow, if I am right. Has anyone had any experience with his manuals?
I am no repair person, but I have a pretty decent collection of camera repair tools and I do perform simpler tasks like rangefinder adjustment, mirror foam and light seals replacement, or occasional cleaning of the inner lens elements if they do not require calibration afterwards.
I am no repair person, but I have a pretty decent collection of camera repair tools and I do perform simpler tasks like rangefinder adjustment, mirror foam and light seals replacement, or occasional cleaning of the inner lens elements if they do not require calibration afterwards.
Nobby was very helpful indeed when I needed some items late last year. If Erik is willing to endorse his manuals, that is good enough for me at least.Thank you all for contributing to the answers to my task at hand! While waiting for answers, I browsed RF forum and found out about this guy who sells Leica manuals from Japan, nobbysparrow, if I am right. Has anyone had any experience with his manuals?
I am no repair person, but I have a pretty decent collection of camera repair tools and I do perform simpler tasks like rangefinder adjustment, mirror foam and light seals replacement, or occasional cleaning of the inner lens elements if they do not require calibration afterwards.
Mr_Flibble
In Tabulas Argenteas Refero
The haze build-up in the 35mm f/3.5 is usually on the surfaces facing the aperture blades.
The front group can be unscrewed, as a unit, completely with the entire black-painted brass beezel using a rubber friction pad. This gives you access to both surfaces you need to clean.
The front group can be unscrewed, as a unit, completely with the entire black-painted brass beezel using a rubber friction pad. This gives you access to both surfaces you need to clean.
Erik van Straten
Veteran
My experience with the nickel 35mm f/3.5 is that getting to the elements is quite difficult. There is a small screw that prevents the optical unit to turn that has to be removed. I remember that replacing that screw is quite difficult. I would not touch the lens without the instructions from Nobbysparrow at hand.
You'll also need the right ring wrenches to open up the optical unit. That is quite like the procedure for the Elmar 50mm f/3.5.
I can copy the pages (2) and send them to emailaddresses, but I will not publish Nobby's info here. His booklet is quite cheap to get. I would not like to interfere his business.
Erik.
miloss
Member
Erik,
I bought Nobby's manual yesterday. He said two weeks, but my experience with Japan post to Germany is much better. I can't wait to get it. Thanks for the offer.
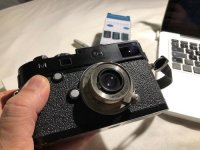
Is the screw you are referring to on the side of the knurled focusing barrel? And I don't know whether my Elmar is a Nickel or chrome. Here is the picture:
I bought Nobby's manual yesterday. He said two weeks, but my experience with Japan post to Germany is much better. I can't wait to get it. Thanks for the offer.
Is the screw you are referring to on the side of the knurled focusing barrel? And I don't know whether my Elmar is a Nickel or chrome. Here is the picture:
Attachments
miloss
Member
Mr_Flibble (Rick),
That sounds like good news. Let's hope you are right and I have an easy job!
Any suggestions on HOW to clean it and WITH WHAT, in order not to damage anything. As I understand, my lens is a non-coated one, which means I will not run a risk of removing any AR coats. According to my data, the lens is from 1935.
miloss
Member
Oh, and I also would like to ask if anyone knows how do I polish the outside of the lens? It has some blemishes on the metal that I'd like to remove.
I do not need to polish it to look like new, just a bit of hygienic touch up or so.
I do not need to polish it to look like new, just a bit of hygienic touch up or so.
Share:
-
This site uses cookies to help personalise content, tailor your experience and to keep you logged in if you register.
By continuing to use this site, you are consenting to our use of cookies.