Rolleiflex 2.8f - Light leak from Preceding Frame (when bright/overexposed)

robdeszan

Member
Local time
6:59 AM
Joined
Jun 19, 2008
Messages
37
Hi All,

I've noticed a certain pattern emerge on negatives taken with my Rollei: frequently, when I generously expose top of the frame (typically sky) the bottom of the next frame will get a faint, slightly brighter stripe.

I've ruled out processing errors (such as development or scanning) and it is too defined to be a light leak. It does not matter if the frames are taken immediately one after another or a week apart, or whether it is the beginning, middle or end of film roll either.

The one pattern has been the preceding bright frame.

Saying that, occasionally the stripe does not occur at all, despite the previous frame being bright and it can vary in height - anywhere between 2 to 6mm in height.

On consecutive frames with bright sky, the height will generally alternate: wider stipe > narrower stripe > wider > narrower etc.

This makes me wonder whether it is somehow related to the cameras mechanics?

Has anyone came across (and resolved!) this issue? Am I missing anything (I do tension the backing paper for film loading and feed it correctly underneath the film-sense roller)?

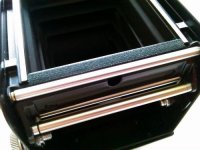
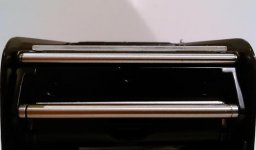
I have attached two representative examples, one with a smaller stripe, the other with a wider variety - the rest of the frame included for proportions / reference. Ilford HP5 at 400iso.

Thanks,
Rob
 

Attachments

  • sample 1.jpg
    sample 1.jpg
    59 KB · Views: 6
  • sample 2.jpg
    sample 2.jpg
    61.9 KB · Views: 6
I'm not sure entirely get it but you get stripes at the top of the negative: is this correct? Looks like something internally to me (not the shutter), but there are better people to discuss it.
 
I'm not sure entirely get it but you get stripes at the top of the negative: is this correct?

A faint lighter stripe (when it occurs) is visible at the bottom of the negative. On the camera, the problem occurs where the rollers assembly is (indicated in pink). On the negatives, if the top of the negative gets excessive exposure, the next frame's bottom area may get the light leak.

Roller assembly.jpg

Below, I've attached a few scans of the in-between-frames area to illustrate it better:

a wider stripe visible
two frames 1 wider band.jpg

a narrower stripe
two frames 2 narrower band.jpg

more images in the next post >>>
 
As pointed out, it is a reflection from the roller. Every Rolleiflex does it. It is not from the previous frame.

If you have people in your photos who you want to obscure it is helpful if you explain that is what you are doing. At first I wondered why there was a giant grey box over your photos.

Marty
 
Notice the partial band on this one, where the excessive exposure from the window only partially created the pattern:
two frames 3 partial band.jpg

Finally, here, no banding. The exposure was sky-balanced in both instances:
two frames 5 no banding exposed to sky.jpg

two frames 6 no banding exposed to sky.jpg

In scanning the above, I noticed that the framing distance, as it does vary slightly, does not alleviate the issue entirely; if the light is strong enough, it will hit the next frame.

Digging on forums, this is a bit difficult to articulate in a search phrase, I've found some posts that describe this issue, this one here sheds a bit more light (pun intended) on the issue, as explained by d_purdy:

"it is caused by the roller that is just below the film gate inside. You have matching rollers in there, one on top and one on bottom. The one on the bottom is the culprit. As the image is projected upside down inside the camera the bottom is actually the top of the picture where it is often showing some sky. The reflection shows up on the next frame and so is seen on the bottom of the picture. It runs horizontally across the film the same as the roller. The reflection is caused by light bouncing off the emulsion of the film through the 1mm gap between the film mask and the film and onto the roller which bounces it right back on the film where it is sitting on the roller. It takes a certain quantity of light to cause a mark on the film so it doesn't always show. If you over expose or if you have a bright sky at the top of the photo there will be enough light to cause the reflection. Generally the reflection lines right up with the bottom of the next image so it never shows. On some cameras the spacing isn't enough and the reflection is a couple of mm into the bottom of the next frame. The place it is easiest to see it is in the leader following the 12th frame. The only way you encounter it is if you examine your film on a light box. If you send your film to a lab and have contacts or machine prints you might never ever see it. On the Yahoo rollei forum there have been long drawn out arguments about it and the cause of it. Some people never see it. I have owned a bunch of Rolleis, a T, some 3.5Fs and 2.8Fs and a 2.8E2 and an FX and all have shown the reflection. My friend's GX also shows it. It isn't on every frame or even every roll. Or at least not enough density to see."

So, Rollei users, have you seen it much? I sort of missed it until I knew what I was looking for. Again, it only raises its head if you overexpose in the top area of the frame.
 
Yep, you beat me to it Marty.

If you have people in yours photos who you want to obscure it is helpful if you explain that is what you are doing. At first I wondered why there was a giant grey box over your photos.

Marty

Sorry, should have made it a different colour : )
 
This is a very well known issue which Rollei acknowledged by retrofitting some cameras with black rollers eventually. Yet those black rollers were made of glossy black anodized brass so the (very expensive) replacement rollers didn't really solve the problem. Some friends whose cameras had been fitted with the black rollers continued to see the issue on their photos, I have seen the pictures and the benefit of the black rollers was very deceptive at the end of the day. It can show on any picture unfortunately, not only on photos which previous frames had been overexposed at their top side or with bright skies.

I have had this nasty issue on both my 3.5F and 2.8F and I have solved it 100% by installing a strip of black cotton adhesive tape alongside the original shiny roller, between the roller and the film gate edge. That kind of black cotton tape is plenty enough to block the light reflected by the emulsion when you take a picture so that the roller isn't illuminated, and the following frame isn't veiled by the image of the roller any more.

So far this has caused no frame spacing or film scratching issue whatsoever (there is some thickness clearance left and the film doesn't rub on the tape actually). It doesn't make that picture side edge to be fuzzy, neither (for people who, like me, like to scan their 120 pictures with the "natural" black frame included : you still have very sharp upper black edges).

I recommend using very good black cotton tape made by Filmolux or any other reputable brand and to properly degrease the film gate surface with acetone before installing the tape. Don't touch the adhesive side with your fingers of course, to make sure there is no fingers grease trapped behind. Use small needle pliers to install it.

See attached pic which I just shot with my cellphone. That black cotton tape strip has been installed ten years ago and so far it hasn't come off nor frayed.
attachment.php
 

Attachments

  • DSC_0248.jpg
    DSC_0248.jpg
    27.5 KB · Views: 18
I recommend using very good black cotton tape (...)

Highway61! Awesome suggestion, will definitely give it a go. I can see you applied it far enough to keep the film gate's original edge - makes total sense.

Do you mind giving the exact type of the Filmolux tape, please? Their website has quite a selection but I can't seem to find anything with cotton.

Did you do it on the other side as well?

You made my day! :)
 
Last edited:
Do you mind giving the exact type of the Filmolux tape, please?
This one, called Filmoplast ® T, in black :

https://www.neschen.de/en/product/filmoplast-t-2/

It's not cotton but rayon actually, but it feels and looks like fine woven deep black matte cotton.

Did you do it on the other side as well?
No. It is not necessary, no problem whatsoever with the other side.

You made my day! :)
You're welcome ! :)
 
Haven’t had that issue. Can the rollers, the second one be adjusted? Could it be if they are a little too high it allows the light to reflect off it.

Just thinking whilst on my second cup of coffee!

I’ll check my 2.8 and look at the rollers.

I have the 2.8 Rolleiflex on my lap and mine has two screws, it looks like it could move the first set of rollers. In the center there is another screw. Is this to adjust the second roller? The second roller on mine is below, maybe a half millimeter, below the body the film rides on for exposure.

Great camera. Got a roll in and I’m going to exercise it! Mine has the Zeiss Planar 2,8 taking lens.

Hope this helps you.
 
Can the rollers, the second one be adjusted ?
Unfortunately, they cannot.

On some older Rolleiflexes, the problem sometimes doesn't show up, probably because of random factory machining tolerances which made the film gate frame thicker, and the film rails lower. Thus the film gate material, between the culprit roller and the film gate opening, was thick enough so that there was no possible light path there. It seems that the late series, noticeably the F, FX and GX cameras, having very probably been made with more precise machines, and maybe with a different type of alloy for that part, had a thinner film gate frame with more acute edges, and higher film rails, allowing for some extra space between the film plane and the film gate surface, hence the unwanted light path towards the roller, which gets indirectly illuminated when the shutter is fired.

As you say with good reason, it is indeed a matter of a fraction of millimeter, this is why the strip of black tissue adhesive solution works just perfect and once for good if cleanly custom cut and installed.
 
Quick update before light testing, I just wanted to send a quick photo of the mod suggested by Highway 61.

I've decided to add one on the take up spool side as well, just in case. The film height does not seem to get in contact with the film gate, even with the tape applied, on either side. I used a paper guillotine to cut it to size. It took a few tries to obtain the right width. I then used a lighter to burn off any lose threads before sticking.

IMG_20210114_090420714.jpg

I am going to take some photos, overexposing it at different +EV values, to see how much you can push it before the light starts spilling again. Will send my results!
 
Well, I tested the camera with the tape applied, taking a series of shots of the same interior setup: a window in the upper part of the frame and darker interior in the lower.

When exposed for the window there were no issues, however, overexposing it still made the light spill onto the edges. I have checked the back (does not appear to be damaged) and the film's pressure plate position, perfectly flush, with the same height in all four corners down to a 0.01 mm.

So I had another look at the tape and the two film rails & noticed the gap between the film plane and the film gate was still there, smaller, but there nevertheless.

I removed the single layer and cut a 2mm-wide piece of tape, applying it to the same spot, followed by a slightly wider, 4mm-piece on top so it can secure the thinner one in place while adhering with the 1mm tape excess to the film gate's surface. Simply putting one piece of tape on top of another does not secure them enough. It is also worth noting that the tape itself is 0.21mm thick mind you, so the two layers give 0.42mm in total.

I shot another roll and it seems like two layers manage to completely seal the gap between the gate and the film's surface. I only noticed a very thin and faint flare on a +6ev overexposed frame, so rather extreme situation. I will reapply it to get a complete seal as the tape does not quite touch the rail, I wanted to make sure this 2-layer approach would work first (see the photo below).

_R004620.JPG

Here, a view of a diy ground glass resting on the film rails. The double tape is now completely flush with both. I just need to scan the negatives and see if it has any adverse effects on them, such as scratches.

_R004622.JPG

Highway 61, does your have a single layer of tape or two?

Is it flush with both rails and in contact with the film surface?
 
Last edited:
Highway 61, does your have a single layer of tape or two?

Is it flush with both rails and in contact with the film surface?
1 : I don't remember, having done it ten years ago. I still have a roll of the tape I used, and just measured it ; with a manual analog caliper I am finding 0.2mm so I assume I have two layers of tape installed.

2 : totally flush with both rails and almost in contact with the film surface, see pics I just took using a ground glass as well.

IMO, now you're done. :)
 

Attachments

  • DSC_0253.jpg
    DSC_0253.jpg
    16 KB · Views: 10
  • DSC_0254.jpg
    DSC_0254.jpg
    12.8 KB · Views: 12
Cool! That looks very much like the height I have on mine. :)

I reapplied the tape tape so it sits in contact with both rails (width-wise), no gaps. A magnifying glass and precision tweezers did help!

10 years?! Filmoplast were not kidding when they said professional archival applications! The fact you said you'd not had film scratching issues is also reassuring!

Well, it does look like it will do the trick! Very grateful for your help and sharing the mod!
 
Back
Top Bottom