Scanning/processing: am I doing this right?

mafoofan

Established
Local time
3:24 PM
Joined
Aug 29, 2011
Messages
57
Well, I've taken my first bunch of photos with my new MP. I'd really appreciate any input or advice any of you might have as I try to learn the ropes.

I'm using a Summilux 50 ASPH and shooting on Portra 400. I had the negatives developed at LTI in New York City and scanned them myself on a Nikon 5000ED. I used Vuescan, and scanned without any adjustments--linear, no color balancing, no sharpening, saved to RAW/DNG, etc. I set the scanner to 4000dpi, single sample, with multi-exposure, and manually set the focusing on each frame. I found that multi-sampling did not improve the images, and actually made them worse in some cases.

I used Lightroom 4 to process the DNG files from Vuescan. For each photo, I adjusted only two settings: the tone curve and white balance. I adjust the white balance first, eyeballing the histogram and checking against the image. Then I play with the curve, generally aiming to maximize contrast without clipping the tonal range.

I am not applying any sharpening, as it doesn't seem to do any good and Portra 400 seems to scan plenty sharp enough.

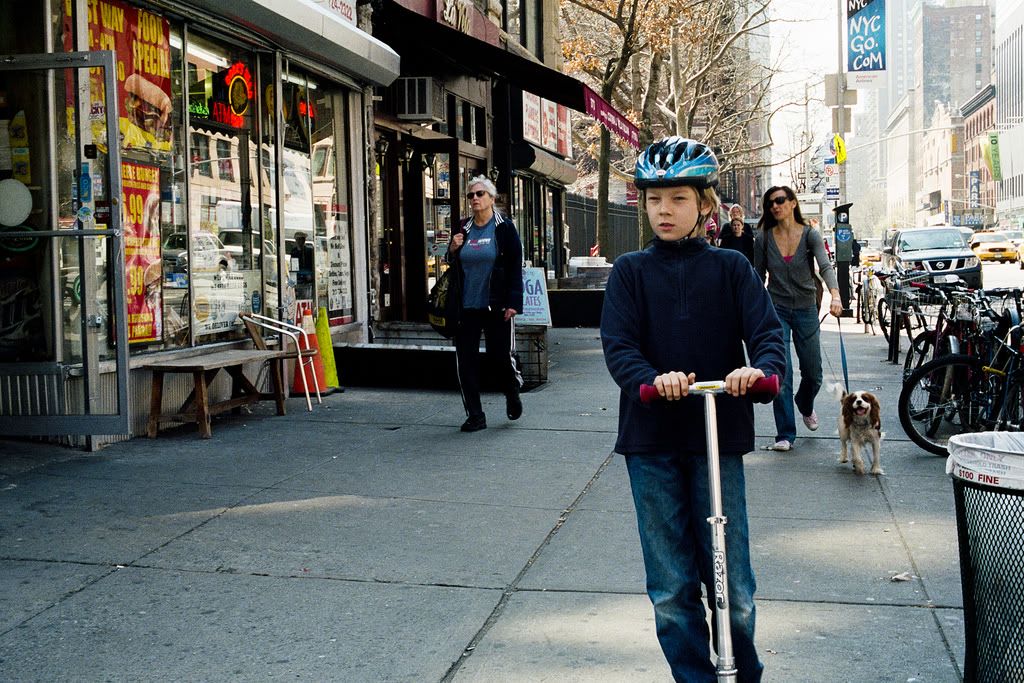
Here are some of my first photos:

2012_0318_1_0319_1_20-1.jpg


2012_0318_1_0319_1_28.jpg


2012_0319_2_22.jpg


2012_0319_2_31.jpg


2012_0316_1_0317_1_30.jpg


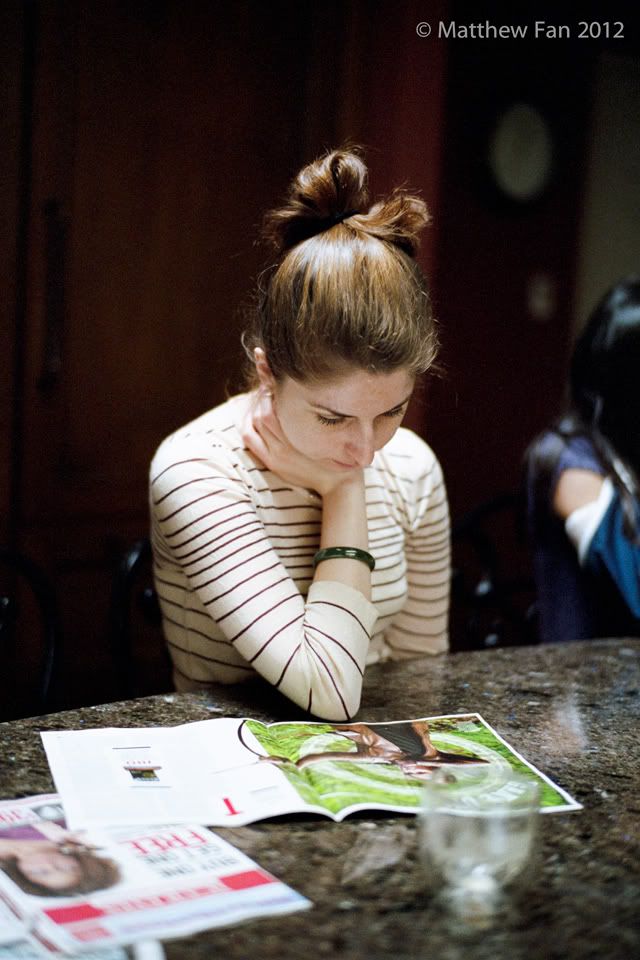
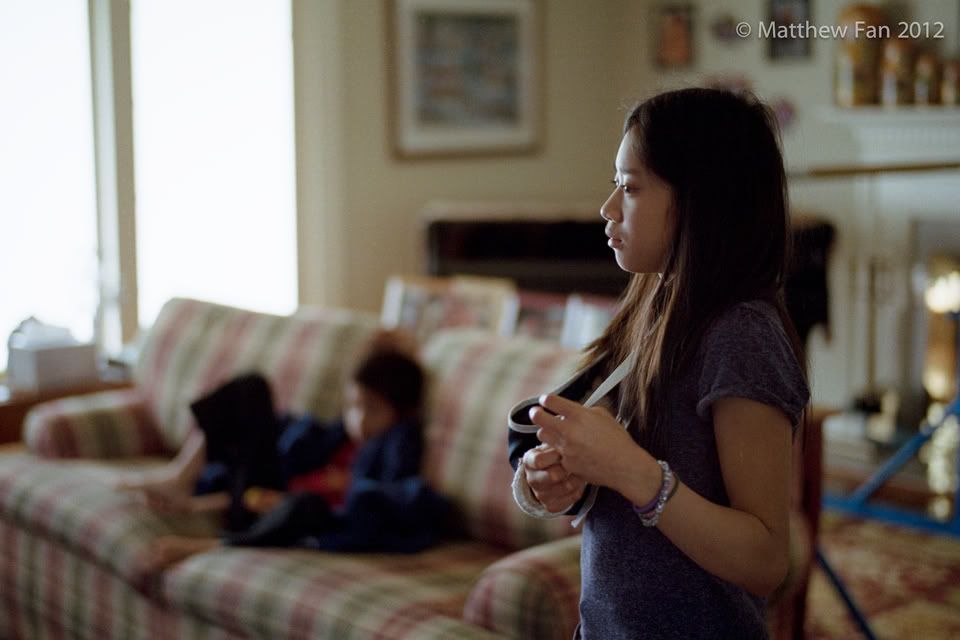
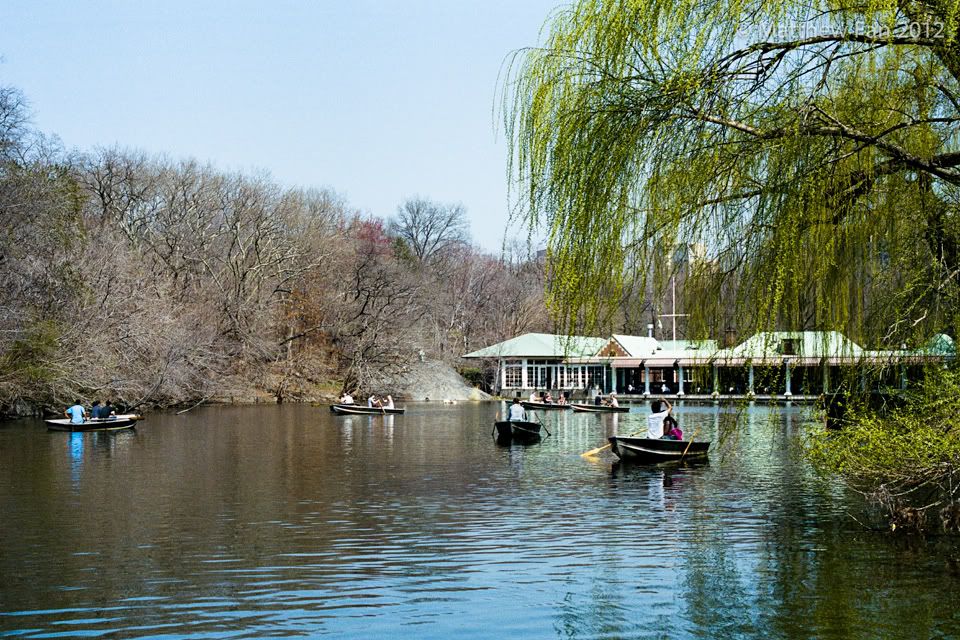
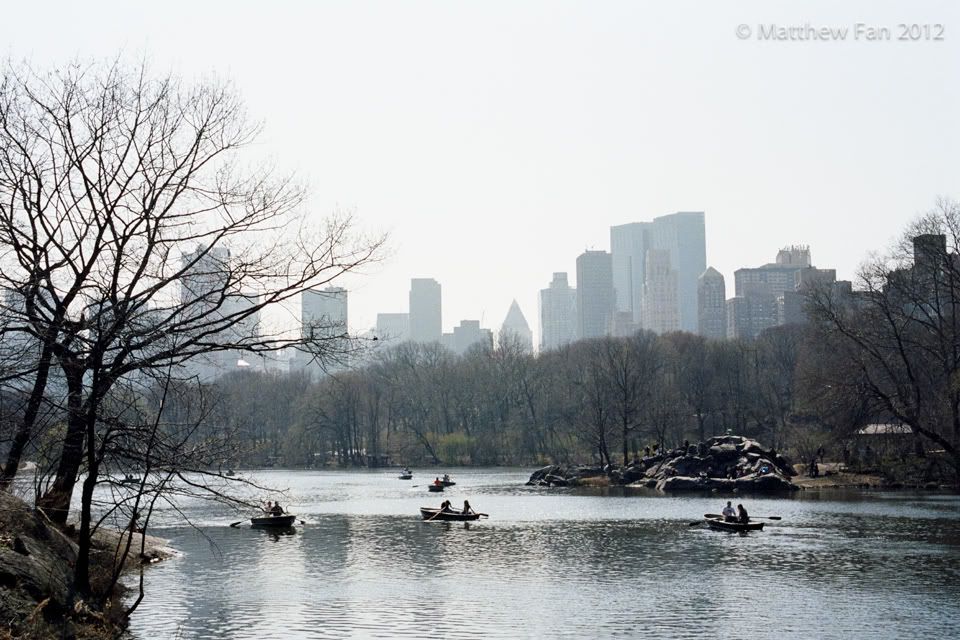
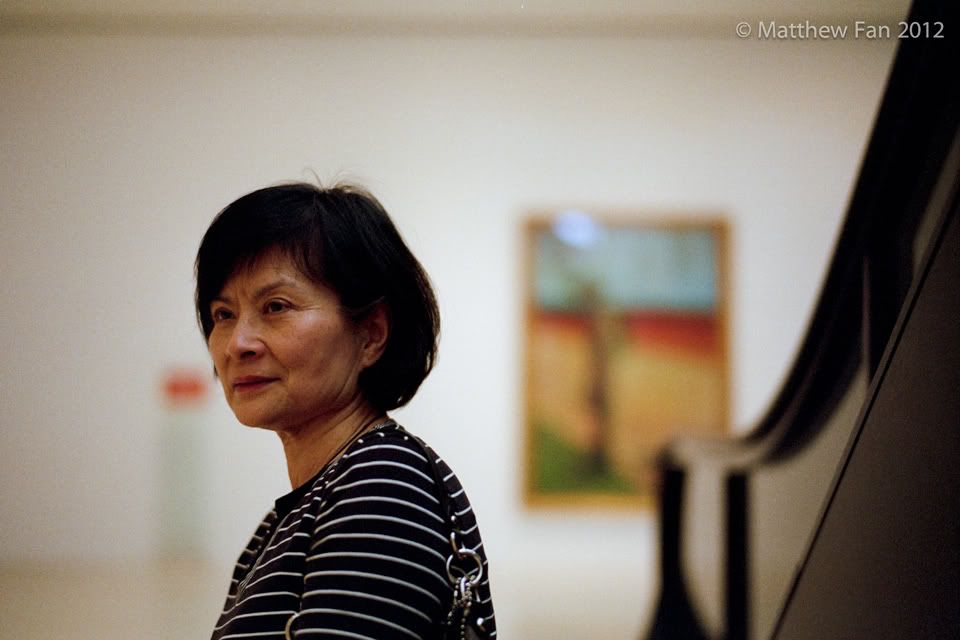
I'm mainly look for feedback regarding technique (focusing, exposure, digital processing, etc.), but thoughts on composition and artistic taste are also welcome! Thanks!
 
Matthew,

They look pretty good to me! Have you printed any yet? That's the best way to know what's going on. I do my M4 negative scanning about the same on my Coolscan V. I do minor curve and color correction and scan at 4000 with the output size at 18" 300 dpi for prints. I recently changed from the SA-21 filmstrip holder to the FH-3 film holder as I was getting a "color bleed" on the edge of my negative. I had to crop the edge and I prefer not to do that.

Good luck,

Walter
 
No, haven't printed anything yet--just started shooting this past weekend!

I realize you're only looking at downsized JPEGs, but can anyone tell me if I'm getting as much detail/resolution as possible out of the negatives?
 
The scans look fine but the content is lacking. The pond has potential, but not in mid-day hard light.

I wouldn't worry about watermarking an image of a girl reading a magazine, or any image for that matter. If Steve McCurry doesn't watermark his images, you don't need to. No one is going to get rich off one of your (or my) images. If you are going to make money from it, it will be after hard work. Those who will use it without paying won't be stopped by a corner watermark.

If this is too honest for you then refer to this vanilla forum reply:
"Excellent color and tones! Wow, sharp!"
 
Bit of an over-reaction to someone having their name on their photos Clancycoop? And not everyone needs to ape HCB with every frame. If I came back from a day with friends & family with these pics I would be pleased. I prefer the people shots over the park scenes, but there is a vintage feel to the second park one that appeals.

The scans look decent to me. For my taste I would try and extract more detail from the darker areas (while scanning and/or processing). Might be style and might be technique.
 
... that's a pretty aggressive answer to a question that wasn't asked ... nice one, perhaps less coffee next time, eh?
 
I am all too aware I'm not a real photographer and just a guy playing around with a camera--hence this solicitation for help. Unfortunately, Lightroom's watermarking feature doesn't filter for credentials or talent.

Thanks for the pointer about bringing out more detail in the dark areas. That was mentioned on another forum too. Would it be legitimate to spot lighten in Lightroom, or is there a preferable method?

I'm not hunting for praise. Honest and frank feedback is highly appreciated. Clancycoop, if you have more specific thoughts regarding content and composition, I'd be happy to hear them.
 
They look like fine scans to me.
Heck, when I test a camera, I usually just use a focus target to make sure the RF is properly adjusted at minimum focus. So, artistically, your first roll is miles ahead of any of my first rolls out of a camera.

Bruce Barnbaum in his book "The Art of Photography" suggests that with negative film, shoot at an ISO that is half of the box rated ISO. This opens up the shadows, and negative film is highly tolerant of overexposure in the highlights anyway. That will help clean up the dark areas of your pictures.
You do get a denser negative.

Viewscan has the "multiple exposure" option to get through dense parts of film. I find it primarily helpful with slide film that gets very dark blacks e.g. Kodachrome, Velvia. It also helps with denser negatives if you're going to follow Barnbaum's suggestion.

Multisampling - I use 2x. Any more than that, and the scan seems to take a long time. If I use 1X, with the latest version of Viewscan (9.0.89), I get banding with my Coolscan 9000. I haven't tried it yet with the Coolscan 5000, as I have both scanners but I've been fooling with 120 film lately.

Under the Crop tab, change the "Buffer" box to 10 or 15%. This leaves a band around the edge of the photograph that Vuescan will not use when calculating scan exposure. This is useful, as sometimes the auto cropping will include the black border outside the image frame.

Filter tab - I find that I get decent results from fast film such as Portra 400 using "medium" grain reduction. Click on the down arrow, and you get a few choices for how much grain reduction you want.
Also in the filter tab - for when you develop the DNG scan in Vuescan is the box to determine the aggressiveness of the infrared cleaning.

Hmmm - now I see the problem. You use lightroom to develop the DNG.
I would suggest that you do a two step scanning process, using Vuescan for both steps.
First step: Use Vuescan to generate the DNG, saved as 64 bit RGBI TIFF-DNG. This is set in the OUTPUT tab.

Vuescan will ignore the COLOR tab information, except for the Output color space (near bottom), which should be Device RGB. This will give you a true RAW data scan that is the direct output coming from the Coolscan 5000. This also captures in a separate channel the infrared scan information, which is needed for dust removal. The benefit is that you scan all your frames as quickly as possible, without delaying to adjust each frame. Each RAW DNG file has all the information you need later on.

SECOND: use Vuescan to process your 64bit RGBI DNG file.
INPUT tab, files box, hit the @ button, navigate to the folder containing the raw DNG files, and highlight them all. If I scan several rolls, I highlight just the frames that come from a particular roll.

Now hit PREVIEW. Your images will get processed, and Vuescan will apply the IR dust removal, grain reduction, color tab selections, etc. This is where you can make as many adjustments as you want to each frame. Just hit preview again to see the changes. In the COLOR tab, under Color balance, I suggest that you use Neutral or White Balance settings. In general your post-processing software will do color balancing better than Vuescan, so don't get too fancy with the colors here. You can adjust settings for each individual frame now, or use the same settings for all of them.

Before you hit "SCAN", set two more things.
Under COLOR tab, Output Color Space, pick the color profile that you want your TIFF file to use. Most people use Pro-Photo, but I use Joseph Holmes' Ekta Space.

Under Output tab, make the output TIFF 48 bit RGB, and click the "TIFF profile" box. If you don't check this box, you will not get the final colors into your standard color space, but it will still be machine RAW color.

Now hit SCAN. It will process all of your highlighted DNG files and make TIFF image files out of them. You then process the TIFF files with your favorite image processing software.

This information is what I use, and comes from Sascha Steinhoff's excellent VueScan Bible (available from Amazon).

I suggest that you try doing this with your roll of film. Then, you can do an A/B comparison with your first scans, and you'll see a difference.
 
Thanks ReeRay and Robert. I actually did reference Chris's scanning advice before getting started and pretty much followed everything he said.

Robert, I did pretty much everything you advise, with the exception of multisampling. I tried 1x and 4x, with 1x looking superior: more, sharper detail. I will try 2x and see how it comes out.

My buffer is already set to 10%, as I include some of the unexposed negative on the horizontal edges of each frame in the scan to prevent Vuescan from cropping parts of the images and manually crop them myself later (the software's automatic frame alignment is only sometimes successful).

I have Vuescan set to output as DNG already--I am not converting in Lightroom.

I set Color Balance set to "None" and minimize the high and low curves applied to 0.001. This way I maximize the information captured. Otherwise, Vuescan smooths out the tone curves and data is lost.

Grain reduction is set to none--I figure it is best left to post-scanning so that I do not unduly modify the underlying RAW.

Is there a disadvantage to doing all processing in Lightroom/Photoshop after Vuescan has converted to DNG? Seems like a better way to preserve the RAW data.
 
The main problem with using Lightroom to process the DNG files is that the infrared cleaning is basically disabled. Using Vuescan to process its own DNG files is the way to go. The Vuescan DNG files are not standard DNG files. They are RAW scans for Vuescan to process subsequently. When you use Vuescan to process the DNG file, it will use the IR channel information for dust spot removal. It will also process the grain reduction (if you want it to), color information, etc.

The DNG file contains RAW data. When you subsequently run a preview with Vuescan, you can keep changing parameters to your heart's content, and only hit SCAN when the image is as good as you can make it. That's the image that you save as a TIFF image file. That TIFF image file becomes the basis of your manipulations in Lightroom.
 
I'm not processing the TIFFs into DNG with Lightroom. I am using Vuescan to make the conversion at the time of scanning and saving. The file is already a DNG by the time I open it up in Lightroom.
 
I think we may have a communication issue. What I mean to say is:
1) Vuescan - raw scan, save as DNG
2) Vuescan - process raw DNG, save as TIF
3) Lightroom, Photoshop, (I use Nikon Scan) work on TIF, save as TIF/JPEG
 
Hmm. I think Vuescan does effect the infrared-based corrections when exporting as DNG--at least, it appears so on my files.

My workflow is thus:

1. Scan with Vuescan, without adjustments (other than dust/scratch removal), save as DNG.

2. Import DNG into Lightroom and make adjustments.

*3. Further corrections in Photoshop, only if necessary.
 
I'm using a different workflow since I discovered Color Perfect. I had trouble with Vuescan's DNG files; they always turned out much too saturated. Now I do a plain linear scan, save as TIFF and convert the resulting negative file (I almost never shoot slides) in Color Perfect which offers incredible control over colour corrections and allows me to prevent shadow and highlight clipping.
 
Back
Top Bottom