So, I have a Polaroid Model 150 I want to convert

Ranchu

Veteran
Local time
8:58 AM
Joined
Sep 7, 2009
Messages
2,708
to pack film, I don't know what else to do with it, and the pictures look good to me.

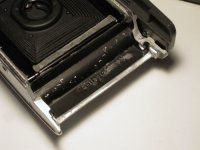
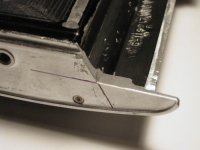
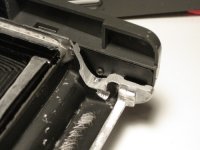
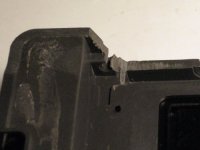
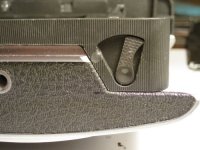
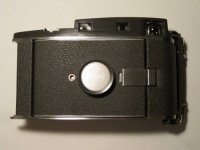
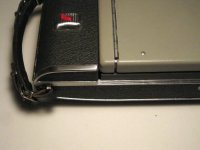
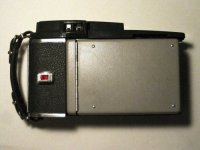
I have a question, how is the bellows attached to the body? I've read glue, and I've read metal tabs hold it on. If I keep the rivets on the body and grind them flush, will they stay there until I get the epoxy on?

This is what I don't understand, I'd like to try to get some idea before I start taking off the film rail piece.

Thank you!
 
Thank you for the reply! I have perused that, he talks here

http://www.instantoptions.com/conversions/150b/150b.8.php

about what I mean. he seems to imply that he's gluing the donor back onto the riveted sheetmetal with the 'ridges' ground off. But the pictures of this 150 and his 110 he takes it off.

http://www.instantoptions.com/conversions/110a/110a.7.php

Hence my quandary, it doesn't make much sense to me to glue onto the sheetmetal as the film plane will be very off, and light leaks (?), but the guy makes me nervous about the bellows coming off.

:)
 
Ok, so I think what I'll do is keep the sheetmetal, but I'm going to seal it around the edges with JB Weld. This will prevent light leaks, and I also don't like the idea of metal filings getting under there and floating out later.
 
Well, if it's going to be that kind of party, I might as well put my ***** in the mashed potatoes. I see no reason to do all that filing if I'm going to move the fiilm plane back anyway, the difference is about 5/32" total from the original plane. I'll just chop off the end and put the donor back on the side edges and glue in a spacer.

:confused:

edit: so I popped the rivets off the infinity stop and checked the range, it looks like it will hit the limit right where the plane would be if the back was put on the metal edges of the camera body, I'd like to have some adjustability, so I'll have to take some off. Here's a good link.

http://www.filmwasters.com/forum/index.php?topic=2083.0
 
the cut

the cut

Hat tip 3rdtrick!

So, the bottom cut is 190mm from the beginning of the ridge on the hinge side, it's 117 degrees, and the flat part is 17.5mm deep from the top of the ridge. The top cut starts the same 190mm, 117 degrees, but it's cut out around the screw that goes into the plastic top. The flat part on the top is only 16mm deep from the ridge because I wanted to keep the screw hole that comes in from the inside to hold the black piece down. I think I'll have to shave off some of the donor there, but I wanted t keep that screw hole. Neither the black piece or the plastic have been cut.

:)
 

Attachments

  • CUT_1.JPG
    CUT_1.JPG
    83.2 KB · Views: 0
  • CUT_2.JPG
    CUT_2.JPG
    81.6 KB · Views: 0
  • CUT_4.JPG
    CUT_4.JPG
    83.7 KB · Views: 0
I'm not sure you need to undo the bellows. Why not leave them? Seems to me to be a lot of work for nothing. The film gate the bellows are attached to can stay as it is. All you need to do is attach the back, less any adapter plate etc, to the gate with some sort of putty like adhesive, maybe PL400 or similar. The fact that the film plane is now moved back by a few mm is not a problem. You would most likely have to adjust for it in the other case too. Re-collimating the register is not that difficult, just undo the infinity stop on the rail and move it back (a Dremel comes in handy). Use an empty film pack with frosted tape across the opening (as a makeshift ground glass) and re-attach the end stop (drill new holes). Remember infinity is infinity, not 30 yards away. The moon is a good choice, or a building or mast several miles away.
 
Many thanks, Ezzie, that's what I decided to do! I'm using a cannabalized pack film camera for the donor back. I'm going to adhere the donor on with RTV, it's a black rubbery sealant type stuff, instead of the epoxy. If I have some kind of problem with the back, I should be able to get it off for a replacement. Things are going along well!

:)
 
Gluing up...
 

Attachments

  • glue_1.JPG
    glue_1.JPG
    34.3 KB · Views: 0
  • glue_2.JPG
    glue_2.JPG
    30.5 KB · Views: 0
  • glue_3.JPG
    glue_3.JPG
    49.5 KB · Views: 0
Back
Top Bottom