Stuck Advance Lever for QL17

Local time
7:53 AM
Joined
Oct 15, 2006
Messages
8
[FONT=Arial, Helvetica]I bought a Canonet G-III QL17 in immaculate cosmetic condition for $25. It LOOKS new! I'm really happy with it--I just can't figure out how to fix it!

The advance lever will not advance past the halfway point. I've searched here and haven't found anything that could help me. I did however find something at the classic camera repair forum:

http://www.kyphoto.com/classics/forum/messages/6899/5838.html

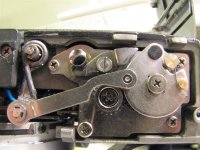
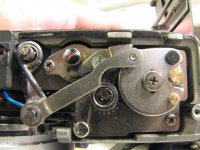
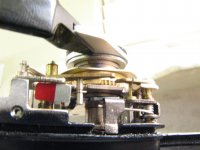
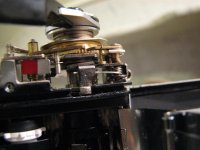
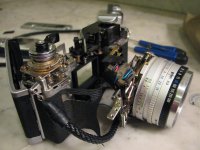
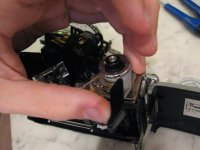
His advance lever also had the same problem but do you think the fix will be the same? Should I pull back the black "skin" covering and remove those four screws, lift the lens plate and finish the cycle? Do I just glue it back on when I'm done? Apparently that stuff is really hard and once it's pulled back--you can't glue it back on.

ANY help would be greatly appreciated! I'm hoping that the fix won't involve removing the leatherette. But if it's needed, I suppose I can buy some green leather from cameraleather.com

Thank you!

Mike
[/FONT]
 
Hello Mike
The vinyl just needs to be peeled back on each side of the lens barrel...start by removing the bottom plate. Now at the corner of the vinyl by the lens barrel start peeling it back....a bit of alcohol on a q-tip helps soften the glue holdoing the vinyl....I use a small flat blade dull screwdriver to pry up the covering.....you only have to peel it back about 3/4" on the left side and about 1/2 " on the right side....Remove the top plate also and start peeling from both top & bottom until you reach the middle.....The QL17 GIII logo has to be removed to gain access to the left service plate.....remove the plates and you can see 3 of the screws holding the lens assembly....tighten the 3 screws that you can see....put the film advance handle back on temporarly so that you can partially advance the lever that covers the bottom screw on the right side....tighten it .....check that all is operational and you are ready to start putting the vinyl cover back on.....no need to try to remove the entire covering.
 
Well thank you for the feedback guys!

However, the problem is NOT the same. I really don't know what the problem actually is. The advance lever STILL refuses to go any farther!

I whipped out my mom's Canon S2-IS and you can see photos of it all in it's dismembered mess HERE: http://www.putfile.com/ledfloyd/images/36813

I've also attached some of the important photos. The first photo is the bottom at a resting position. The second is as far as the advance lever will take it. The third is how far I'm able to actually advance it. The others are just some pictures of the advance lever.
 

Attachments

  • IMG_3665 (Large).JPG
    IMG_3665 (Large).JPG
    130.7 KB · Views: 0
  • IMG_3666 (Large).JPG
    IMG_3666 (Large).JPG
    135.6 KB · Views: 0
  • IMG_3656 (Large).JPG
    IMG_3656 (Large).JPG
    82.3 KB · Views: 0
  • IMG_3663 (Large).JPG
    IMG_3663 (Large).JPG
    83.8 KB · Views: 0
  • IMG_3650 (Large).JPG
    IMG_3650 (Large).JPG
    94 KB · Views: 0
Last edited:
And more photos... Third photo, again, is how far I'm able to advance the lever myself.
 

Attachments

  • IMG_3661 (Large).JPG
    IMG_3661 (Large).JPG
    110.9 KB · Views: 0
  • IMG_3648 (Large).JPG
    IMG_3648 (Large).JPG
    112.3 KB · Views: 0
  • IMG_3653 (Large).JPG
    IMG_3653 (Large).JPG
    89.6 KB · Views: 0
Last edited:
Hello Mike....I do have a question...Is the self timer lever at the bottom of its slot?....I can't see it in you pic's. If the self timer is not at the bottom of its slot, then you can't advance the film.....sometimes the shutter will stick and then someone tries the self timer and it can't complete its cycle because the shutter has stuck. If the self timer is not at the bottom of its slot...try to gently push it towards the bottom....sometimes this works.....you may have to remove the front lens and clean the shutter with ronsonol to get it working freely before the self timer can complete it's cycle.
 
Back
Top Bottom