Leica LTM Summar of Love (Leitz Summar Sample Pics)

Leica M39 screw mount bodies/lenses
You've got quite some contrast out of it, the pictures look great. That's what it is all about.

Erik.

Indeed, it's all about the results. Contrast comes up a lot at and above f/4. I think getting the interior glass completely clean and repainting the sides of the cemented pairs makes a big difference.
 
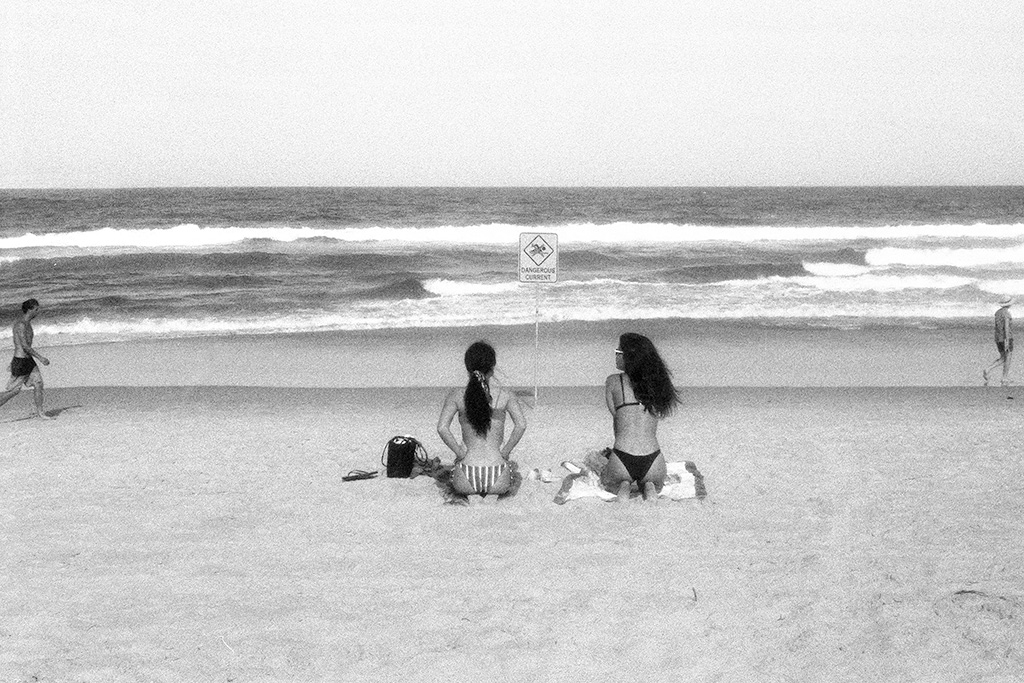
I picked up a very tired example of a Summar a few weeks ago - everything stiff, finish worn, front glass nearly opaque with scratches, and the rest of the glass covered in haze. I disassembled it, cleaned and lubed as appropriate, repainted the flaking black paint on interior surfaces, and spent many hours hand-polishing the front element with cerium oxide (it had been coated, but obviously that's now gone). It's not perfect, and probably never will be, but it was good enough to warrant testing, so I reassembled and mounted it on my X-E1. These are two from earlier today, both straight from the camera JPGs shot wide open (no hood).

27265556212_b84548119b_o.jpg


26756637083_7e2e535aec_o.jpg


All things considered, I'm pretty pleased, as the lens was completely unusable when I got it. The front element could probably be improved a bit more with continued polishing, but I'm going to shoot a few rolls of film first to see how it does before I make that decision.
Wow. Do you have before and after photos of the lens?

Sent from my m2 note using Tapatalk
 
Wow. Do you have before and after photos of the lens?

Sent from my m2 note using Tapatalk

Nope. Should have taken a before picture, but I didn't. If you want to know what it was like to look through, grab three or four sheets of wax paper and look through that.
 
Commentary: the images from the repolished Summar are very inviting to the eyes, O2Pilot. It adds something both tangible and emotional to the photographs.
 
Commentary: the images from the repolished Summar are very inviting to the eyes, O2Pilot. It adds something both tangible and emotional to the photographs.

Thanks, Daryl. It's definitely got some character. Here's a couple of more recent shots (the second one with a medium yellow filter).

30889863136_00093aea4c_c.jpg


30512623670_a93c1381a5_c.jpg
 
We had go in and drag him off the beach

M1706044.jpg


I'd rather hang out with the WACs over at the communication center.

M1706030.jpg
 
I like the framing of landing craft with the helmet and arm, Mr Flibble. Not easy with an old Leica finder! The German soldier has aged well, as have the WACs.
 
Thanks,

These were taken at the Operation Medemblik 2017 last weekend. Various WW2 living history groups were camped out around the town of Medemblik. We were located at Radboud Castle. The British airborne unit were at the old steam train station, The Germans were at windmill and the US Airborne units were at a pumping station.
Trucks ferried tourists from spot to spot on both days.
At noon on Saturday and Sunday the American groups did a beach landing with the help of two Dutch Royal Marine landing craft and a couple of assault boats, against a German held beach and a load of impressive pyrotechnics.
It was an impressive show I'm told. I was too busy worrying about keeping my kit dry while charging ashore.
A few folks tripped leaving the boats and went into the drink head first.

I used my Leica M-E and Speed Graphic to record the rest of the weekend as well.
 
02 Pilot, I'm impressed that you managed to hand polish the front element. The photos taken with it afterward look pretty good to me. My Summar has a very finely scratched front element and your effort (and the other samples in this thread) convinces me this would be worth a try.

Here's another from mine (uncoated):

U27021I1520416181.SEQ.0.jpg
 
Lynn, I think it's definitely worth a shot. Use pure cerium oxide powder and cotton swabs dampened in water. I worked in small circles, always moving around the surface and periodically reversing, trying to cover the lens as evenly as possible. Use as little pressure as possible. The swaged-in edges are the hardest to get at, and there's a tendency to overwork the center - just be methodical and you'll be fine.

The paste will dry quickly; I found it was best to work with small amounts of paste only until it dried, then go over it with a clean wet swab to take off the dried material, then start over with fresh cerium oxide. It's tedious, but you will see results relatively quickly. Good luck!
 
Back
Top Bottom