dmr
Registered Abuser
Ok, gang, in response to a thread on the topic of better results scanning B&W negatives as positive a few days back, I decided to put this to the test and be as consistent as I could about it.
I picked a negative from a batch I am currently scanning. This one happens to be Panatomic-X, old, but still in good condition, and one that looked normally exposed to the naked eye. I scanned it 3 ways, all shown below, and I tried to be as consistent as I could with it. I scanned everything 16 bit, 4x sampling, on the K-M SD IV with the standard software. No correction in scanning. I tried to be as consistent in scanning and in adjusting as I could, making this a fair comparison in methods.
(Yes, I can see what looks like a weak fingerprint in there, some dust spots, and I think some highlights in the horse are washed out. I didn't do any cropping or spotting.)
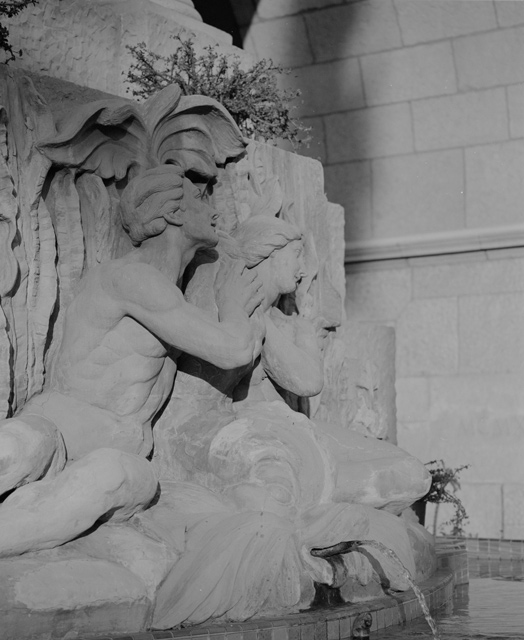
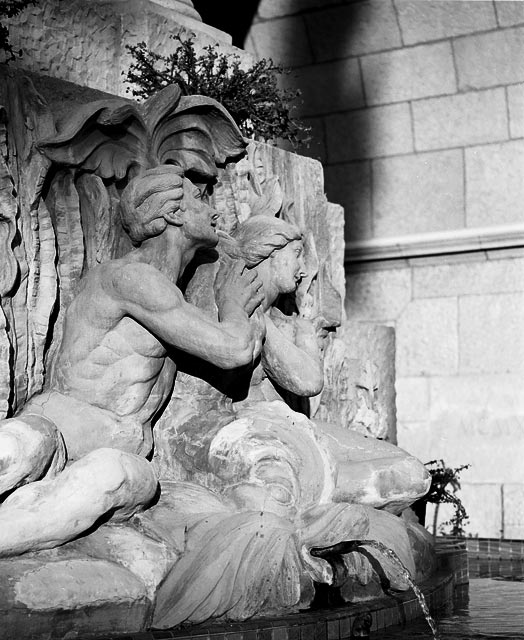
The scans below are:
1. Scanned as B&W negative.
2. Scanned as B&W positive.
3. Scanned as color positive.
Then in Photoshop, I did the following steps on each scan:
1. Invert, if necessary.
2. Levels, I just brought the sliders to the point where I thought significant information began to appear, not looking at the photo at the time. On the color one I did each color level separately and then a final sanity check on RGB.
3. Convert to 8 bit, greyscale on the color one.
4. Resize, 800 on the long side.
5. Save as .jpg, quality 7.
Comments?
I picked a negative from a batch I am currently scanning. This one happens to be Panatomic-X, old, but still in good condition, and one that looked normally exposed to the naked eye. I scanned it 3 ways, all shown below, and I tried to be as consistent as I could with it. I scanned everything 16 bit, 4x sampling, on the K-M SD IV with the standard software. No correction in scanning. I tried to be as consistent in scanning and in adjusting as I could, making this a fair comparison in methods.
(Yes, I can see what looks like a weak fingerprint in there, some dust spots, and I think some highlights in the horse are washed out. I didn't do any cropping or spotting.)
The scans below are:
1. Scanned as B&W negative.
2. Scanned as B&W positive.
3. Scanned as color positive.
Then in Photoshop, I did the following steps on each scan:
1. Invert, if necessary.
2. Levels, I just brought the sliders to the point where I thought significant information began to appear, not looking at the photo at the time. On the color one I did each color level separately and then a final sanity check on RGB.
3. Convert to 8 bit, greyscale on the color one.
4. Resize, 800 on the long side.
5. Save as .jpg, quality 7.
Comments?
jan normandale
Film is the other way
I like the jpgs in the following order of your posting them left to right as 1-2-3. My preference is 3-2-1. The colour scan with the colour stripped out seems the best. I looked at the detail and could see little difference in the architectural details of any of the three. However there did appear to be flaws showing in 1 , signs of flaws in 2, no discernable flaws in 3.
Problem was I couldn't big size these to see what was really going on. But for scanning to RFF that would be my preference.
BTW I'm using a KM SD IV also.
Problem was I couldn't big size these to see what was really going on. But for scanning to RFF that would be my preference.
BTW I'm using a KM SD IV also.
sf
Veteran
hard time seeing differences, but the positive scans are slightly blacker blacks. I actually like the first one best.
dmr
Registered Abuser
jan normandale said:However there did appear to be flaws showing in 1 , signs of flaws in 2, no discernable flaws in 3.
What flaws are you talking about?
I could probably post a crop of a full size scan if you think it would be a good idea.
formal
***
DMR,
An interesting test.
I think the first one (B&W negative) looks better, but I'm not convinced that this is a "fair" test.
My original problem was that the "B&W negative" scan could not retain both highlights & shadows, whereas the "B&W Positive" could. With a positive scan the image has low contrast and I lose detail when making it more contrasty, but I have more control in Photoshop.
This image has very little shadow and therefore, with a negative scan the exposure could be adjusted to retain the highlights with out too much impact on the shadows?
Regards,
David
smileyguy
Established
I'll throw my vote in for 1, 3, 2.
One seems to have the greatest depth of the three of them. The tones were pleasing to me.
Two seems to be a little washed out for my taste, looks a little overexposed.
Three is not bad but doesn't have the depth that one has.
That's just my take on it.
One seems to have the greatest depth of the three of them. The tones were pleasing to me.
Two seems to be a little washed out for my taste, looks a little overexposed.
Three is not bad but doesn't have the depth that one has.
That's just my take on it.
peterc
Heretic
My vote would go 1-3-2 as well. 2 has lost blacks and 3 is somewhat muddy, but still better than 2.
I'd suggest scanning in 8 bit ... there's no point going any deeper for B&W most of the time. Also, I'd suggest reducing the oversampling to single pass or 2 at most. While good for colour, I've found the multipass reduces sharpness in B&W.
Peter
I'd suggest scanning in 8 bit ... there's no point going any deeper for B&W most of the time. Also, I'd suggest reducing the oversampling to single pass or 2 at most. While good for colour, I've found the multipass reduces sharpness in B&W.
Peter
jonasv
has no mustache
Are these images that light for everyone, or is it my monitor? I'd prefer a bit darker images to be honest - I can't see any blacks, just greys and whites! Of these three, #1 is best though, in my humble opinion.
dmr
Registered Abuser
jvx said:Are these images that light for everyone, or is it my monitor? I'd prefer a bit darker images to be honest - I can't see any blacks, just greys and whites! Of these three, #1 is best though, in my humble opinion.
I just did a sanity check on all 3 images to be sure I was reasonable when I set the levels. Using Photoshop's eyedropper color sampler, I get close to absolute black on all 3 images right above the tire on the car on the left, various places under the awning toward the top, and by the left front tire of the taxi at the right. Likewise I get close to absolute white on the horse's hind end and on the lady walking toward the left. Yes, I admit those parts are overexposed. They look very dense on the negative although I can't really see that closely when I look at it. They don't appear clipped on the unadjusted scans.
Patman
Established
1 definately shows the most detail followed by 3 and then 2.
jan normandale
Film is the other way
dmr said:What flaws are you talking about?
I could probably post a crop of a full size scan if you think it would be a good idea.
On the left jpg there is some kind of distortion or surface flaw/blotching on the image in the bottom centre of the frame. Less noticeable on the middle and least on the right jpgs.
Look in front of the vehicle and below the curb on the far side of the street. There is a flaw/blotch that is about 1/3 frame wide bottom centre. This is visible on both my home and work monitors.
sf
Veteran
I like number 3 best now.
S
StuartR
Guest
My experience with the scan dual III and the Scan Multi Pro was that scanning as a positive would give you the most workable detail, and from there you could adjust levels and discard what you wanted. When scanning as a negative it did not give you nearly as much info. That said, after you invert you get a very flat negative. Here is a before and after sample. A scan from the minolta multi pro only inverted, and then with editing. Notice that I discarded a lot of shadow detail (on purpose), but also got a much contrastier photo with true blacks and whites. It is basically like deciding to print on grade 4 or 5 paper versus grade 1 or 2.
Last edited by a moderator:
sf
Veteran
Hey, thanks Stuart. That is a good example of what I need to be doing with all my negatives right now. I've been scanning as negatives mostly - comes up with largely useable stuff, but I have noticed that I get a great deal more range with the positive scanning - at least if I leave curving out of the equation. . . .
I do ALSO notice, however, that when I scan as negative, full 16 bit, save as a PSD file, etc., I have the ability to do a lot of curves adjustment after the fact. What looks blown or black almost always has tons of information that I can get to with adjustment. Really, it works either way with practice. So far, I've already scanned 172 6x4.5 frames with the Multi Pro. E-6, color and black and white negatives. You can scan in positive, which will give you a flat image with lots of room for post processing. Or, you can scan in negative with slight adjustments to the exposure that will produce perfect photos, or you can scan as negative and just play with the curves afterward. Honestly, I find that I have as much flexability with the negative scanned files as the positive scanned files.
I love this scanner.
dmr
Registered Abuser
StuartR said:That said, after you invert you get a very flat negative. Here is a before and after sample.
That is actually what I did for this test. Here's the color negative one with only invert, resize, and 8 bit along with the histogram it produces -- no level adjustment. Yes, it's very flat.
I set the black point to about where the green arrow is. The darkest information on the scan (actually the lightest)
") appears to be artifact and in the border at the top, setting the black point at the red arrow gives weak solids and shadows. Setting at the green arrow gives absolute black in the shadow areas I mentioned above.
appears to be artifact and in the border at the top, setting the black point at the red arrow gives weak solids and shadows. Setting at the green arrow gives absolute black in the shadow areas I mentioned above.I agree that if I were to print this one, I would probably want higher contrast. However, I was just comparing the 3 methods and set the levels to the points where the histogram began to rise significantly.
Now -- in playing around with this more, by using only the center slider in the levels, I can get 3 to look very much like 1 and vice versa. I'm beginning to think that the real difference between the positive and the negative scans is some slight inherent nonlinearity somewhere in the scanning system.
I'm going to repeat this on another negative and see if I get similar results.
This has been a very interesting experiment ...
dmr
Registered Abuser
jan normandale said:Look in front of the vehicle and below the curb on the far side of the street. There is a flaw/blotch that is about 1/3 frame wide bottom centre. This is visible on both my home and work monitors.
Oh yes. That's what I think is my grubby little fingerprint. I'm afraid it's a 30 year old fingerprint, so I don't know how well the film cleaner will work. If I were to scan this as a keeper, I would try to clean it off.
lido
Established
I find that when I scan B&W as positive, because of low contrast I need to do a lot of post processing. Sometimes playing with levels will distort the histogram so badly that I get posterization. This does not effect the image when looked at on the screen, but once I print it I can definitely see it. Still trying to figure out the workflow for best performance. I use Nikon LS 2000 with Vuescan.
aterlecki
Established
dmr said:Ok, gang, in response to a thread on the topic of better results scanning B&W negatives as positive a few days back, I decided to put this to the test and be as consistent as I could about it.
The scans below are:
1. Scanned as B&W negative.
2. Scanned as B&W positive.
3. Scanned as color positive.
Comments?
Sorry I don't like any of them. All are far too light, and completely lacking contrast. It doesn't matter which of these three you start with as they can all be dramatically improved with a simple curves adjustment.
I think you've fallen into the trap of those who are venturing into digital B&W and not applying the principles of sensitometry that have been used for decades by darkroom practitioners.
B&W film can record a massive range of light. 12 stops is not unsual. You simply cannot print that full range on paper (or display it on screen) and get anything other than an incredibly flat image. Something has to give. Usually that means getting rid of a lot of information in non-important the shadow areas (i.e. letting it go to black), maintaining or increasing contrast in the middle tones (which usually where the interest lies) and then flattening out the highlights (this can be done because the eye is more sensitive to subtle differences in highlights). Try to avoid letting anything other than specular highlights go to white. Darkroom printers almost always start by getting the appropriate detail in the highlights.
Once again, if you try and keep all the information from a negative you are never going to get a satisfactory print. Look at the great master printers and see how they print. More often than not they darken (burn in) areas that don't matter and often let areas go to black.
Here is a modified pic from your first one with a quick curves adjustment. Took all of 10 seconds but I think the balance of tone is much better. Personally I'd also start doing some quick masks and some local tonal corrections (digital equivalent of dodging and burning) but you can get quite a way just with a decent curves adjustment.
jan normandale
Film is the other way
dmr... this and the more recent threads are really exceptional work and a lot of effort. I'm the kind of user who just scans, crops and saves for the web. Occasionally I've played around with the positive vs negative thing but haven't been methodical. Either I liked it and proceeded or reverted.
Thanks to your curiosity you have saved me a ton of work and checking. Yay dmr. I'm going to have to send you a couple of subliminal messages on other things on my mind and wait to see if you do similar tests... LaL!
Thanks to your curiosity you have saved me a ton of work and checking. Yay dmr. I'm going to have to send you a couple of subliminal messages on other things on my mind and wait to see if you do similar tests... LaL!
dmr
Registered Abuser
aterlecki said:Sorry I don't like any of them. All are far too light, and completely lacking contrast. It doesn't matter which of these three you start with as they can all be dramatically improved with a simple curves adjustment.
Uh, ummm ... I think there's a misunderstanding here ...
Actually, I don't like any of the above images at all either. If I had to choose, I dislike #1 the least
but all of them lack punch.What I was doing here was not preparing a scan for printing or even for the web, I was just seeing why some people swear you get a better scan by scanning a B&W negative as a color positive. If I wanted to make a print I would probably do as you did below and tweak the levels and punch up the contrast quite a bit. I think Stuart's example above shows how to make adjustments and compromises to get a pleasing image.
I still don't know which is the best method to use, but I'm having fun finding out.
Share:
-
This site uses cookies to help personalise content, tailor your experience and to keep you logged in if you register.
By continuing to use this site, you are consenting to our use of cookies.