hans voralberg
Veteran
I took that Epson scan^ and edited in photoshop to get the best possible result. I also took my Walmart scan and got the best possible result in photoshop. Here are the end results.
http://img171.imageshack.us/img171/8084/comparesx5.jpg
(you may have to click on the picture somewhere to see it full size)
The Walmart scan is on the left and the Epson V500 scan on the right. If you look at the subjects face, you can see that difference I am talking about. The Walmarts scan is crystal clear and the pixels look clean and organized. The Epson scan just looks horrible if you look close at the face.
This is truly a very dissapointing thing for me to find out about my scanner.
I'm not as convinced as you are, actually I'm convinced otherwise. The sample is bloody small and honestly, except sticking a loupe to the screen I cant see any different in your "grain" or "sharpness". The Walmart scan actually has more blown hightlight.
And it appears that you're trying to push alot out of the original scan, what setting for the PS USM are you using ?
oscroft
Veteran
The best way to flatten negs is to wind them, emulsion side out, on a developing spool (if you have one) and leave them for a few hours.I would also suggest putting your negs in a sleeve page and flattening them under a stack of books overnight
hans voralberg
Veteran
That's great to know oscroft, never thought of that.
Jeremy, I did a 90 seconds PS job on your pics, not quite as contrasty/saturated, but no significant grain and I think the sharpening is enough for your taste

Last edited:
sfb_dot_com
Well-known
Hi Jeremy,
Looks to me that you've got your knickers in a twist over this. All this post-processing seems to have actually made the images worse rather than better. You've actually got green and red casts in your pictures as a consequence, and all the subtle colour gradations are now lost. The original scan looked OK to me with fairly neutral skin tones and accurate if flat colour. I have say that this is a completely unsuitable picture for a test as you have harsh fluorescent lighting which a daylight balanced film emulsion is going to record incorrectly for starters. I actually think that your scanner has made a reasonably good job of resolving it. As for sharpness, don't ever put USM on at scan time. You may think your scans look soft, but come print time, they will be fine. Always apply USM, or edge-sharpening at print time which Lightroom will allow you to do. I have prints from film scanned on a V750 up to 15x20 on 35mm and they look fine at normal viewing distances. I also think that the other red herring is the film flatness issue affecting sharpness. Poppycock I say, it's the least of the major factors affecting the quality of the image. Most important is the density of the exposed neg, the original exposure, sharpness of the taking lens, lighting. etc etc.
I feel a bit like you didn't get the results you wanted with no user input, so from then on, you have just been wanting to justify the urge to ditch the V500 which I think given a bit of sensible handling should more than meet your requirements. Scanning is a bit of a black art, but once you have mastered it, it's just another skill to add to your portfolio. Keep on trying, and good luck!
Andy
squirrel$$$bandit
Veteran
Hey, just a little update on my V500--I tested it with some prints and slides, with all the software stuff turned off, and results are BEAUTIFUL. The colors are just about perfect.
It's only negatives where I'm not getting any reds, and everything looks all cyan-y. Maybe it's the film I was using--this discontinued AGFA stuff...although my Kodak UC400 pictures were washed-out, too. Anybody know what I might be doing wrong? How come negatives are scanning all blue and overexposed?
ampguy
Veteran
Here are some test scans from the cheap V100 Epson, at 24-bit, 2400 res. from Walgreens processed negatives. I didn't get scans from Walgreens on this roll, only prints. The prints look sharper and cleaner and more saturated, but I'm happy with the scans, which have more shadow detail.
Only the default option of unsharp mask - medium was turned on in the prof. menu of Epson Scan. Output was to JPG at #1 setting (highest JPG quality).
http://matsumura.smugmug.com/gallery/4746431_Uop76#281232541_UCZQY
Only the default option of unsharp mask - medium was turned on in the prof. menu of Epson Scan. Output was to JPG at #1 setting (highest JPG quality).
http://matsumura.smugmug.com/gallery/4746431_Uop76#281232541_UCZQY
Pherdinand
the snow must go on
Jeremy,
If u scan colour negatives, the orange mask is screwing it up for you.
The epson scanner software is UNABLE to find the proper colour balance on its own.
You HAVE to help him,no way out.
You have two ways of getting good scans from a colour negative.
1: Scan without any adjustments IN 48 BIT and proceed in Photoshop. Scan with double the resolution you wanna finally have and you may get better sharpness. Put USM on "low", turn off everything else except ICE if u want to avoid dust spotting in photoshop. If you use ICE, use it well, on the Quality setting.
2: Scan the preview, click on auto exposure, pick the mid-gray colour picker tool in the Epson scan software "Levels" adjustment window and click with the tool on a region of the image where you know it should be neutral gray. It works wonders.
You can finetune the result in Photoshop.
Pherdinand
the snow must go on
Sorry, the above was for mabelsound. But maybe for Jeremy also.
squirrel$$$bandit
Veteran
Jeremy,
If u scan colour negatives, the orange mask is screwing it up for you.
The epson scanner software is UNABLE to find the proper colour balance on its own.
You HAVE to help him,no way out.
You have two ways of getting good scans from a colour negative.
1: Scan without any adjustments IN 48 BIT and proceed in Photoshop. Scan with double the resolution you wanna finally have and you may get better sharpness. Put USM on "low", turn off everything else except ICE if u want to avoid dust spotting in photoshop. If you use ICE, use it well, on the Quality setting.
2: Scan the preview, click on auto exposure, pick the mid-gray colour picker tool in the Epson scan software "Levels" adjustment window and click with the tool on a region of the image where you know it should be neutral gray. It works wonders.
You can finetune the result in Photoshop.
Excellent, that's just what I wanted to know. Doing that Robot roll really got me familiar with how to use Lightroom (and a bit of PS), and if I can get it close with the gray picker, I'll be golden. Gonna go try it now.
squirrel$$$bandit
Veteran
OK WAIT!!! I can't believe this...when I switch to THUMBNAIL PREVIEW MODE in the Epson scanning software, the images come up PERFECTLY BALANCED. The software is adjusting everything FLAWLESSLY. WTF?!!? How on earth can I get it to balance correctly with thumbnail mode turned off?? I don't WANT the software to cut up the negs for me...but I DO want these adjustments!
squirrel$$$bandit
Veteran
OK, here's the line from the EPSON Scan manual:
"Normal preview displays your previewed images in their entirety. You must select the scan area and make any image quality adjustments manually.
"Thumbnail preview displays your previewed images as thumbnails. Epson Scan automatically locates the edges of your scan area and applies automatic exposure settings to the images. This is the default preview type when scanning film or slides."
AM I INSANE OR DOES THIS MAKE NO SENSE AT ALL?!!?!!? Why on earth should I not be able to take advantage of the automatic IQ adjustments unless the damned software is manually cutting my negatives?!? What if I want to cut them myself, with a black border left in? What if my negatives AREN'T 24MM X 36MM RECTANGLES?
Somebody please tell me I can do it my way...
wray
Well-known
If you want a black border click on the configuration button and go to the Thumbnail Cropping Area and pull the button to large.

Last edited:
squirrel$$$bandit
Veteran
If you want a black border click on the configuration button and go to the Thumbnail Cropping Area and pull the button to large.
Got that...but my main problem is that I'm taking weird sized frames on 35mm film. They're 24x24. So I can't use the thumbnail mode--the software puts one and a half photos in each thumbnail. Yet I want the image processing of thumbnail mode.
hans voralberg
Veteran
Well you cant have the cake and eat it I guess, how about trying Vuescan, I think it does that
squirrel$$$bandit
Veteran
Well you cant have the cake and eat it I guess, how about trying Vuescan, I think it does that
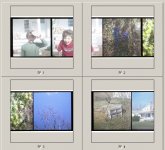
Well...getting scans from this camera is the only reason I bought the damned scanner. Here's what the thumbnails look like (below). (Pls note the overexposure isn't the scanner's fault--I was only testing the camera, which is meterless!)
I downloaded Vuescan and have not yet figured out how to do this with it. We'll see...
Attachments
Last edited:
squirrel$$$bandit
Veteran
Hmm...tried it in VueScan and it works, but the auto-adjustment is not nearly as successful. Epson Scan makes instantly usable images; VueScan would require a fair amount of retouching (though not nearly as much as ES without auto adjust).
The obvious solution would be to scan in thumbnail mode, then move the negs three quarters of an inch over. What a pain...
briandaly
Established
Wary,
You've got lots of detail with very little grain in that shot.
What film type and format are you scanning?
You've got lots of detail with very little grain in that shot.
What film type and format are you scanning?
wray
Well-known
It's Ilford XP2, 35mm - shot with my OM2.Wary,
You've got lots of detail with very little grain in that shot.
What film type and format are you scanning?
squirrel$$$bandit
Veteran
HOORAY!, I figured it out! The problem was that, when I scanned in normal mode and got one big image, I was putting my marquee around BOTH strips of negs. As a result, the big white bar between them was part of the "image" that ES was trying to auto-adjust, and the white balance was way off. When I put a very tight marquee around the negative strip ONLY, the auto-adjust works perfectly well. I think I can get away with adjusting only blacks and whites in photoshop/lightroom.
oscroft
Veteran
I put a separate marquee round each individual frame myself, then click on the "All" button and it scans them all separatelyWhen I put a very tight marquee around the negative strip ONLY
Share:
-
This site uses cookies to help personalise content, tailor your experience and to keep you logged in if you register.
By continuing to use this site, you are consenting to our use of cookies.