For accurate framing, what is needed is to have is the center of the picture seen through the finder to be the actual center of the picture the camera takes. The field of view (width and height) are a different matter, but those can also be determined with a similar technique as discussed here.
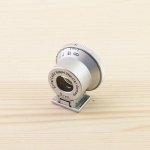
Put the camera on a tripod in a room with a flat level floor, where you can move the tripod from 3.5 feet away from a wall to about 20 feet away. On the wall, put a dot at the same height as the camera's lens. Put an arrow next to dot showing which direction is up. Set the VIOOH to 135mm, so the frame is smallest (the goal is to be able to place the dot at the center of the frame, and the 135mm setting makes that easier.) At 3.5', 5', 7', and 15', accurately focus the lens, and transfer the distance indicated on the lens to the VIOOH's distance setting. Take good notes, such as
Frame 1 landscape at 3.5',
Frame 2 landscape at 5',
Frame 3 landscape at 7',
Frame 4 landscape at 15',
Frame 5 landscape at 20',
Frame 6 portrait at 3.5',
Frame 7 portrait at 5',
Frame 8 portrait at 7',
Frame 9 portrait at 15',
Frame 10 portrait at 20'
Then, go outside and pick a point at infinity, focus the lens, set the VIOOH to infinity, and take a landscape and portrait shot with the chosen spot at the center of the frame.
Frame 11 landscape at infinity,
Frame 12 portrait at infinity.
Develop the roll of film, and check each frame to see if the expected center is the actual center of the negative (such as by drawing an X across the negative from opposing corners).
If the expected center is not at the negative's actual center, then you know you need to either compensate for the inaccuracy of the VIOOH, or (and I don't know if this is possible) have the VIOOH recalibrated.
I hope this helps. I have a VIDOM which does not match the framing shown in the viewfinder of my IIIg, so will probably do this myself in the near future.