Spyderman
Well-known
I'm posting here in case somebody needs to do something similar. My Nokton 40mm f/1.4 focussing was too loose. Like if all the original grease got pushed away from the helical and there was just too little damping.
I think that many Cosina Voigtlander lenses share the same construction - I think the 35mm f/1.4, 35mm f/2.5 (M mount), 25mm f/4 etc.
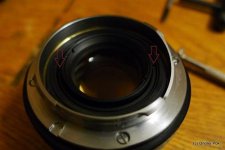
The optical block can be removed after loosening a ring from the rear. Focus to MFD to get better access to the notches in the ring. The optical block fits in only one way, there are no problems during reassembly.
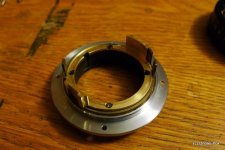
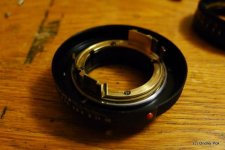
The focussing block can be taken apart after removing the 4 screws from the rear of the mount. If you want to fully unscrew the helical, make sure to scribe a mark where the helical threads disengage because there are multiple starts of the thread.
I think that many Cosina Voigtlander lenses share the same construction - I think the 35mm f/1.4, 35mm f/2.5 (M mount), 25mm f/4 etc.
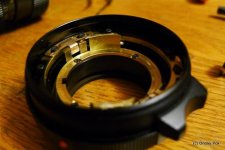
The optical block can be removed after loosening a ring from the rear. Focus to MFD to get better access to the notches in the ring. The optical block fits in only one way, there are no problems during reassembly.
The focussing block can be taken apart after removing the 4 screws from the rear of the mount. If you want to fully unscrew the helical, make sure to scribe a mark where the helical threads disengage because there are multiple starts of the thread.