What is your scanning method ?

Flyfisher Tom

Well-known
Local time
7:45 PM
Joined
Feb 17, 2005
Messages
1,975
I admit, I am rather backwards with technology.

For instance, scanning. I have a Minolta 5400 Dimage.

Here are my questions in no particular order of confusion:

1) what resolution Input DPI and Output DPI should I use? what does this depend on?

2) Is there an optimal number for both, or either?

3) What effect does varying one or the other have?

4) should my size output dimensions simply match what I anticipate printing (at its largest)?

5) I sometimes see 300 dpi tauted as the dpi used by magazines, yet on digital files shot on a digital camera, the dpi is merely 96 (these are shots in RAW). What am I missing? If 300 dpi is required by magazines, why are digital cameras geared to shoot 96 dpi? How should the 300 dpi and 96 dpi figures be reconciled?

I'm sure I have other elementary questions, but I'll save them after a few responses.

Many thanks
 
Very interesting topic!
I use Nikon Coolscan 5000, and still I think I am doing all wrong :)
Sharpening method is very interesting aspect, also GEM ...
Thank you Tom for the topic!
 
Flyfisher Tom said:
I have a Minolta 5400 Dimage.

Here are my questions in no particular order of confusion:

1) what resolution Input DPI and Output DPI should I use? what does this depend on?

Many thanks

Tom,
you got the best consumer filmscanner on the market, especially if it is the slow 5400 I version.

First, don't mix up dpi and ppi or you will get mad soon. DPI is a printing setup value, ppi is scanning resolution value. Dots and pixels. Even the scanner manual sometimes mix tha tup !

Second, do you scan for printing or for the monitor ? For printing always best scan at full resolution and resize it later to the printing size. For the monitor I do not scan more than 2400 ppi and resize it later at 700 on the large side.

Turn all scanner settings off ( USM, ICE , colour corrections and whatever) and do that all with PS later and the raw output of the scanner.
PS can do that all much better, USm setting for example.
ICE is ok ef there are serious damnages, too large to clone them out later with the copystamp. of PS.

So far my receipt !:)

Regards
Fitzi
 
I scan at 3200 ppi, very few exceptions. Even if I'm reducing quite a bit, I've found that 1200 and 1600 sometimes show grain aliasing.

I set the output file to .tif, 300 dpi, 16 bit depth, usually 2x or 4x multi-scan. This makes a huge 75-80 meg or so file, but when you process it, it will cut it down. I'll make level adjustments and such in 16 bit mode, then convert to 8.

I seem to get the best results printing at 300 dpi. I have an older hand-me-down HP 720 and it gives a beautiful print if you feed it 300 dpi images. If you give it web resolution images it gives yucky to so-so prints. I was about to give up on this printer when one of the guys on another system sent me a test image file that they use to test the big Fuji Frontier units and told me to print it at 300 dpi. It was flawless, while all of my other attempts were gross.

Hope this helps. :)
 
Thank you all, that was most helpful. I'll give the 300 dpi a try.

Although I'm not looking forward to dealing with giant 70meg + files ... lol.
 
I think the Minolta doesn't have dust-removal, but here's what I do on a 4000 dpi scanner.

1) clean the film - just a quick once over with canned air or such. This will save you time later when cloning out dust

2) for color, or the chromogenic B&Ws, I turn dust-removal on - silver B&W and Kodachrome need it turned off

3) scan at the highest native dpi - think that's 5400 for you. I don't play too much with the curves, saving that kind of thing for other software

4) scan at 16 bit depth - this gives you alot of hidden image quality if you need to make dramatic changes to the image.

5) Caption/whatever

6) convert to PNG format, they are half the size of TIFs

7) archive to DVD/whatever

This approach is what I use to scan the "keepers", but then I have to keep all those image files somewhere. Another approach is only to scan as you need an image for use. If you do that, and don't intend to work up the image too much, that'd be a good time to use the controls to say 8x10 300 ppi or such.

If you don't like the scanner software that came with yours, you might check out VueScan by Ed Hamrick. Free demo version available on the web. I can't use anything else now, it's really quite good.
 
Flyfisher Tom said:
I admit, I am rather backwards with technology.

For instance, scanning. I have a Minolta 5400 Dimage.

Here are my questions in no particular order of confusion:

1) what resolution Input DPI and Output DPI should I use? what does this depend on?

2) Is there an optimal number for both, or either?

3) What effect does varying one or the other have?

4) should my size output dimensions simply match what I anticipate printing (at its largest)?

5) I sometimes see 300 dpi tauted as the dpi used by magazines, yet on digital files shot on a digital camera, the dpi is merely 96 (these are shots in RAW). What am I missing? If 300 dpi is required by magazines, why are digital cameras geared to shoot 96 dpi? How should the 300 dpi and 96 dpi figures be reconciled?

I'm sure I have other elementary questions, but I'll save them after a few responses.

Many thanks


You will get quite a range of responses to this, as you can already see! But here's my understanding, and what seems to work for me. I'm using a Nikon Coolscan V.

Many will advocate the Rolls-Royce approach, which in this context means to scan at your highest resolution and save the output as a tiff file. I agree that's best, but it won't work for me because the resulting files are too big (130 MB or thereabouts) per negative, and my computer can't handle the processing either in PS.

For me, the best way to approach this is to decide what I want to do with the output. I print very few pictures, so I will usually scan at a resolution that is sufficient to give me a good screen image - for that I need a 1024x768 image, roughly speaking. If I really like the picture and want a large print, I'll scan it again at higher resolution. I know - inefficient! But read the last paragraph again.

A very good printer needs 300 dpi worth of information to work with. If I want an 8 x 10 print, that's (8 x 300) X (10 x 300) = 7,200,000 dots/pixels of information.

Now, I've just scanned a 35mm neg at my best resolution, 3998 dpi, which yields a file 5955 dpi x 3943 dpi, 134 MB in size (scanned as 14 bit RGB and saved as a tiff file). 5955 x 3943 = 23,480,565 pixels of information - more than is strictly needed to fill an 8 x 10 at 300 dpi printer resolution.

For an 8 x 10 I could get away with scanning at 2400 resolution - 2400 x 2400 x 1.5 inches x 1 inch = 8,640,000 pixels. (The 35mm negative is 1.5 inches x 1 inch.) At 2400 scanning resolution, my tiff file is 48.6MB, and the image dimension is 3575 x 2367. For comparison, my 6.1 megapixel digital produces a very nice 8x10 from its 3008 x 2000 file.
 
Thanks all.

Chris,

I'm still missing something. My digital camera gives me RAW files of about 36mb of 3200x2400 ppi, but with an output of 96 dpi. Now, given most pro photojournalists are now using digital, and 300 dpi is preferred for magazine publication work, why are the pro Canon/Nikon digital cameras recording in files that are merely 96 dpi. At least when I open them in Photoshop Elements 2, and look at the "resize" window, they all say 96 dpi.

I must be missing something or confusing some term.

I'm chasing my proverbial technology tail :eek:

This is giving me a headache :bang:
 
Flyfisher Tom said:
My digital camera gives me RAW files of about 36mb of 3200x2400 ppi, but with an output of 96 dpi. Now, given most pro photojournalists are now using digital, and 300 dpi is preferred for magazine publication work, why are the pro Canon/Nikon digital cameras recording in files that are merely 96 dpi. At least when I open them in Photoshop Elements 2, and look at the "resize" window, they all say 96 dpi.

In your Photoshop, you should be able to "resize" them to 300 dpi, with or without resampling. 3200x2400 will give you just over 8x10" at 300 dpi. You can resize without resampling if you want to keep the 3200x2400 or with resampling if you want a smaller (or -- grab can of worms, walk toward can opener -- larger) size.
 
Tom,

you can ignore the dpi 'comment' of the picture, the important information is how many pixels you got (in this case 3200x2400).

Regards, Robert
 
My scanning method is between 'Rolls-Royce' and Chris's method:

after some time of scanning in 2800 or 4000dpi (Coolscan V) now I usually scan for what I print most: a 6x enlargment. Because I print at 300dpi, the scan is done at 1800dpi, in 16 bit per channel (48bit with color, 16 bit with B&W).

The next step is to decide which pictures I would like to print and touch up the dust / scratches (with 'healing brush').
Next I crop the picture to 1 : 1.5 ratio (cropping away the black borders etc).
Next (optional, only for few pictures) is the 'local contrast enhancement' (USM with a large radius and low amount).
Next comes curves or sometimes only levels and then the picture is turned to 8 bit per channel.
Then USM.
Then a thin black border and then the canvas is enlarged (filled with white) to A4 size (approx 21x30 cm) and saved as jpg for sending out to a print service.
 
Flyfisher Tom said:
Thanks all.

Chris,

I'm still missing something. My digital camera gives me RAW files of about 36mb of 3200x2400 ppi, but with an output of 96 dpi. Now, given most pro photojournalists are now using digital, and 300 dpi is preferred for magazine publication work, why are the pro Canon/Nikon digital cameras recording in files that are merely 96 dpi. At least when I open them in Photoshop Elements 2, and look at the "resize" window, they all say 96 dpi.

I must be missing something or confusing some term.

You are not alone! This only makes sense to me because, as Robert advises, I ignore the bits that don't help!

But let me ramble for a bit. The image size in pixels (3200x2400 ppi for your RAW file) is absolute. The 96 dpi (resolution) describes how densely that 3200x2400 ppi image will be laid down, on the screen or on paper. If printed at 96 dpi your 3200x2400 ppi image would print at 33.3 inches by 25 inches. If printed at 300 dpi the image would be 10.6 x 8 inches. Image dimensions in conjunction with (output) resolution determine the physical size of the output.

For example, my computer screen displayes at 1024x768. The screen is 305mm wide; let's call it 12 inches exactly for the sake of the discussion. 1024 divided by 12 inches is 85.33, so my screen output resolution must be 85 dpi. To fill my screen an image need only be 1024x768, but if I take that image file and print it at 300 dpi I would have a printed image only 3.4 inches x 2.56 inches in size.

Does that make sense?


Robert - I'm interested in your workflow and output. I think you say you print to 6x4, but you enlarge the canvas to A4 size? Is that correct? So your print service prints onto A4, and you have a 6x4 print centred on an A4 sheet?
 
Chris,

sorry for the delay, I was on holiday..

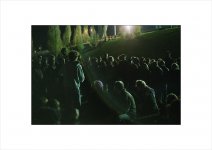
Yes, you're right, that's exactly what I do. I found out that for me the 'wasted space' is not wasted at all since it brings some 'silence' around the picture. I'll try to add an example..

best regards
Robert

edit: I've added another thin grey border around everything because otherways the 'normal' white border was hard to see ;)
 

Attachments

  • 2006-05-Walpurgisnacht-14.jpg
    2006-05-Walpurgisnacht-14.jpg
    88 KB · Views: 0
Last edited:
One thing I would check in the scaning software is to look a the histogram and see if you are clipping the highlights or shadows. I always move the sliders to make sure that I get all the info I can, and then use PS to adjust curves to get the picture right.

300dpi is a pretty strict standard for prints. It really depends on how good the scan is, your sharpening, the subject matter of the picture and your printer. 200dpi, to me is the very low end. I use an Epson 2200 and I set it to 288 (multiple of 1440 and 2880 dpi from the printer). A printers dpi is always higher, and it really doesn't mean the same thing as dpi in pictures. The dpi in printers reflects how small each little dot of ink is, not how the pixels from the picture. (I just really mangled that.)

I'd say the most important leson would be to take a negative with varied subject matter and shadows/highlights and process it different ways. And most importantly MARK ON THE PRINTS OR THE FILE NAMES WHAT VARIABLES YOU PLAYED WITH.

It is so easy to mess with bunch of stuff, end up with twenty prints, like one the best and then get confused on how you did it.

You really have to experiment, that is the best way to learn.

Mark
 
Back
Top Bottom