Yashica 635 Rebuild

farlymac

PF McFarland
Local time
5:58 PM
Joined
Jan 1, 2009
Messages
7,657
Got this camera as a project, and because it will also take 35mm film. Broken hood and name plate were the obvious problems. I figured that I'd just get the parts to make the camera whole again, and that would be all that was needed. I couldn't find just those parts, so I bid on a partially disassembled camera, and got everything but the viewing lens, and all the screws that had been taken off.

After looking my camera over, and doing some fitting tests with some Bay 1 filters I had (a mix of Rollei and off-name brands), I found out that none of the filters would work on the Yashica. Well, all except one, and it was a bear to get on and off. I was hoping then that the parts coming in would be a different design.

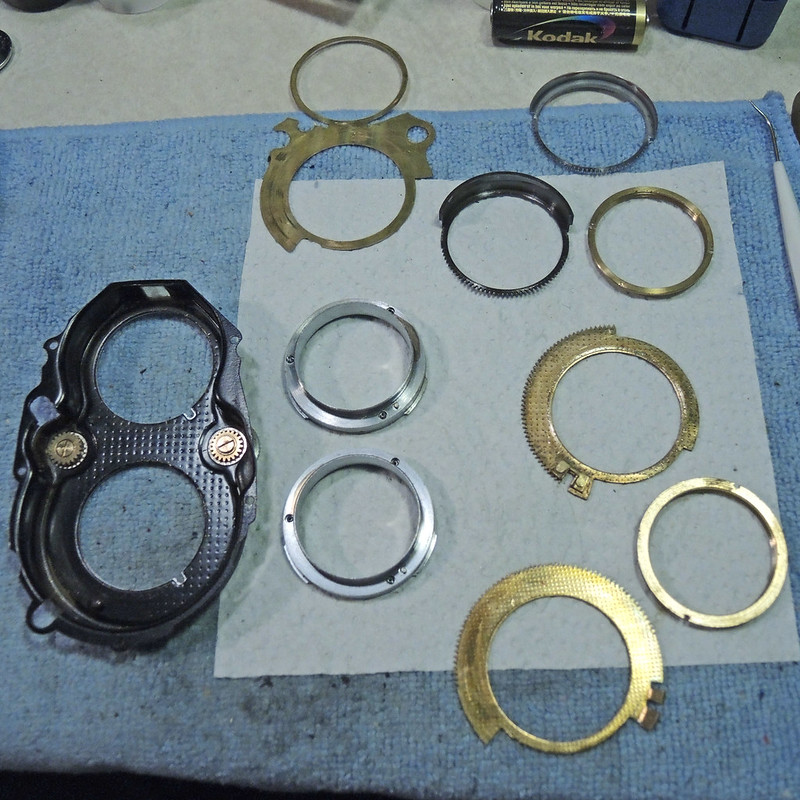
As it turned out, the parts donor is from the last design version (3 of 3), and my camera was from the second version. So I was able to do a lot of comparing to see what parts were better suited to be transplanted onto my camera. The filter bayonet was my first point of focus, and happily, the filter retaining pins were shorter, and had pointed tops, making filter mounting much easier.

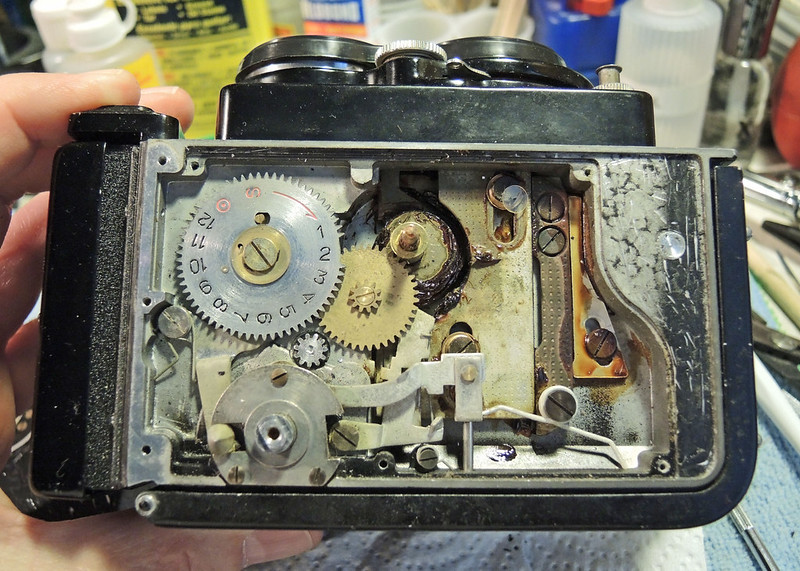
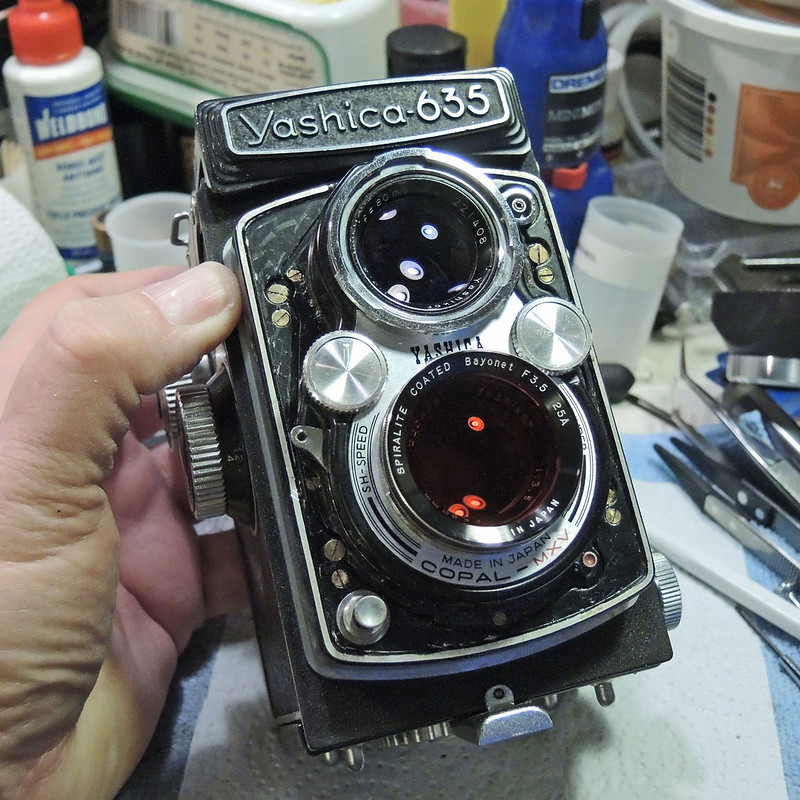
I also needed to do a cleaning of the shutter, as the slow speeds were sticking. Dunking the escapement in Ronsonol took care of that. So, since it meant an almost complete tear down anyway, I went ahead and replaced the following items: Hood with focusing screen; mirror; name/serial number plate; and front cover. While the camera was apart, I also checked focus on the taking and viewing lenses. I'll need to get a new covering for the front, as it was just a brittle mess getting that off. But here's what it looks like now, followed by a link to the Flickr set with all the notes and photos.


Filtered by br1078phot, on Flickr

http://www.flickr.com/photos/7699588@N07/sets/72157640222208015/

PF
 
Cool stuff. You are a braver soul than I, diving into the guts of this bad boy.

It's cool you are doing so, this means that a once dead camera is alive and loved again and that is a good thing!
 
Getting the focus assembly back together at the right point is a real difficult thing, I had mine completely torn down only the glue holding the leather gave me lots of grief.
 
Further Adventures

Further Adventures

Well, it's not quite done yet. I had some binding in the shutter speed selector which I traced to the speed cam drive pin fouling on the new cover. So I took the new cover off, swapped the bayonets, then ran into a different binding problem. Turns out the newer bayonets are a different height than the old ones. So I took the new bayonets out, swapped the retaining pins and springs, then put the front cover back together. Came real close to getting it right on about the fifth try, but have binding in the shutter speed selector again, but only in one direction. Will tear it down again in the morning to see if I can find a solution.

PF
 
I got rather proficient at taking my YashicaMats apart, first time because I dropped it,
and the others for shutter cleaning and all ( I once had 4 ) for re skinning with CameraLeather kits. The kits fit perfectly (just took awhile to arrive) . Well worth the effort,they're way under rated . Peter
 
Yeah, I have to contact CameraLeather for a new cover set. I might get a colored one.

Okay, I finally got the front cover to go back together correctly after about eight tries. It all depends on the order you do it in, and taking care not to bind up the parts when putting the retainer rings on. So I'm back to all original parts on the front cover except for the retaining pins in the bayonets. That is one touchy gear arrangement, and I suppose would have gone a lot easier if I'd had a factory jig with the proper tools. Those gears can get out of alignment so easily. Will know for sure if it's all okay after I get it back on the camera, and check the alignment of the read-outs.

PF
 
This was the fun part


Dis-assembled by br1078phot, on Flickr

Got it back on the camera, and the shutter selector binds if the front cover screws are tightened all the way. I backed the screws off, then kept turning them back in until I got a good balance of keeping the cover on, and being able to change speeds. So I'm not going to go test shoot it until I can get a piece of leatherette on the front to keep the screws from backing out on their own.

PF
 
Don't know why I didn't think of that, Peter. Thanks for reminding me. Now I have to go peruse the cosmetics aisle again.

PF
 
New Problem

New Problem

Looks like more surgery is needed on the 635. I went to load a roll of film in it this morning, and the frame counter does not work. I'll have to check the manual again to see if there anything I did wrong before taking the side cover off. But now I have a dedicated test roll of 120 film.

PF
 
Winder Repair

Winder Repair

As suspected, there was a weak return spring in the winding mechanism that kept the gears from meshing properly. I had to take most of the parts out to get to it, but it didn't take too long, as it's pretty straight forward construction. My biggest problem was figuring out why the frame stop wasn't working. After a while, I realized that the frame release button had to be installed, which I had left off so that the frame winder knob would be quicker to take off. D'oh!

So it's all working now, and I uploaded 40 more photos, and 3 videos.

View of the winding and focusing mechanisms

Winding Mechanism Revealed by br1078phot, on Flickr

And the culprit spring

Transfer Gear Lever Return Spring Adjustment by br1078phot, on Flickr

As always, all photos, videos, and narrative at the link below
http://www.flickr.com/photos/7699588@N07/sets/72157640222208015/

PF
 
Test Photos

Test Photos

I did the film test with Kodak T-Max 100, and a yellow filter. I screwed up when using the Kodak Series V-to-Bay 1 adapter, leaving the retaining ring on while using the hood. It caused a bit of vignetting, but I fixed most of that by judicious cropping, and sometimes some dodging (vignetting) and burning (flare from the retaining ring reflecting off the back of the filter).

Full set at the link. http://flic.kr/s/aHsjSjsSpE

PF
 
Thanks for the link to your photo set. I picked up a decent 635 locally last week.

Shutter is oil free and works splendidly on all speeds and apertures. Has some metal trim corrosion, but no rust, and inside is spotless. There was a spot on the back of the front element that was probably not an issue, but it gave me an excuse to figure out how to take it apart. Cleaned that off and all the other lens surfaces as best I could, cleaned the mirror, and put it all back together and only managed to make two tears in the vulcanite. There are some specks out of the lens coatings and a small chip on the front element and rear element with quite a bit of micro-scratches but no haze. It has the Yashinon lenses, FWIW.

Noticed the viewing lens seemed off a little compared to the taking lens so took it all apart again. Didn't realize it had a set screw and thought it screwed out like the taking lenses so turn a little and the mount with lens fell out. The mount was pressfit aluminum. So I cut a small 3/8" wide piece of film negative and wedged it in the mount hole while pushing it back in with the set screw in it's access hole. Seemed pretty tight and flush to the plate it mounts to. The only true way to fix it I think would be to get a new plate with the mount and swap. Long as I don't bang it around it should be good now. Yes, I'm an idiot :bang:

To make matters worse, when I went to set the infinity focus, which what was actually off, and adjust the focus knob stops, the far side cams popped out. I now have a completely torn apart Yashica 635! Did a dry-fit and everything works on the focus rails now, but they are a little rough on the right side and hope lube will help. Need to disassemble, lube, and put it all back together. Someone had been in it before because there was a lock nut and a couple of washers on the focus knob that was missing. Long as I can get the focus back correctly I should be good to go. Might as well cement that viewing lens mount while I'm in there and pick out some new fancy pleather for the front and side coverings. Even if it doesn't work out it is cool to see how everything works.

Does anyone have suggestions on what lube to use on the cams and rails?

As a side note Mark Hama quoted me $135 to CLA it. Considering I only spent $45 on this one it might be worth it.
 
As a side note Mark Hama quoted me $135 to CLA it. Considering I only spent $45 on this one it might be worth it.

That's the right attitude! Some would say it's not economically worth it, since the repair cost is 3x what you paid. I look at it as if you saved a lot on the purchase, and have plenty of budget left for the renovation.
 
That's the right attitude! Some would say it's not economically worth it, since the repair cost is 3x what you paid. I look at it as if you saved a lot on the purchase, and have plenty of budget left for the renovation.

I already have a Yashica-Mat (not a 124) with the Yashinon lenses that I really like, so it's not like I don't have another camera to use :D

Right now I have my Retina IIc on it's way to New Zealand for Mr. Sherlock to work his magic. I'll probably clean the 635 up as best I can and see if I can get everything set. If it's still iffy I'll send it off to Mark.
 
Does anyone have suggestions on what lube to use on the cams and rails?

I use Super Lube. It's a very good synthetic that works in a wide range of temperatures, and guaranteed not to separate or run. Micro-Tools sells it, but I found it locally in the hardware store. One 3 oz tube should last me for years.

PF
 
I use Super Lube. It's a very good synthetic that works in a wide range of temperatures, and guaranteed not to separate or run. Micro-Tools sells it, but I found it locally in the hardware store. One 3 oz tube should last me for years.

PF

Thanks! I'll look about and see if someone local has it. It looks like the cams (and it's shaft) and the rail guides are what needs lube. Everything else I would assume would be better left dry or maybe with just a needle drop of machine oil.
 
Back
Top Bottom