Yashica Electro Lens on Sony Mount

ColSebastianMoran

( IRL Richard Karash )
Local time
3:34 PM
Joined
Sep 15, 2010
Messages
2,738
Location
New Hampshire USA
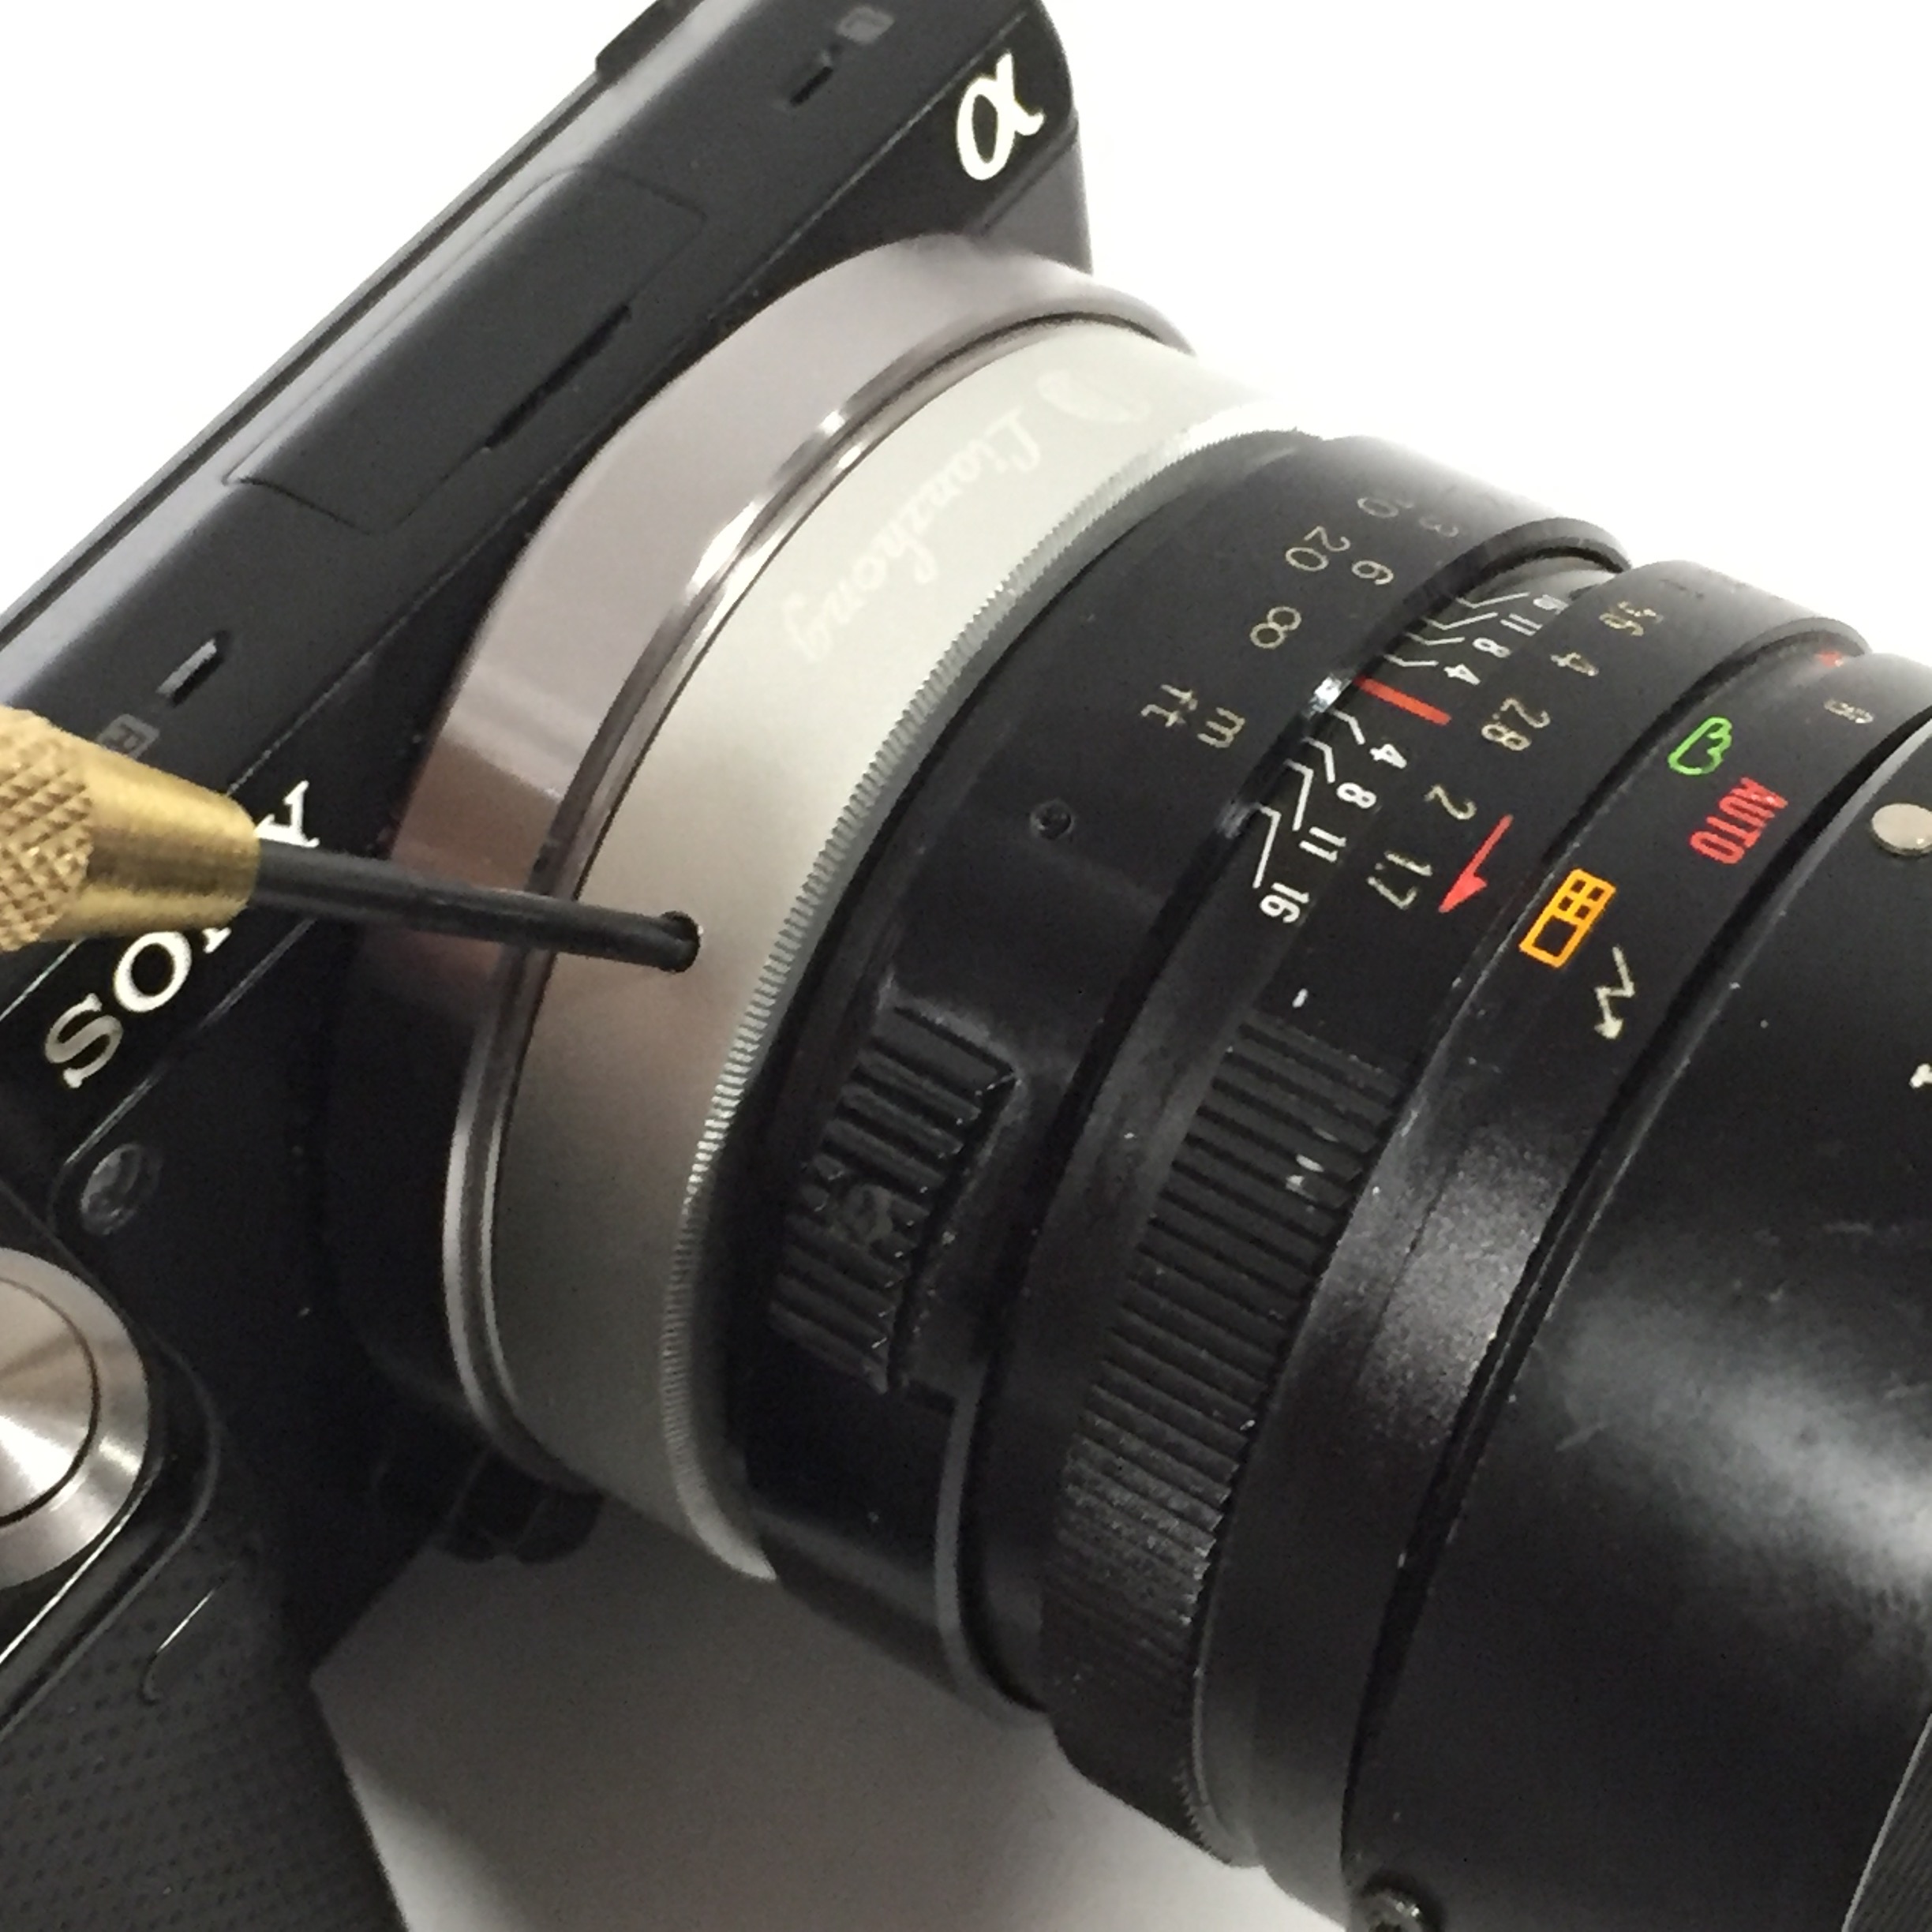
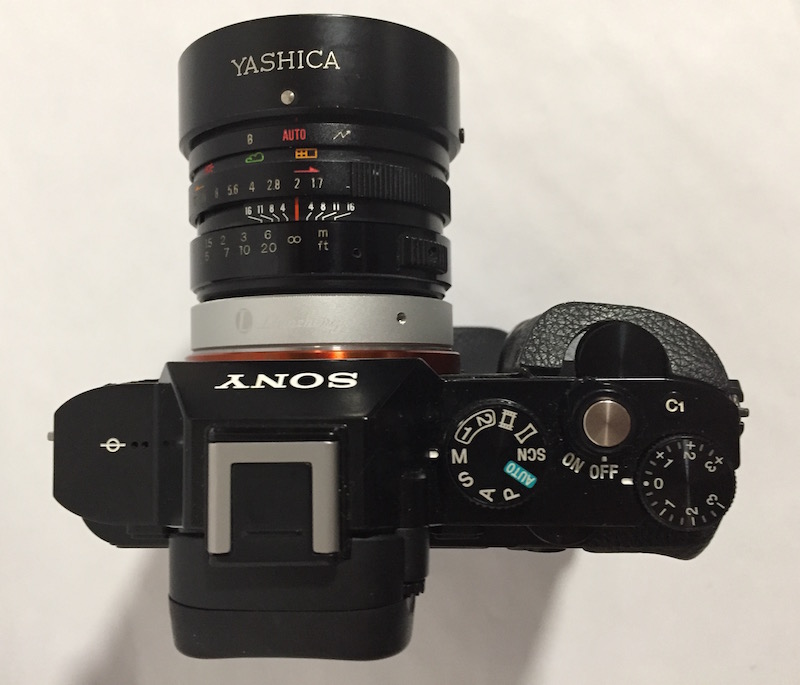
Have long liked the lens on the Yashica Electro and lusted to have one mounted on a modern DSLR.

Now in the midst of a project to create one.
- Here is a thread with instructions and photos
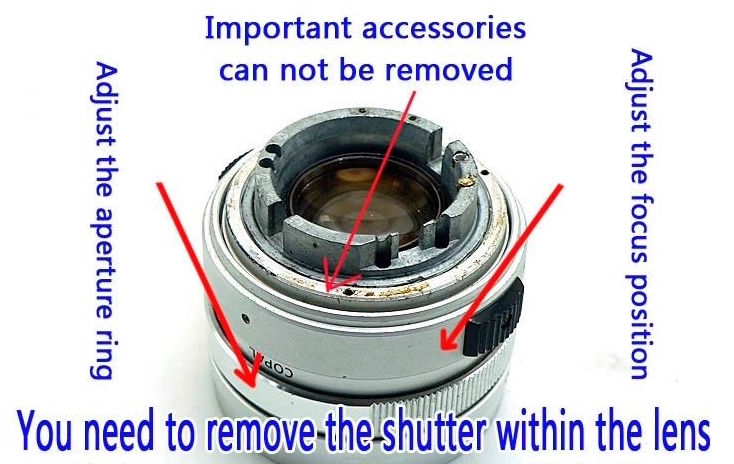
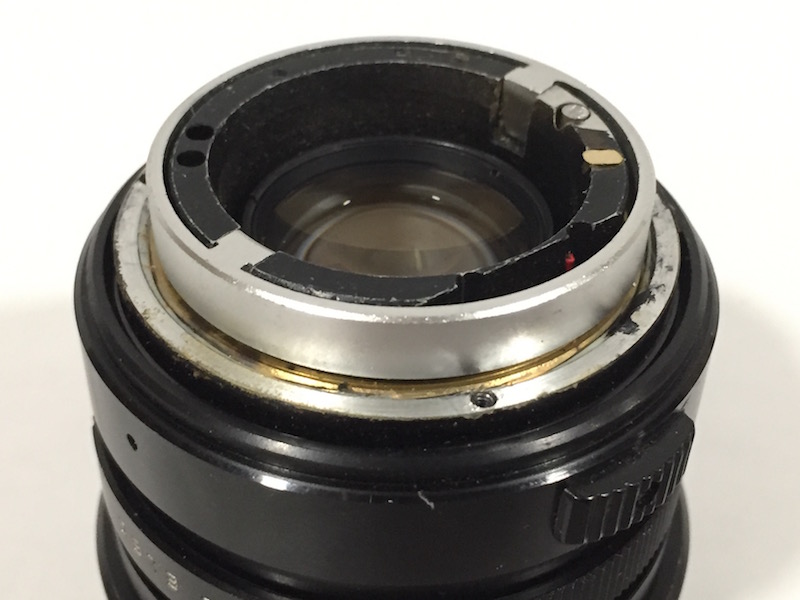
- Here is more detailed info about opening up the front of the lens
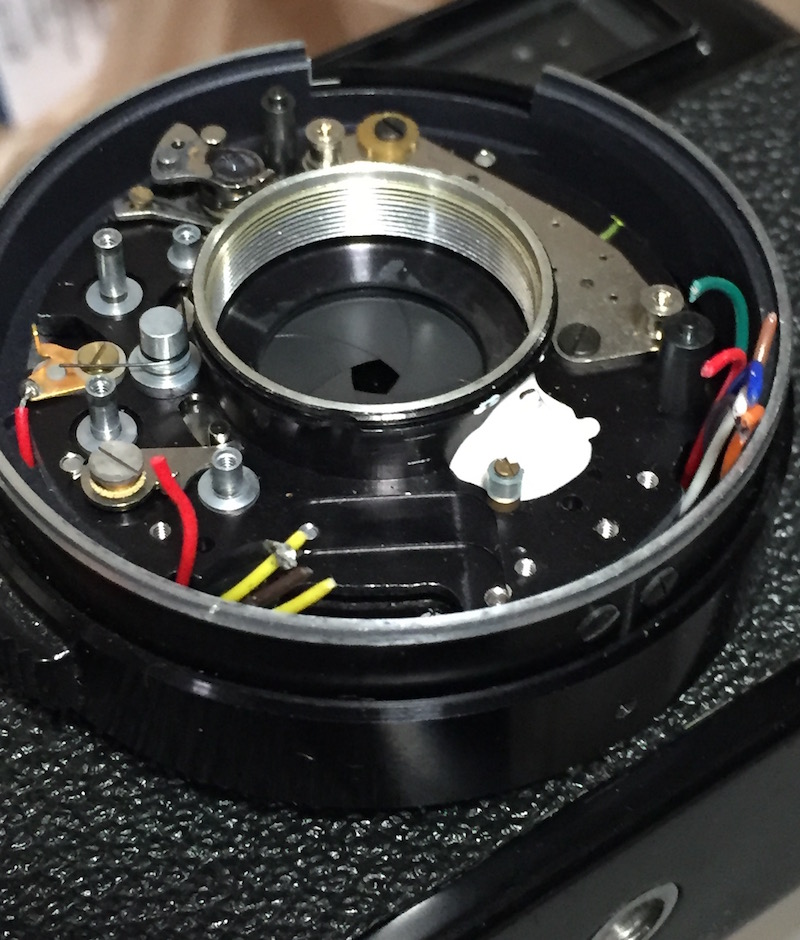
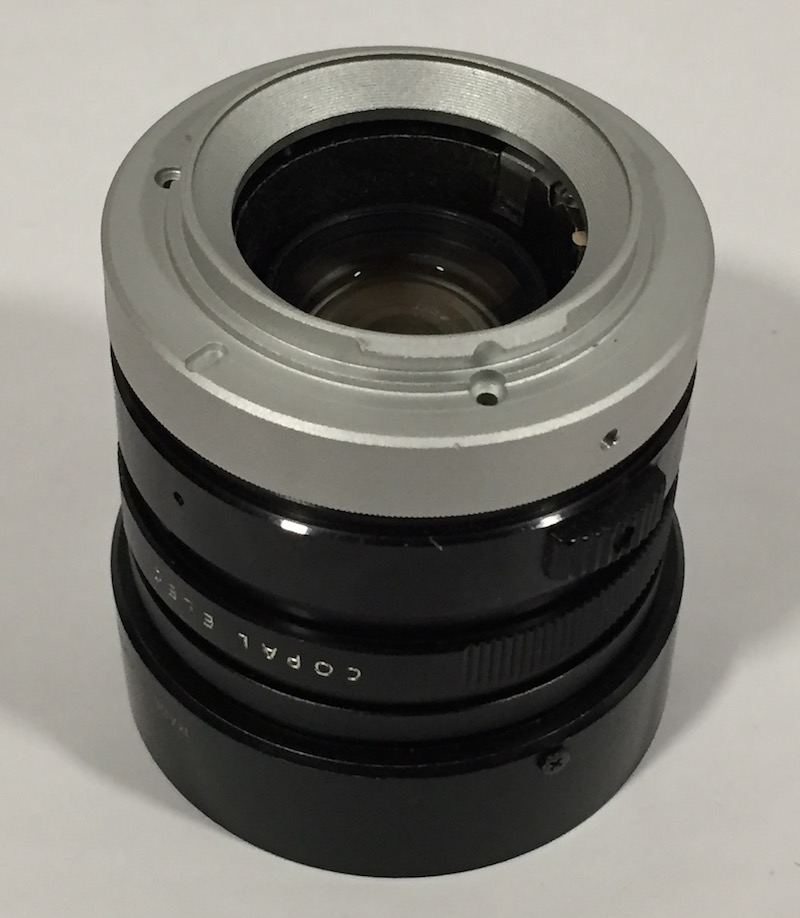
- And, finally the repair manual with lots of helpful photo sequences

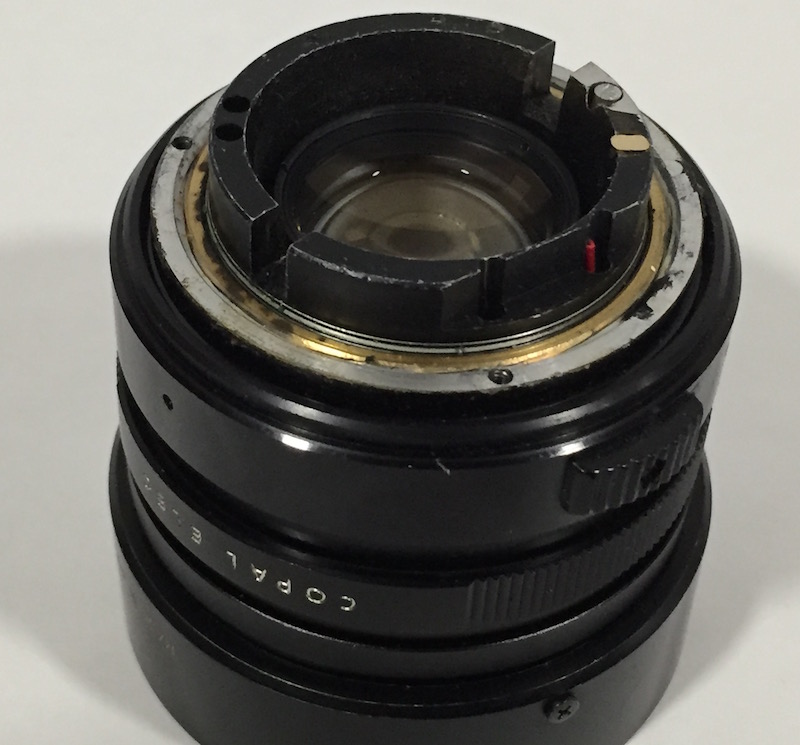
I like the black metal Electro lenses, so I'm doing this with a GT.

More to come!
 
Amazing! I have a Yashica Electro 35 CC here, with electronics problems I can't fix. I have been thinking about putting its lens in some mount, I would love to have it RF coupled, but I'm afraid that will be extremely difficult... so I might follow your example if I ever get a Sony (actually I'm feeling the temptation to buy one just for that... but I'll wait for prices to come further down, I'm fairly broke).
 
Amazing! I have a Yashica Electro 35 CC here, with electronics problems I can't fix. I have been thinking about putting its lens in some mount, I would love to have it RF coupled, but I'm afraid that will be extremely difficult... so I might follow your example if I ever get a Sony (actually I'm feeling the temptation to buy one just for that... but I'll wait for prices to come further down, I'm fairly broke).

CC will require jury-rigging the adapter.

If you want to get your CC fixed, suggest contacting Mark Hama; he has parts.

Finally, the Sony's are great, you could try out a NEX 5n for very little money.
 
I have a junk Electro with a very nice lens. I wonder if this can be mounted with a Canon FD mount. I have both. I also have a 39mm LTM I could use. Anyways I'll be following your progress.
 
By jury-rigging, do you mean more than in your case? The rear of the lens looks similar.
I don't think I'll send it out for repair, especially not overseas (I'm in Europe), but I'm not determined to butcher it yet, either, it's a really nice camera... might just sell it to someone who wants to have it fixed. Or just keep it until a Sony or a second broken CC to make one functioning one drops into my lap🙂.
 
Here's the part I'm buying for the mount:

170122-YashicaSony-Adapter-crop.jpg
 
Thank you, I've read your post on the other forum and for now it looks like the CC lens might work the same. I might get back to you about measurements if I actually do this, but it won't be soon.
It occured to me that it might even be possible to swap the weirdly shaped two bladed diaphragm in the CC's lens for one from a lens like yours, but alas, even if technically possible the size of the opening will most likely be different because it's a different focal length, right?

I have no idea if the CC lens could be re-purposed like my Electro GT lens. I'll be happy to measure anything if it would be helpful.
 
David, getting the shutter blocked and getting the lens out was not bad. I don't have any special tools, just a set of tiny screw-drivers.

Shutter: Go in from the front. Unscrew the ring. Unscrew the front lens set. Remove the next piece and the shutter mechanism is right there. Just start removing screws and pieces until you can see the pins that move the shutter. Freeze with a drop of epoxy.

Lens off: Basically peel back the covering and remove four screws. But, find the repair manual on the net, this has a couple hints for getting the lens off the body. Clean up the back by ripping off one lever and cutting one protruding rod.

Still waiting for the USPS to deliver the mount kit.
 
Finally got the parts from seller. Looks good. I'll report here.

Recap:
- Start with a full-sized Yashica Electro, GT, GTN, GSN.
- Go into front of lens by unscrewing the cosmetic ring
- Unscrew lens front group
- Remove the next piece to expose shutter mechanism
- Remove lots of parts, lock shutter open with a drop of epoxy

Here's what that looks like:
- White epoxy locks shutter open
- You see the diaphragm here
- EDIT: Diaphragm is still controlled by the aperture ring

170202-00-YS-ShutterEpoxy-IMG_8015.jpg
 
Next, remove the lens:
- Peel back leather
- Remove four screws
- Find the repair manual for a couple hints about removing the lens
- Tear off one protruding thing, cut off the other

Back of lens will look like this:

170202-01-YS-LensBack-Naked-IMG_8126.jpg
 
See photo further up in this thread for the new parts.

Here's the inner ring slid onto the back. This keeps inside lens structure from rotating as it moves in/out for focus.

This inner ring has to be kept from rotating, but not pushed to one side or deformed. See more below.

170202-10-YS-LensBack-wRing-IMG_8124.jpg
 
Next, set the focus ring to infinity. Now we have to lock the inner ring in the right position for infinity focus.

The mount is well constructed so that with the red line centered, lens should focus to infinity. I'm going to be focusing manually, and I want to make sure I can reach infinity or even a little beyond.
- Red line just left of center, lens focuses beyond infinity
- Red line right on center, supposed to be right at infinity
- You choose

Tighten the three grub screws gradually, a bit at a time, so the pressure on the inner ring is even, so it's not pushed to one side.

If the focus ring binds, the grub screws have pushed the inner ring against the outer. Loosen and retighten till the focus is smooth as silk.

Here's my final alignment, just left of center. Check with a camera body, with MF assist and focus peaking, make sure you can focus on a distant object.

170202-40-YS-LensAlignmentForInfinity-IMG_8131.jpg
 
Top view, with the nice Yashica hood for this lens. I've replaced the standard thumb screw with a small flat-head screw; I plan to leave the hood on most of the time.

EDIT: Note red line aligned left of center. Like this, the lens will focus way past infinity. I adjusted it some more, took a couple of tries.

170202-58-YS-on-A7Top-IMG_8134.jpg
 
Back
Top Bottom