
kittyjuls
Newbie
Hi there, this is my first post and I have just fallen in love with RF cameras. The simplicity, no menus no auto focus, no USM, no shooting while looking like some evil Dalek, just love it. I had been facing a waining interest in photography as I look at my 5D and just thought of any excuse not to take it. Bought my first Zorki 4k and I'm hooked. Anyway, I digress, one of the things that these camera's need is a good CLA and I can confidently tell you that the instructions on here posted by Anthony Nichols were easy enough that even a complete idiot like me who has never taken anything apart and gotten it to work again, well not after putting it back together, has been able to do this job - thank you Anthony.
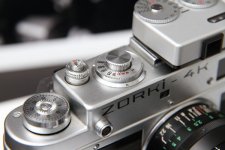
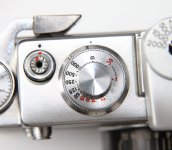
After all that work it just still peeved me that the speed dial was becoming unreadable, a common problem I'm told. Obviously this has been a well used camera, the unmistakable sign of a goodun. Well anyway, not to allow this small detail to ruin my proud achievement, I set about fashioning a new set of markings by scanning a sharper (not so smooth operating) Zorki dial and Photoshop the markings. Bought a sheet of clear water slide decal paper off of ebay for £2 and printed off the dial, left it to dry for a couple of hours, applied a couple of coats of lacquer and Wallah!!..
The red is still a bit blurry as my inkjet doesn't seem to be able to produce a sharp red but it's 100 times better than what it was. If anyone's interested I can post up a link to the photoshop file. Maybe if you have access to a colour laser printer you could get the dials sharper.
Attachments

Last edited: