I did something of the sort about a decade or so back, but it was on a Leica Elmar 90mm f4 - the earlier chrome type which had a vulcanite ring around the base. In my case I used the only compound I could find at the time that was suitable which was a thick trowel-able bituminous compound designed for sealing joints in roof gutters etc. (From my local hardware store). It took a week or two to set hard as I recall, but when it did its look pretty much exactly matched the look of vulcanite in color and its feel was realistic too.
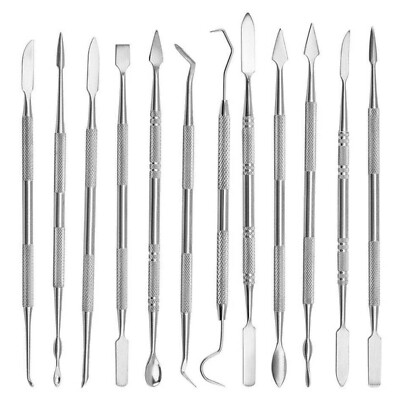
I was fortunate in that I had retained all but a tiny piece of the detached vulcanite so most of it could just be glued back in place using a suitable glue and in the small missing area I was then able to pretty much match the vulcanite's pattern enough to make it convincing. From memory I used the sort of modelling tools depicted in the first eBay link below as part of the project + tweezers for handling small bits of vulcanite.
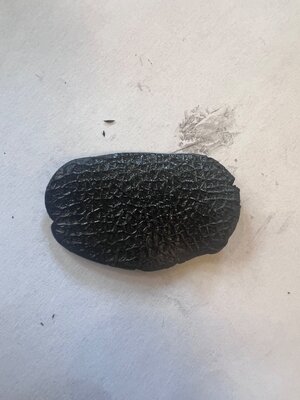
For a larger (but still relatively small) piece of missing vulcanite it is more difficult to get a convincing result. One thought occurs to me is that it may (????) be possible to buy a sheet of PU leatherette with a really close matching pattern on eBay. A year or so back this was exactly what I did (see second link below) but in my case I used it on a Zeiss 135mm f4 lens that originally had this kind of leatherette around the circumference of its focus ring (which was designed to look pretty much exactly like vulcanite). In my case the entire covering of that ring was missing when I bought it so I did not need to match a new patch to existing vulcanite - I just replaced the lot with leatherette. Different leatherette types were being sold and some variants had different appearances that looked less like vulcanite's texture, other's more like it. Also, if you were to go down this route you would need to match the shape of the patch to the shape of the missing piece - which can be done fairly closely by rubbing the vulcanite (covered with paper temporarily taped to the body) using a soft black pencil to make a more or less precise stencil for cutting out the patch.
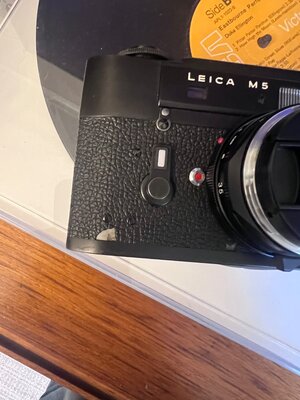
BTW in my case when I had to replace the missing vulcanite piece on the Elmar lens I also first carefully flooded the underside of the surrounding vulcanite with super glue (a very small amount) as that vulcanite was showing signs of detaching from the lens body too - leaving a gap between vulcanite and body. This stabilized the remaining vulcanite in that area so more of it did not crack and fall off. Needless to say, be careful as super glue has a habit of running into places you do not want it and also of fogging glass elements in the vicinity as it outgasses when curing. In my case the Elmar fix worked perfectly and eventually I sold it quite some years later - the repair was still there and never seemed to affect the price so I suppose it did a good job. To be honest had I known about the existence of leatherette when I worked on the Elmar I probably would have just removed its damaged vulcanite in its entirety and used a full wrap of the leatherette instead. It would have given an arguably easier result. But of course, that would have involved removing all of its vulcanite and you do not wish to do that with your camera (and I understand your motives in this).
PS I am not familiar with Milliput (specifically) and have not seen it here in Australia. I imagine from its name that its a kind of epoxy putty which can be worked with the fingers to mix the active ingredients and is not "goopy" and ultra sticky as with many epoxies including some that have a paste like consistency. We do have some such epoxy putties like this, sold by other names, and I have used them for other purposes. In this case I would be inclined to roll out a thin sheet and press this into the gap. Use a flat board to level the top to the same level as the vulcanite. Then use the kind of tiny hobby tools I linked below to replicate a reasonable facsimile of the vulcanite's texture. Problem is of course is that in my experience, this stuff tends to set quickly so working time is strictly limited........................so I suggest it only as a potential option but one which would have issues.
12pc Clay Sculpting & Wax Carving Tool Set – Stainless Steel Mini Spatula Kit. ✔ Miniature sculpting. 12x Double-ended Sculpting Tools (24 heads total). ✅ 12 Unique Tools – A full range of shapes for carving, smoothing, modeling & scraping.
www.ebay.com.au
Black Leatherette | Faux Thick Leather. Can be machine or hand sewn and is suitable for die cutters capable of cutting pu leather fabric of this thickness.
www.ebay.com.au