Advice on filing a negative carrier

Leica All Day

Veteran
Local time
12:01 PM
Joined
Nov 29, 2007
Messages
2,177
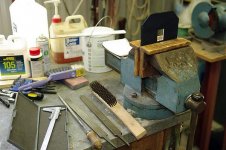
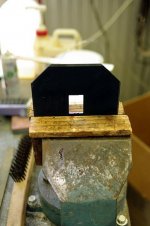
Hello.....I would like to file the edges of my negative carrier slightly so I can get all four borders black...I can only get two borders to show now that are black.....does anybody have any advice before I start to file......
cheers, michael

attachment.php


omega rff 1.jpg

omega rff 2.jpg

omega rff.jpg
 
Never done it, but I would -

Use a fine tooth, single cut flat file.

Grind the sides/edges of the file smooth/dull with a whetstone or fine sandpaper on a flat surface so they don't cut into the side when you're in the corners.

My 2c, maybe some words from sombody who's done it?
 
Last edited:
My suggestion would be to get a second Neg Holder, one that's used, worn & ugly (check out *bay) so that if you screw up you don't screw up on the one you have (which looks really nice)
Next just get a good flat file, maybe an inch wide and go for it...tape or mark how much you want to remove...take your time, do not rush it...
 
Do you have a spare carrier? Or a 6x6 carrier you could tape up and use instead of filing this carrier?

If you proceed, work slowly, with a new file (fine, single cut as recommended by Ranchu). Don't overdo it in the corners.

I am literally in the middle of filing out an old half-frame carrier to 35mm. I file it square to the dimensions, then carefully bevel or undercut the lower edge of the opening (as per the original carrier in the Durst 1200 system). After filing I will carefully polish the edges with very fine carborundum paper to give a smooth finish, then give the bare surfaces a light coat of mat black spray paint.

Cheers!
 

Attachments

  • Mask1.jpg
    Mask1.jpg
    45.4 KB · Views: 0
  • Mask2.jpg
    Mask2.jpg
    30.5 KB · Views: 0
Last edited:
It depends on the finish. Rough edges have never bothered me. I mark on outside surface with a guidelines. File it out with a fine metal file--something with a flat surface and a fine edge for corners. I lightly debur the edges, especially the inside edges. I use a sharpie to blacken the filed surface rubbing the surface that makes contact with the negatives to make sure no ink is there.

If you are cutting a mask for a panoramic format, I start with a holder of the right film size and make rough cuts with a saw to make the open the approximate size before filing.
 
I've been looking to do the same to my negative carrier. The only thing stopping me is the fear of overfiling my carrier. I'm going to pick up a second carrier to practice on. I'm thinking of filing the top side first to get a feel of it, if I overfile I hope the bottom side will only show the right dimensions(assuming I get it right the second time).

Measure twice, file one.
 
I have filed out 35mm Widelux carriers, 6x6, 6x12, and a double 6x6 and I have never over filed. I use an exposed test frame that I don't need to check the aperture from time to time, but if you measure the film area propertly, it is not that difficult. Besides, negative carriers are just flat pieces of metal.
 
thanks guys....I currently have 4 negative carriers...one is for the minox size negative...one is the 35mm that is shown in this thread, one is for 6x6 and I think the other is for 6x7.....I thought about modifying the 6x7 but then I thought about how flat the film would lie and decided against it...I use the 6x6 one, so I dont want to modify that one...........I think my best bet would be to try an find another 35mm carrier online and get it to sent to me out here.....

the thought of modifying the mionx negative carrier has crossed my mind, but I think I will try to find a second 35mm carrier and give it a go...thanks

cheers, michael
 
"it is not that difficult. Besides, negative carriers are just flat pieces of metal."

yeah, i thought that too....then I had second thoughts
 
"it is not that difficult. Besides, negative carriers are just flat pieces of metal."

yeah, i thought that too....then I had second thoughts

I just put it in the vise and filed it. Not concerned with cosmetics, just a smooth finish so as not to scratch the neg. I didn't measure anything, just hit it with the file. All you want is a bigger hole. 20 years later it still works fine...
 
Why not simply make a mat-board carrier, they work just as well as the metal ones for the film sizes you mentioned?

Eli
 
I second Eli's comment. Make a second carrier from cardboard, using the original carrier as a template on how it's shaped. It's easier to cut card than metal. And if you make a mistake, cardboard is cheaper too, than getting a new or another 'real' negative carrier.
 
Why not simply make a mat-board carrier, they work just as well as the metal ones for the film sizes you mentioned?

Eli

it does not work as well, it can bow from the heat and/or pressure and does not keep the film as flat. I tried it ages ago. It also lacks the guide rails or posts for ensuring the neg is centered with the lens. There is just no way you can wreck a metal carrier just by filing it out a bit, just do it.
 
it does not work as well, it can bow from the heat and/or pressure and does not keep the film as flat. I tried it ages ago. It also lacks the guide rails or posts for ensuring the neg is centered with the lens. There is just no way you can wreck a metal carrier just by filing it out a bit, just do it.

I used a lot of cardboard carriers for ages too, and they seemed to work well in Omega, Beseler, and other enlargers with 'jaws' which clamp on the carrier.
As for guide rails, you can also do cut outs which mimic the the punched holes and guide pins found in many of these carriers. Lining up 35mm or 120 strips with these makeshift guides is as easy and effective as the original carrier.

Here is an example of a print from a negative carried by a cardboard 'filed out' carrier:

index.php
 
I've used full frame matt-board carriers for more years than I care to count, both in professional studio darkrooms where I was first introduced to them and my own. The only time I've had difficulties was when too thin matt was used. 8 ply matt is pretty much de rigueur and if an original carrier is used as a templet, it is easy enough to see/feel when it's out of position.

If you have trouble lining up the negative, a strip of tape or film at the top end of the window will make for easy positioning.

Eli
 
The others have already chimed in with good advice. One thing I will add - you only need to file two edges (no need to do all four). It is a little easier to keep things square and neat if you only file two edges. That being said there is no real reason to keep the edges neat (your easel can compensate for rough edges). You can also skip filing the carrier and just create black penlines while you are printing.
 
Get a second carrier to do this on.

I didn't use a vise. Just held it. You want a six inch mill ******* file. It's a single cut file. Also some sandpaper. I used 320 and 600 for the final buff. You might want to coat the edges with some kind of black paint to reduce reflections. Then again, you might not want to if you want sloppy borders.

Use an old negative to check your progress. Once you are done and you think everything is really smooth, use some old film to check for scratching.
 
Back
Top Bottom