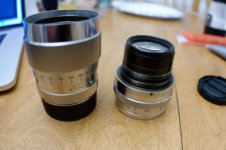
Thanks Jim. I figure out how to take it apart.
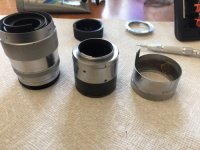
Optics are easy from the front as the whole module with aperture just unscrews from the front. Then the rear optic unscrews from that module.
Taking apart the focus ended up to be fairly easy, getting it back together was a little more of a puzzle. The distance scale on the lens has one set screw. If you take that screw out and then unscrew the distance scale (it is separate from the focusing ring) you can unscrew the two halves of the helical. When I had them apart it was easy to clean and regrease one side. The other side would have take more disassembly but I didn't need to go that deep.
The mount area has three set screws. Take them out and the entire mount with DOF scale will come out. Leave this off to reassemble the lens.
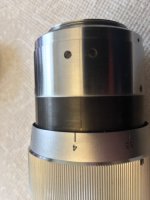
The distance scale and the DOF scale have each part of the focus limiter in them. I found it easiest to put it back together by screwing the distance scale completely into the focus ring and putting in the set screw.
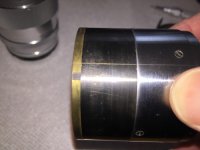
There were two scribed lines on the brass body (mount side) that lined up the helical with the set screw hole in the focus ring half of the assembly. Line those up to get the helical started.
Then lining up the helical and screwing it together. Make sure the RF cam is fully extended when you have the helical all the way together. You might need to reach into the lens body to hold the spring loaded actuator out slightly to get the helical to screw in all the way.
After you have that screwed in all the way I back off from infinity slightly (to give room around the focus limiter) and then put the mount/dof scale back on the lens. A little tricky to get the three holes lines up but I used wood toothpicks in them to get it all lined up.
Could probably take it apart without removing the set screw on the distance scale. If you just take off the mount/DOF scale that would disable the limiter and allow it to unscrew completely. Taking out the distance scale gives a little more access to outer side of the helical to be able to clean it more.
Shawn