Ash
Selflessly Self-involved
I'm sure I'll become notorious for these kind of things, but here goes!
A big thank-you to TimeFreeze. I now have 5 huge bulk rolls of 20 years out-of-date camera film to use up!
It's mainly 'Process E6' slide duplicating film.
Of course, E6 processing is next to non-existent, so much like my attempt with a C41 film, I've begun the endeavour to work out what speed a slide-duplicating film should be used at, and how to develop.
I've managed to get one or two photo's.
My question is this: What happens in E-6 processing?
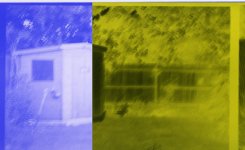
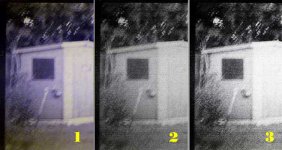
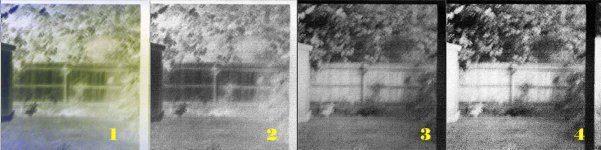
When developed with typical b&w developer (generic Jessops brand) the negs appear black, but held up to the light with a yellowy tinge I can see a negative image creeping from beneath.
My neg scanner can only JUST cope with the film but strangely, when only scanned as a positive, and then inverted in Photoshop. The pictures have a really nice blue colour 🙂
Has anyone got idea's on stripping some layers* from this film so that the scanning is easier, and the negs don't appear with that thick dark layer? Some fun has taught me bleach strips ALL the emulsion! You live and learn I guess!
Anyone dabbled in E6 or other colour developing, or have any thoughts on how I should conduct my experiments?
*sorry about my awful terminology!
{positive/negative attached. Please dont criticise the exposure and blurring etc - handheld slow shutter speed on a test film, very rushed}
A big thank-you to TimeFreeze. I now have 5 huge bulk rolls of 20 years out-of-date camera film to use up!
It's mainly 'Process E6' slide duplicating film.
Of course, E6 processing is next to non-existent, so much like my attempt with a C41 film, I've begun the endeavour to work out what speed a slide-duplicating film should be used at, and how to develop.
I've managed to get one or two photo's.
My question is this: What happens in E-6 processing?
When developed with typical b&w developer (generic Jessops brand) the negs appear black, but held up to the light with a yellowy tinge I can see a negative image creeping from beneath.
My neg scanner can only JUST cope with the film but strangely, when only scanned as a positive, and then inverted in Photoshop. The pictures have a really nice blue colour 🙂
Has anyone got idea's on stripping some layers* from this film so that the scanning is easier, and the negs don't appear with that thick dark layer? Some fun has taught me bleach strips ALL the emulsion! You live and learn I guess!
Anyone dabbled in E6 or other colour developing, or have any thoughts on how I should conduct my experiments?
*sorry about my awful terminology!
{positive/negative attached. Please dont criticise the exposure and blurring etc - handheld slow shutter speed on a test film, very rushed}