miyarui
Newbie
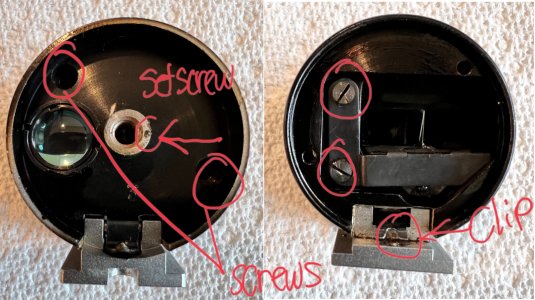
I recently acquired a Zeiss Universal Finder 440 from a relative. It has a turret-style finder, as shown in the attached image, and can switch between focal lengths of 25mm, 35mm, 50mm, 85mm, and 135mm.
The exterior is in good condition, but there is noticeable cloudiness on some of the lenses in the internal optics. I would like to disassemble and clean the finder to improve its clarity, but I cannot find any articles or resources that explain the process in detail.
I have previously cleaned a KMZ turret finder, but the internal structure of the Zeiss 440 seems quite different. If anyone has experience disassembling this model or can offer some advice, I would greatly appreciate it.
最近、親戚の縁でZeiss Universal Finder 440を手に入れました。添付画像にあるターレット型のファインダーで、焦点距離を25mm、35mm、50mm、85mm、135mmに切り替えられます。
外観は良好な状態ですが、内部の光学系にはいくつかのレンズに顕著な曇りが見られます。ファインダーを分解して清掃し、鮮明度を向上させたいのですが、手順を詳しく説明した記事や資料を見つけることができません。
以前KMZのタレットファインダーを清掃したことがあるのですが、ツァイス440の内部構造はかなり異なっているようです。このモデルの分解経験のある方、または何かアドバイスをいただける方がいらっしゃいましたら、大変助かります。
Last edited by a moderator: