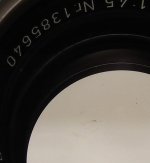
Hektor 135/4.5 disassemble and cleaning

MXP

Established
Local time
2:36 PM
Joined
Aug 8, 2008
Messages
167
I just got a nice 135/4.5. It has some dust / dirt inside. Not bad but could be nice to have it cleaned. Is this lens easy to disassemble and do the clearing your self? ......any detailed description on how to do this somewhere?

If you just want to clean the rear element. How do you out there do this?
The rear element is not easy to reach.
 
The optics module unscrews from the focus mount. Just turn it.

Thank you!
This was very easy. Next step would be to clean the glass surfaces where the aperture is. Is this done from the front using a rubber tool to unscrew the ring with the name, ser. no. etc......and then continue from there?
 
That should be it, or if it's similar to the 90/4 you can unscrew the rear element and clean the inside of the front element through the aperture opening, not sure if it is indeed the case though.
 
That should be it, or if it's similar to the 90/4 you can unscrew the rear element and clean the inside of the front element through the aperture opening, not sure if it is indeed the case though.

Yes, there is a retaining ring holding the rear element so I can use a spanner wrench to let the rear element drop out. I tried if I could unscrew the front lens group with a rubber tool but it is very tight......or I may have missed something (set screws covered by the aperture ring?). My only concern taking the rear element out is that it seems very symetrical so if I miss the orientation it might be very difficult to put it in again right.....but 50% change to do it right :)
 
I use a marker and put a dot on the outside surface, on the very wdge. Been there, done that, waited till the test roll came back to put an element in correctly....
 
I use a marker and put a dot on the outside surface, on the very wdge. Been there, done that, waited till the test roll came back to put an element in correctly....

OK.....that is an easy solution to mark it....and it should be easy to remove the mark again with some alcohol. I have heard that the 135/4.5 is a bit soft so maybe I would think the rear element was put in wrong anyway ....after a test rool......so I better be sure to put in the rear element right....first time :)

I will have a good nights sleep before doing that. The lens is almost mint....so will be bad to scratch it....a spanner wrench can slip....if you are not very careful.
 
Everybody says it is a DOG, as it was named after a dog. But I love mine, I guess a nitpicker could find many things wrong with it but to me: it has character.

2292421876_5339fa3fd7.jpg
 
I expect the lens to be OK when stopped down a bit. Wide open it is probably useful for portraits. Do you have a blow up of the image you attached?

I like to buy Leica stuff at that price level! The corresponding FSU lens (Jupiter 11?) may be more expensive :)
 
put your fingers in between the spanner, that way the worst that could happen is you cut yourself ;)

Yes, I will try that :) a minature spanner wrench could be nice and eassier to control. Also a lens suction cup could be a good thing.....maybe most useful for insertion of the lens element again. You have to kind of drop it in again and hope it hit just right :) .....it is also easy to apply finger prints on the edge of the lens you have just cleaned. Some thin cotton gloves may be needed.
 
Everybody says it is a DOG, as it was named after a dog. But I love mine, I guess a nitpicker could find many things wrong with it but to me: it has character.

2292421876_5339fa3fd7.jpg

Thought the Russians named the dog in orbit after the camera they copied? ;-)

I have a couple of these, they seem to perform well on the M8 and the prices are generally low. The finder really helps. SHOOC? Should be a good lens for the M9.

John
 
I expect the lens to be OK when stopped down a bit. Wide open it is probably useful for portraits. Do you have a blow up of the image you attached?

I like to buy Leica stuff at that price level! The corresponding FSU lens (Jupiter 11?) may be more expensive :)
If you are talking to me. I don't have a blow up, but I shot that at F 5.6. Here is another (F 8):

2444417356_c425baebdb.jpg
 
If you are talking to me. I don't have a blow up, but I shot that at F 5.6. Here is another (F 8):

The quality looks ok. I got it because many think it is under rated and the price was fine. I got a near mint one. The only thing is a bit of dirt on the glass surface where the aperture is. Think it will be easy to clean but it is so little so the lens is in shooting condition as it is now.

I just ordered a "lens sucker" .....to take the lens out and also place it again after cleaning. I could take some pictures with the lens while I wait for the packet......
 
It's very likely to introduce more dust during the cleaning.
I say leave it alone unless you have a well-controled place or the dirt affects image in some way.
 
It's very likely to introduce more dust during the cleaning.
I say leave it alone unless you have a well-controled place or the dirt affects image in some way.

It will be impossible to do it 100% dust free. But I think I can make it a bit cleaner that it is now. There is an small area which is a bit dirty. The rest looks perfect. I can see it is on the inside surface of the rear element.
 

Attachments

  • DSCN1041.jpg
    DSCN1041.jpg
    19.9 KB · Views: 1
I use a big squeeze-bulb blower on both surfaces right before bringing the element back into place. To help aid centering the lens, I put it in a low-cost ultrasonic cleaner and let it vibrate for a few seconds in between tightening the retaining ring. The idea is the fast vibrations will drive the optic to the center.

On the suction cup: get a good one and be careful. The coatings are soft, and it is possible to mar them. I use the suction cups that came with a toy: a Barbie SunCatcher. Soft rubber, and clear. It worked on several 1950s Summicrons without damaging them.

I like good advices. So good I did not start right away. I ordered the suction cup from micro-tools they usally have good stuff. I will see when I receive it. It is a set with a 5mm and 20mm cup. The 5mm will probably do the job. I also ordered a set of rubber tools to uscrew rings. 10 different sizes. I had the universal one (5 in 1) but the other ones should have more friction. And then a very small spanner wrench :) .....good to have an excuse to buy some new tools......avoiding the shipping cost to be the major part :)
 
As a short follow up I just got the "lens sucker" I ordered and this was great to use when lifting up the rear lens element. I cleaned it and also cleaned the lens surface on the lens element on the other side of the aperture. Then used the "lens sucker" to put the element back. A quick operation. Now the Hektor looks like a new lens. No haze and dirt when looking through the lens. I look forward to take some images with the lens.
 
You will like the results. It is a lower contrast lens, renders beautiful color. I have a framed shot with it in the family room.
 
Back
Top Bottom